Four-step buttonholing (cont’d.), Step 3: side stitching, Step 4: bar tack – SINGER 7184 User Manual
Page 57: Adjusting stitch density balance, Four-step buttonholing ,55, Adjusting stitch density
Attention! The text in this document has been recognized automatically. To view the original document, you can use the "Original mode".
FOUR-STEP BUTTONHOLING
(Cont’d.)
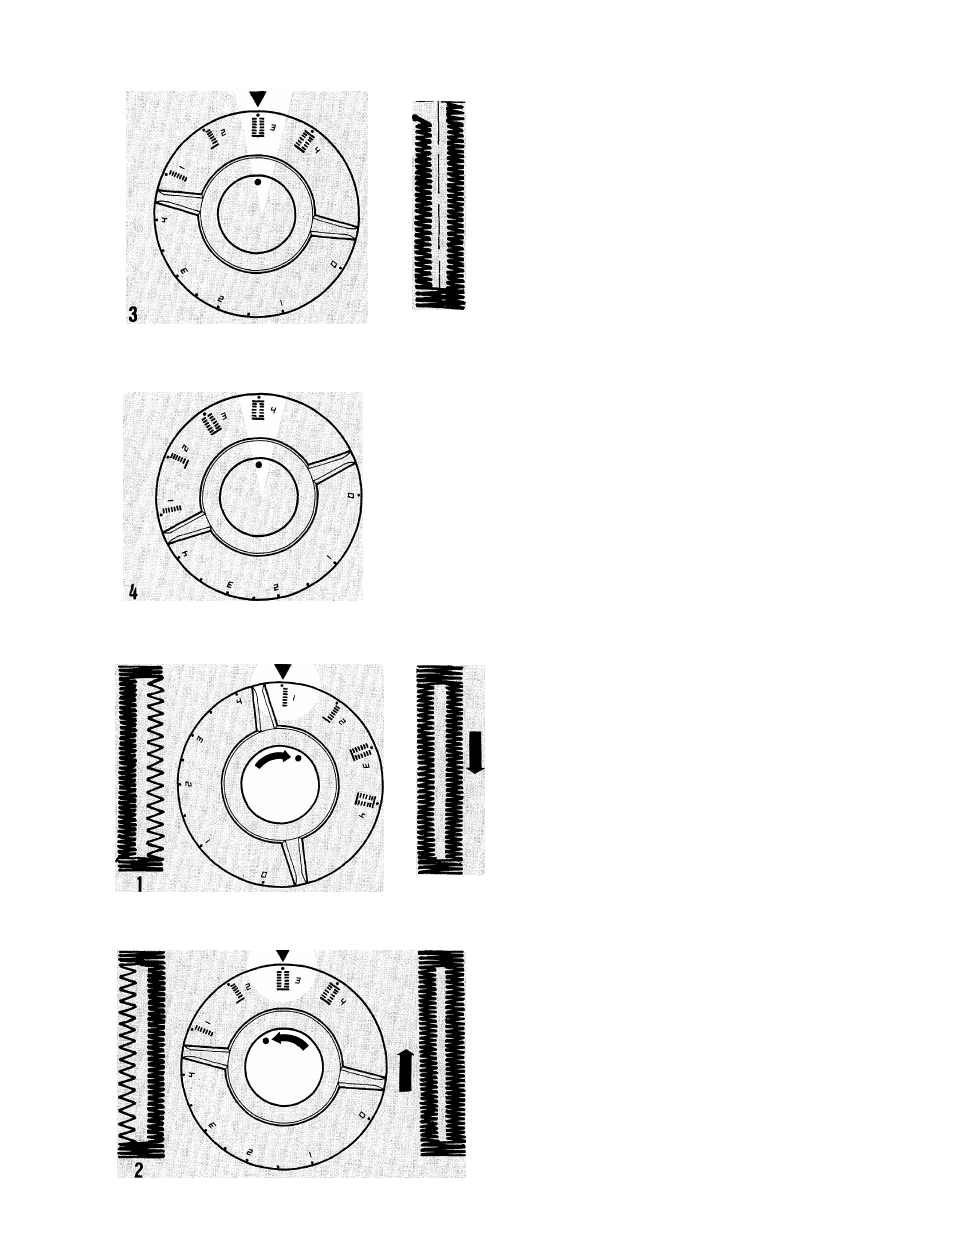
Step 3: Side Stitching
Raise the needle above the fabric.
Turn buttonhole dial toward left to step
Stitch to within a few stitches of the end
the buttonhole (point D).
3.
of
Step 4: Bar Tack
Raise the needle above the fabric.
Turn buttonhole dial toward left to step 4.
Take four or five stitches (point E).
Remove the work, draw threads to the under
side, tie, and trim.
ADJUSTING STITCH DENSITY
BALANCE
Differences in stitch density between the right
and left sides of the buttonhole (forward and
reverse stitching) are equalized by adjusting
the reverse stitch push button. A very slight
rotation of the button will produce a noticeable
change.
• Make a test buttonhole with the push button
in neutral position (indicator dot directly be
low T symbol).
1. If stitches on right side of the buttonhole
are too open, rotate the push button toward
right from its neutral position to increase
density of stitching.
2. If stitches on left side of the buttonhole are
too open, rotate the push button toward left
from its neutrai position to increase density
of stitching.
After buttonhoie stitching is completed, return
push button to its neutral position (indicator
dot directly below T symbol).
55