Removing and replacing bobbin case, To remove bobbin case, Caring for your machine – SINGER 9124 User Manual
Page 22
Attention! The text in this document has been recognized automatically. To view the original document, you can use the "Original mode".
2. Turn hand wheel toward you, lowering
needle into either hole of button.
SECTION 6
CARING FOR YOUR MACHINE
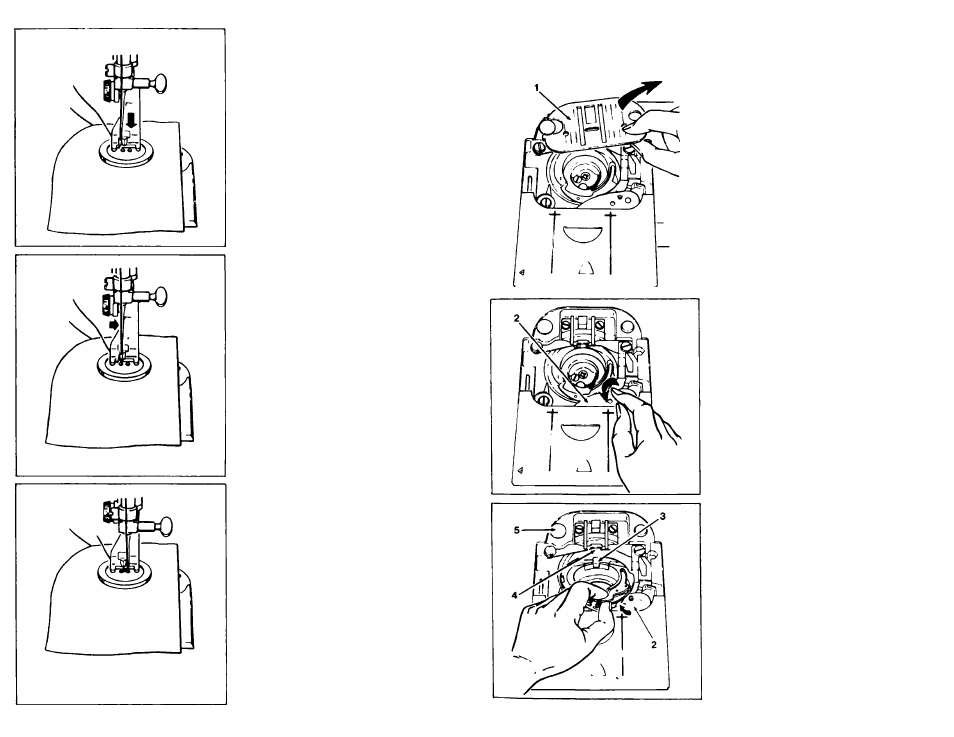
REMOVING AND REPLACING BOBBIN CASE
3. Continue turning hand wheel until
needle rises and moves over the other
hole of button. Adjust width if neces
sary.
4. Lower needle into hole.
Run machine slowly making 6 or more
stitches to attach button.
Remove work from machine, leaving 4"
(10cm) of thread.
To secure stitching, pull thread ends to
inside of garment and knot close to
fabric.
CAUTION: Before cleaning or adjusting
the machine, remove plug from the socket
outlet.
• Raise presser foot and needle.
• Open slide plate and remove bobbin.
To remove the bobbin case, the needle
plate must be removed first.
• Lift needle plate (1) from right corner
and slide out from under foot.
TO REMOVE BOBBIN CASE
•
Push lever (2) toward you until it stops,
and hold in this position.
• Lift bobbin case up and guide it out
toward you, as shown.
40
TO REPLACE BOBBIN CASE
•
Push lever (2) toward you until it stops,
and hold in this position.
• Guide bobbin case into place, making
sure block (3) is all the way under metal
bracket (4).
• Return lever (2) to locking position over
top of bobbin case.
NOTE: After locking case in place, be
sure it is not tight, but can move slightly.
• To replace needle plate, slide it under
pin (5) and push it to the left.
• Press needle plate down in place.
• Insert bobbin and close slide plate.
41