Two-step buttonholing – SINGER 9124 User Manual
Page 20
Attention! The text in this document has been recognized automatically. To view the original document, you can use the "Original mode".
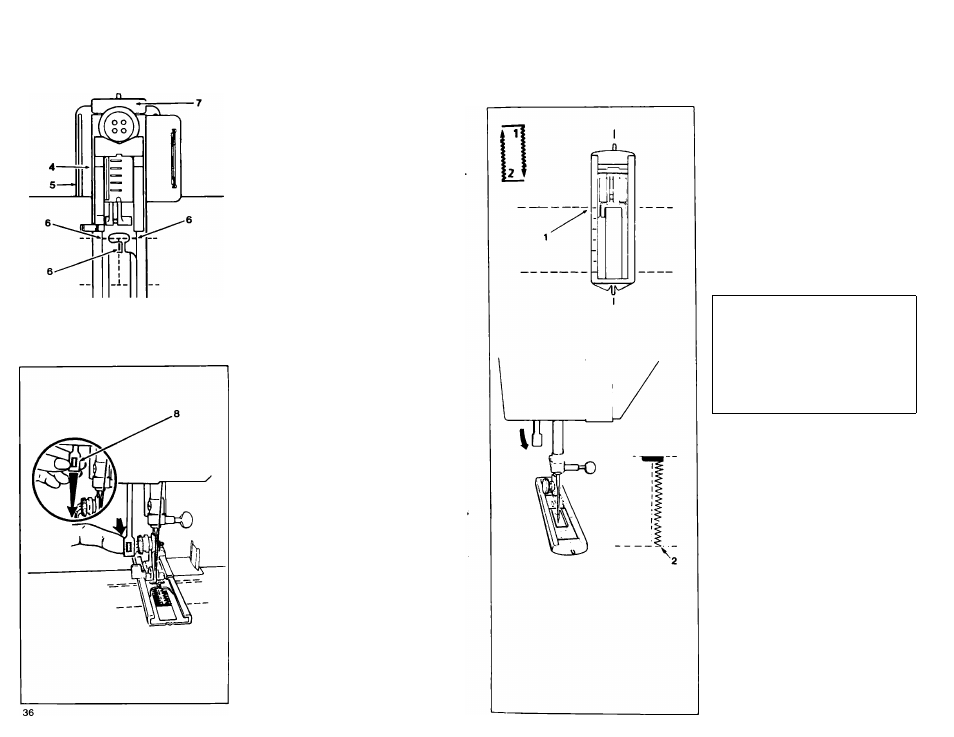
Place fabric between upper and lower
plates.
Center 3 red guidelines (6) of attach
ment around beginning line of button
hole.
Lower presser foot lifter.
Push foot from back of button carrier
(7) toward you to insure proper button
hole length.
Pull buttonhole lever (8),'located under
sewing light, straight down as far as it
will go.
Press it toward you.
Start running the machine.
The entire buttonhole will be stitchedi
in one operation.
Stop sewing when machine begins over
lapping starting stitches.
Raise foot lifter and remove work from
machine; clip thread ends; cut button
hole opening with scissors or seam
ripper.
(Adjust width and balance of test
buttonhole, if necessary.)
Press buttonhole lever toward you for
each buttonhole to be sewn.
When all buttonholes are completed,
push buttonhole lever (8) back up into
machine.
To remove buttonhole attachment, raise
presser foot lifter and press down on
both sides of button carrier near shank,
and slide off machine.
TWO-STEP BUTTONHOLING
Your machine makes buttonholes in two easy steps.
• You never need to move the fabric or reposition the needle.
• Always make a practice buttonhole on a sample of your fabric.
When making buttonholes on hard-to
reach areas convert machine bed to free
arm sewing.
Mark buttonhole position on fabric as
indicated in pattern.
When sewing delicate fabrics, place a
piece of paper over the fabric when
positioning the garment. Lower the
presser foot and slip the paper out from
under the foot. This will prevent the
teeth on the underside of the foot from
picking and pulling the fabric.
RECOMMENDED SETTINGS
Stitch Selection
Buttonhole Stitch
Stitch Width;
1
: III
i >
Stitch Length:
4
Foot:
Buttonhole (L)
Needle Plate:
General Purpose (A)
Step 1
•
Raise presser foot.
• Place fabric under foot.
• Center a red guideline (1) of foot around
beginning line of buttonhole.
• Select Buttonhole Stitch.
• Lower the foot and make sure the sliding
portion of the foot is all the way fon/vard.
• Press the buttonhole lever, located under
sewing light, toward you.
• Start running the machine and stitch
down to point 2.
37