SINGER W1213 User Manual
Page 6
Attention! The text in this document has been recognized automatically. To view the original document, you can use the "Original mode".
n . Installation of Machine Head
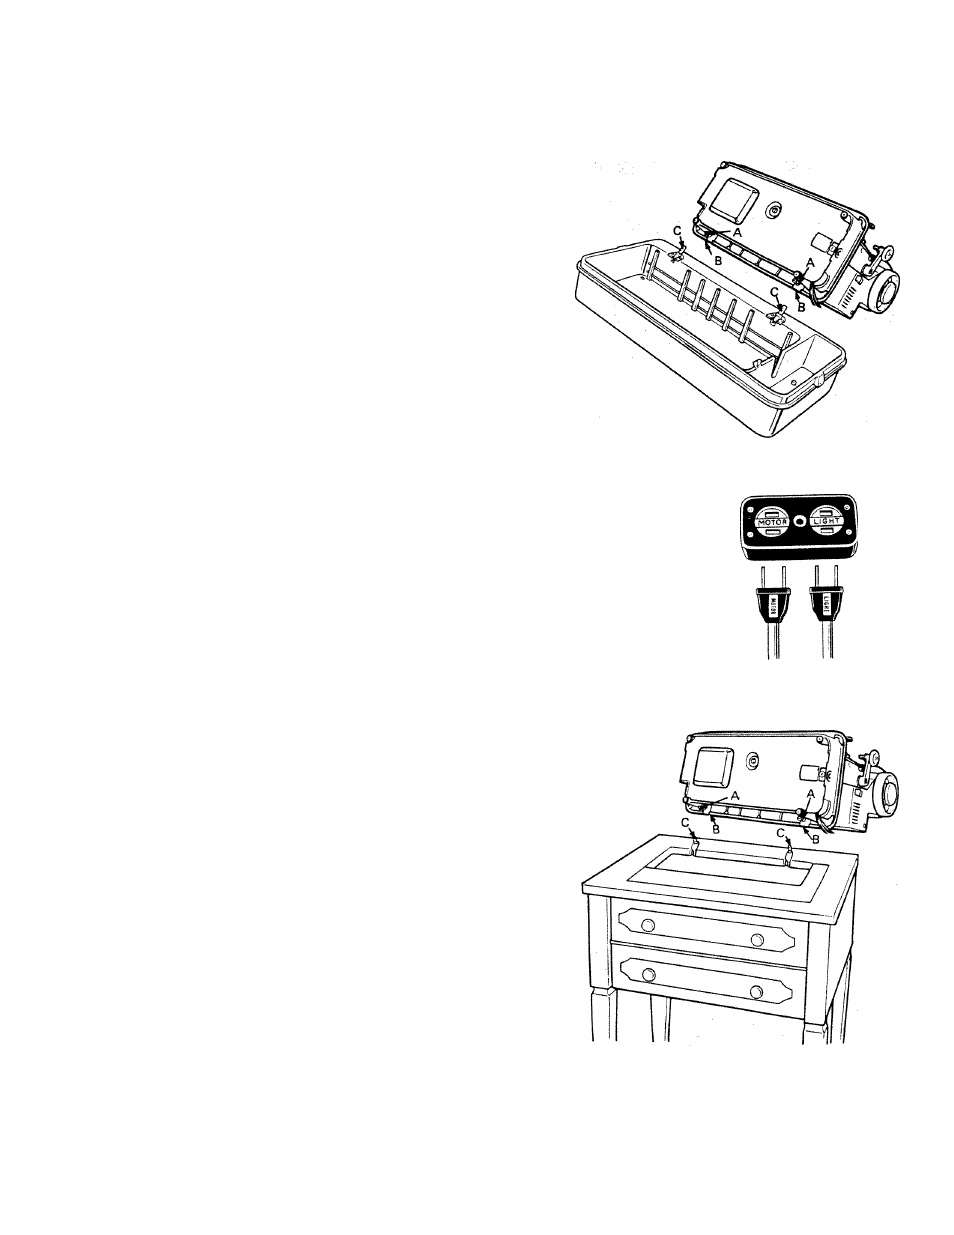
Portable Case
Lay the sewing machine unit face down on a
table. On the underside of the back of the
sewing machine are two clamping screws (A).
These enter the head hinge holes (B). Release
the clamping screws.
On the base of the portable case are two head
hinges (C). Lower the sewing machine onto
the base, fitting the hinges (C) into the holes
(B). Tighten the clamping screws securely
with a screw driver. Place machine in an
upright sewing position. Machine will snap
under portable case clamp securing it in
correct position.
Draw the two electrical leads through the slot
in the base. Plug cord labeled motor into the
receptacle marked motor on the block attach
ed to the outer section of the base. Insert the
other cord into the receptacle marked light.
Insert plug into a wall outlet. (110-115 volts)
Cabinet
Lay the sewing machine unit face down on a
table. On the underside of the back of the
sewing machine are two clamping screws (A).
These enter the head hinge holes (B). Release
the clamping screws.
On the cabinet are two head hinges (C). Tilt
them up and back as far as they will go.
(Hint: Stretch a rubber band across the two
hinges to help hold them upright while
mounting
the
sewing
machine
unit.)
Carefully lower sewing machine onto the
head hinges, making sure to insert the hinges
as far into the hinge holes as they will go.
With the sewing machine in its tilted position,
tighten both clamping screws securely with a
screw driver.
Plug the electrical leads into the sockets
located inside the cabinet. Plug the cord
labeled motor into the receptacle marked
motor on the block attached to the inside of
the cabinet. Insert the other cord into the
receptacle marked light. Insert plug into a
wall outlet.
(110-115 volts)
NOTE: Where three wire grounding is
provided connect the plug from the sewing
machine to the connection leading from the
control. One prong is larger than the other
three, eliminating the possibility of error.
Insert plug into wall outlet. (110-115 volts)