Overcasting, Seaming knits – SINGER W1213 User Manual
Page 20
Attention! The text in this document has been recognized automatically. To view the original document, you can use the "Original mode".
Vin. Applications of the Zigzag Stitch
64
65
66
Pattern - M
Length - I
-3
Width — 5
Needle Position — M
Feed Dog - High
Pressure — 5
Foot - All Purpose
Pattern - M
Length - 1
Width - 1
Needle Position - M
Feed Dog - High
Pressure — 5
Foot - All Purpose
Pattern - M
Length - 0
Width 2-5
Needle Position - L
Feed Dog — Down
Pressure - 5
Foot - Button Sewing
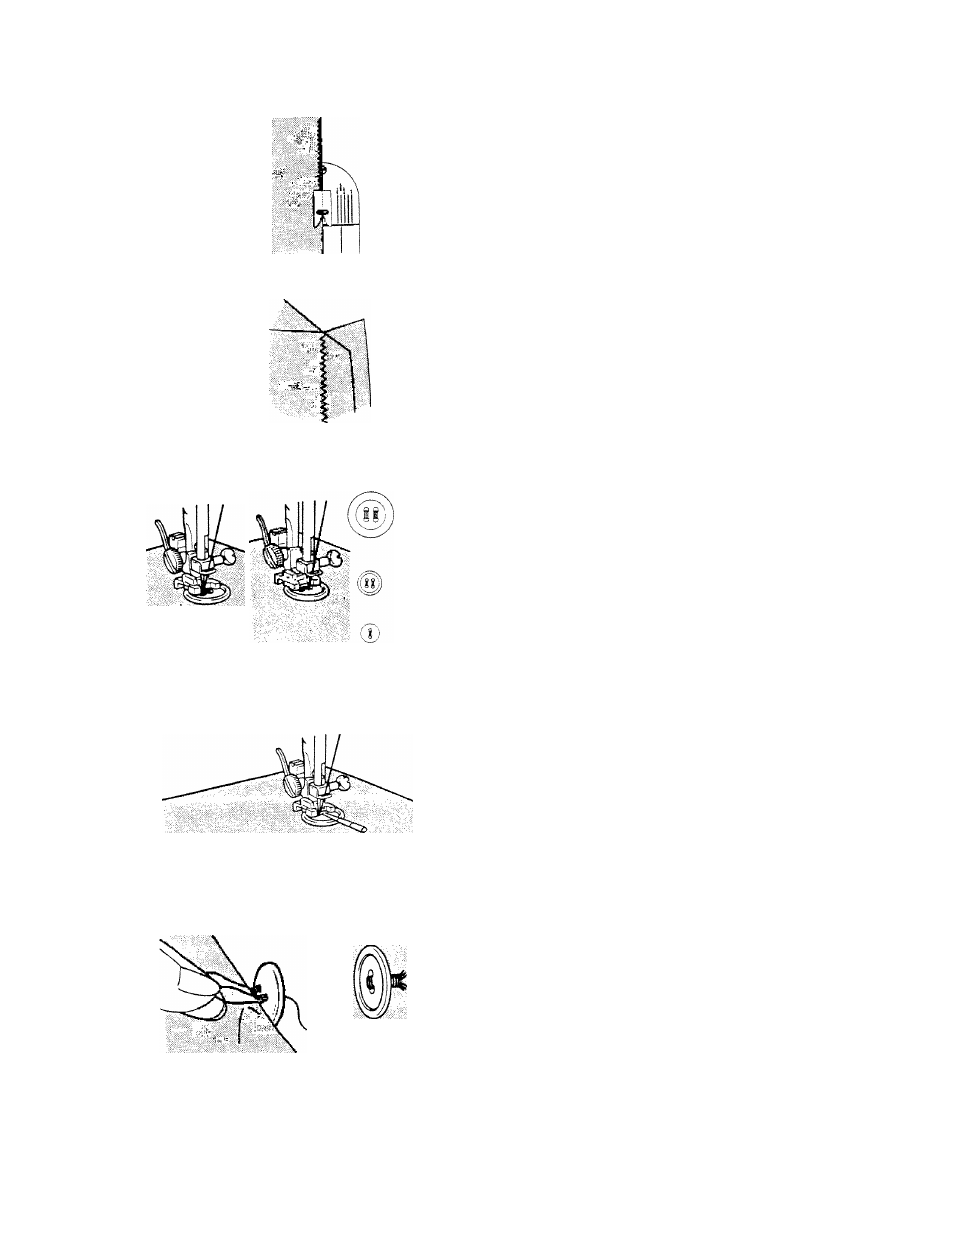
Overcasting
Place the e^dge of the material underneath the
opening
of
the
sewing
foot
and
guide
raw
edge
along
the
center
groove
of
the
foot,
allowing stitch to form half on and half off
the fabric. (Fig.64)
The multiple stitch zigzag is a wiser choice for
most fabrics. See page 27.
Seaming Knits
The narrow zigzag can be used in seams of
firm
knits
for
added
strength.
After
sewing,
open seam and press flat. Tiny zigzag stitches
can hardly be seen and the seam will give
when stretched. (Fig.65)
Sewing on Buttons
Zigzag stitching is a very easy and convenient
method
of
sewing
on
buttons
without
a
shank. (Fig. 66)
Place
the
button
so
its
left
hole
comes
directly
under
the
needle,
then
gently
lower
the
button
sewing
foot.
Take
a
stitch
into
the hole.
Raise the needle from the left hole, and move
zigzag width lever to the right until the needle
comes down exactly over the right hole in the
button.
Note: Be sure the needle clears the holes of
the
button
by
moving
the
wheel
by
hand
before running the machine fast.
67
Usually
6
to
8
stitches
are
adequate
for
securing
a
button
in
place.
Stop
with
the
needle in the left hole. To lock the threads,
set the stitch width at 0, and take a few
stitches in the left hand hole.
Forming a Thread Shank
Buttons* sewn on coats or jackets should have
a
thread
shank
to
make
them
stand
away
from the fabric. (Fig.67) To form a thread
shank, sew over the blade of a regular sewing
machine
needle.
Insert
needle
into
hole
on
the front side of foot.
After
stitching
the
button
to
the
fabric,
remove
work
from
under
the
presser
foot
leaving threads about six inches from fabric.
Remove needle. Pull the threads to back of
button and form a shank between button and
fabric by winding threads tightly around the
attaching stitches. Pull threads to back of the
fabric and tie thread ends securely. (Fig.67)