O' u o – SINGER W1213 User Manual
Page 13
Attention! The text in this document has been recognized automatically. To view the original document, you can use the "Original mode".
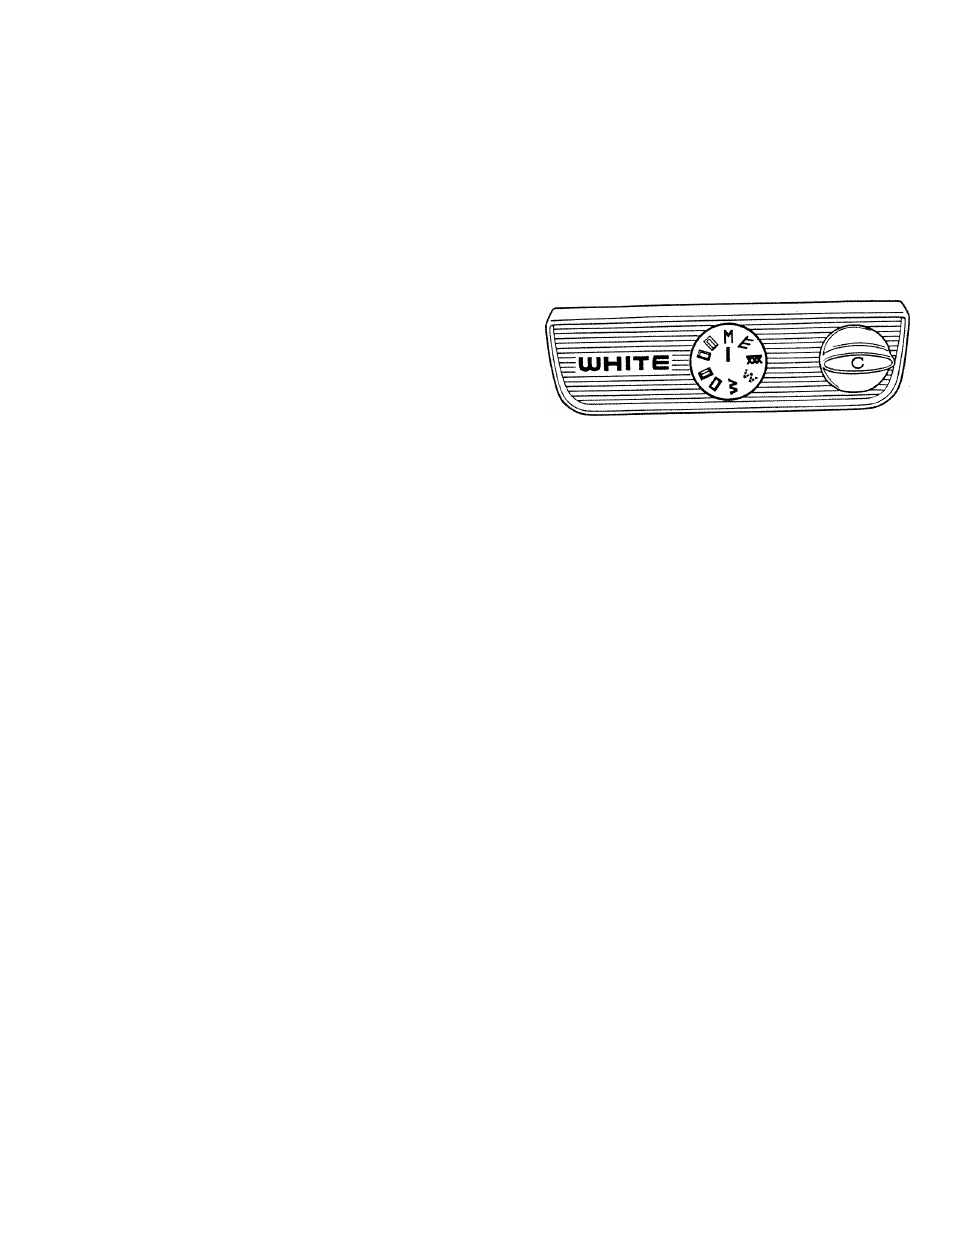
Pattern Selector
This dial (Fig. 37) selects the stitch pattern
to be made according to the pictures shown
at the blue indicator. Turn the silver selector
dial to the right and the picture of the stitch
to
be
formed
will
be
shown
in
the
top
position. The stitches shown are as follows:
1.
M
stands
for
manual
position
which
gives
the
standard
straight
stitch
when
the width is at 0 and the standard zigzag
when the width is engaged.
2.
Black
boxes
-
indicate
buttonhole
steps
for four step buttonholes to be explain
ed on page 22.
3.
Blindhem ( $ ) - stitches forward then a
zigzag
bite
to
the
left
for
use
in
hemming,
shell
tucking,
and
other
ap
plications.
See
page
25.
Width
0
will
give
a
straight
stitch,
all
other
widths
will give the blind hem stitch.
4.
Multiple stitch zigzag ( iS ) - takes three
stitches
from
side
to
side
for
use
in
overcasting,
applying
elastics
and
mend
ing as shown on pages 27. Width 0 will
give a straight stitch, width 5 is the best
choice
for
use
of
the
multiple
stitch
zigzag.
_
5.
Overlock stitch ( e ) - takes one stitch
to the left, one stitch backwards and then
one stitch to the right to form a straight
seam
and
overcast
all
in
one
operation.
This
is
excellent
on
both
knits
and
wovens
for
Vi
inch
seams
on
width
5,
and
for
the
straight
stretch
stitch
at
width
0.
See
page
29.
Straight
stretch
stitch is discussed on page 31.
6.
Ultra stretch stitch
{
} -
takes stitches
then back on a diagonal. This stitch has
the greatest strength and elasticity and is
excellent
for
loose
or
bulky
knits,
such
as
sweater
knits,
bathing
suit,
and
cotton
knits.
Use
it
at
width
5
for
completed
V*
inch seams on knits. This
stitch is never used on width 0. See page
31.
Needle Position
This dial controls the location of the needle
in
relation
to
the
presser
foot.
(Fig.
38)
Never
move
the
needle
position
dial
while
the
needle
is
in
the
fabric
because
it
will
bend or break the needle.
The
needle
may
be
used
in
any
position
between the left and right even though only
three
positions
are
labeled.
L
-Left
M
-
Middle R - Right
The
etched
guide
lines
on
the
needle
plate
are measured from the needle in the
middle
position.
Pattern -
Length - 2
Width - 5
Needle Position - M
Feed Dog - High
Pressure - 5
Foot - All Purpose
37
38
M
M
M
O' U O'
Pattern - M
Length - 2
Width - 0-2
Needle Position - L, M, R
Feed Dog - High
Prcbiuic - D
Foot - All Purpose