SINGER 114W110 User Manual
Page 7
Attention! The text in this document has been recognized automatically. To view the original document, you can use the "Original mode".
10
back plate has a cutting edge. Replace the needle plate and by
drawing the thread backwanks, as shown in Fig. 14, the thread
will be cut the correct length.
ISV.'.'J
M. U
n d e r
'I' miiiADiNd CoMi'i.ETKii
To Thread the Needle
(S
ee
I'’
ics
. I.S
and
l(i)
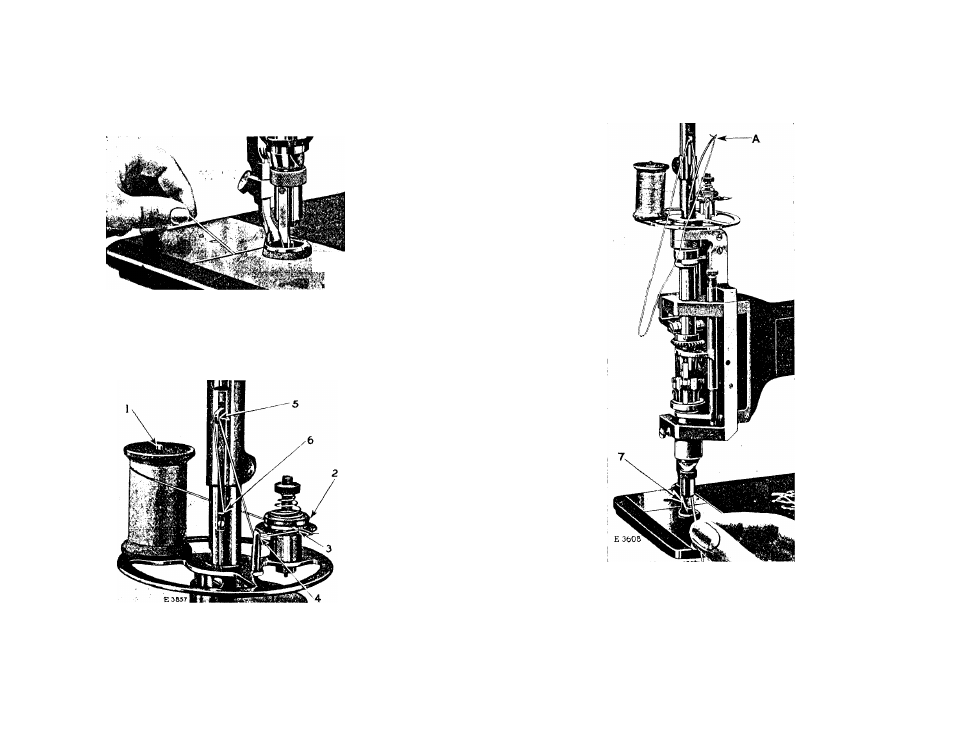
Turn the handle (A, Fig. 5, page 5) until it is toward the
front of the machine. Place the spool of thread on the sj)ool pin
Ul(i. 1,'j. 'rilREADIN(i THE X
e
EDEE
(1, Fig. 15) and pass the thread from the spool around the back
from left to right between the tension discs (2, Fig. 15) into the
thread controlling spring (3, Fig. 15) then through the thread
guide (4, Fig. 15) and through the small hole (5, Fig. 15) in
the end of the take-up lever. Draw about 10 inches of thread
11
through the t,ake-u]) lever or enough to reach the needle, then
insert the threading wire (A, Fig. 16) in the upper end of the
UiG. 1(). TnuBADiN(i THE N
e e d l e
hollow needle bar (6, Fig. 15). Pa.ss the wire down until the
lower end strikes the needle plate. Then hook the upper end of
the wire to the thread, as shown in Fig. 16, and draw the wire
and thread down through the hollow needle bar (6, Fig. 15) then
pass the thread from right to left through the eye of the needle
(7, Fig. 16).