SINGER 114W110 User Manual
Page 13
Attention! The text in this document has been recognized automatically. To view the original document, you can use the "Original mode".
22
To Adjust the Thread Controller Spring
(Si.;io t’ln.
28
)
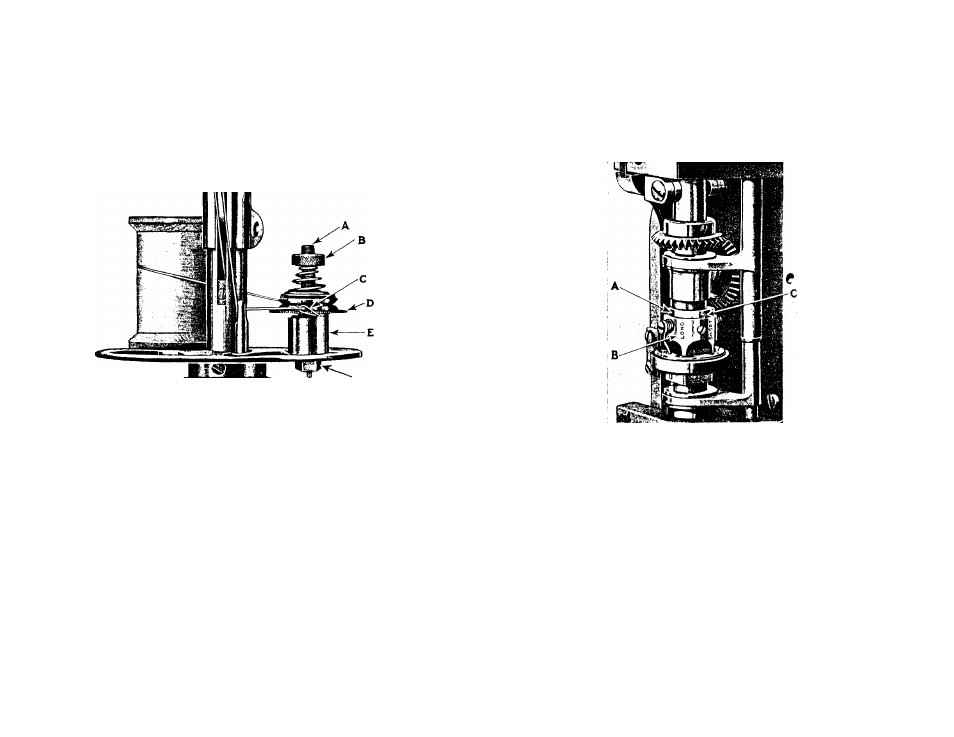
The stopping position of the thread controller spring (C,
Fig. 28) should be so adjusted that when the machine is sewing,
the spring will have a movement of about one inch.
E
3862
1
“
Fi(!. 28.
A
d
.
iu
.
stmiont
.
s
on
the
T
hkeai
) C
ontuoi
.
i
.
eu
S
i
'R
ino
To adjust the stopping position of the spring, loosen the
hexagon nut (F, Fig. 28) on the underside of the spool j)latform
and turn the barrel (E, Fig. 28) until the desired stopping position
is reached, then securely tighten the hexagon nut (F).
The tension on the thread controller spring should be just
tight enough to take up the slack thread. To increase the tension
on the spring, loosen the tension stud (A, Fig. 28) and turn the
knurled disc (D, Fig. 28) over to the right. To decrease the
tension on the spring, turn the knurled disc f)ver to the left. After
the desired tension is obtained, tighten the tension stud (A).
23
The length of stitch is regulated by means of the eccentric
stitch adjusting collar (A, Fig. 29). To shorten the stitch, turn
To Regulate the Length of Stitch
E3772
Fili.
29. S
titch
K
eihilatoh
the handle (A, Fig. 5, page 5) to the right, then grasp the stud
(C, Fig. 29) and turn the eccentric collar (A) toward you or
around to the right in the direction of the word “short” stamped
on the feed lever bracket (B, Fig. 29). To increase the length of
stitch, turn the eccentric collar (A) away from you or around to
the left in the direction of the word “long” stamped on the feed
lever bracket. Never move the stud (C) beyond the words
“short” or “long” stamped on the feed lever bracket.