SINGER 114W110 User Manual
Page 11
Attention! The text in this document has been recognized automatically. To view the original document, you can use the "Original mode".
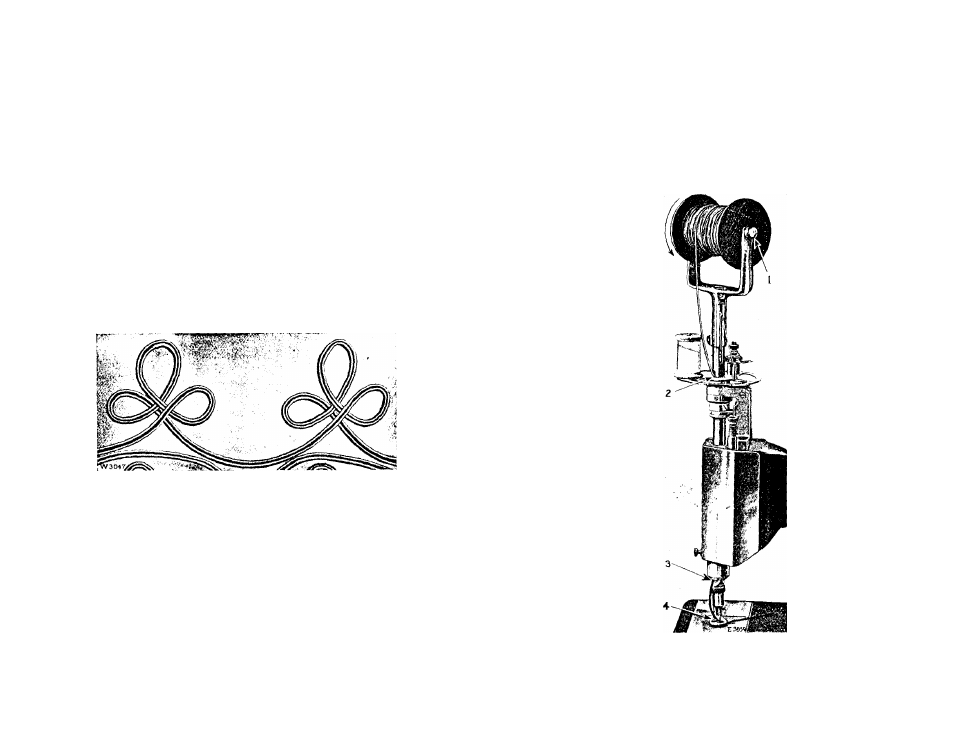
When the braid is taken from the spool, the spool should turn
in the direction indicated by the arrow in Fig. 21. Then with
the threading wire furnished with the machine ]iass (he braid
down through the opening (2, Fig. 21) of the hollow tube so that
it will be fed through the rear opening (2, Fig. 21) in the braid
guide carrier, then pass the braid from back to front through
the hole in the braid guide (4, Fig. 21) and draw it back under
the pre.sser foot. For stitching, follow the instructions given on
pages 12 and 13.
To Adjust the Braid Guide for Sewing Braid
“Flat on’’ with Invisible Stitches
( i S e e F i ( i s . 2 0
a n d
2 2 )
If it is found that the needle does not enter the braid properly
after the braid is threaded through the braid guide, loosen the
18
Ki(i. 22. BuAii) S
e w n
“F
e a t
o n
"
w i t h
I
n v i s i h e k
.S
t i t c h f i s
knurled ring (D, Fig. 20, page 16) and slightly loosen the small
set screw (A, Fig. 20) in the braid guide to bring the guide closer
to the needle. The braid guide should be set so that the needle
just enters the braid at every stitch. When the braid guide has
been properly adjusted tighten the knurled ring (D).
To Sew the Braid “Edge on’’ for “Standing’’ Braid
Also to Sew on Round Braid
(S
e e
F
f e
.
2
:p
Select the braid guide according to (he .size of braid to be
sewn and place it in the groove at the left of the braid guide
carrier as in.structed on page 16.
FlO, 2;i. TlFFlEADINF! B
h
AFF) F-'nlt SloWINF! TFFFO B
f i
AFFI “K
f
MJFO ON'
FOR “iSTANFItNo” I’
h
MI), Af.SO
S
f
CWF.NF;
ON KOF'NI) B
f
IAFI)