SINGER 114W110 User Manual
Page 10
Attention! The text in this document has been recognized automatically. To view the original document, you can use the "Original mode".
16
17
(S
ke
F
io
. 20)
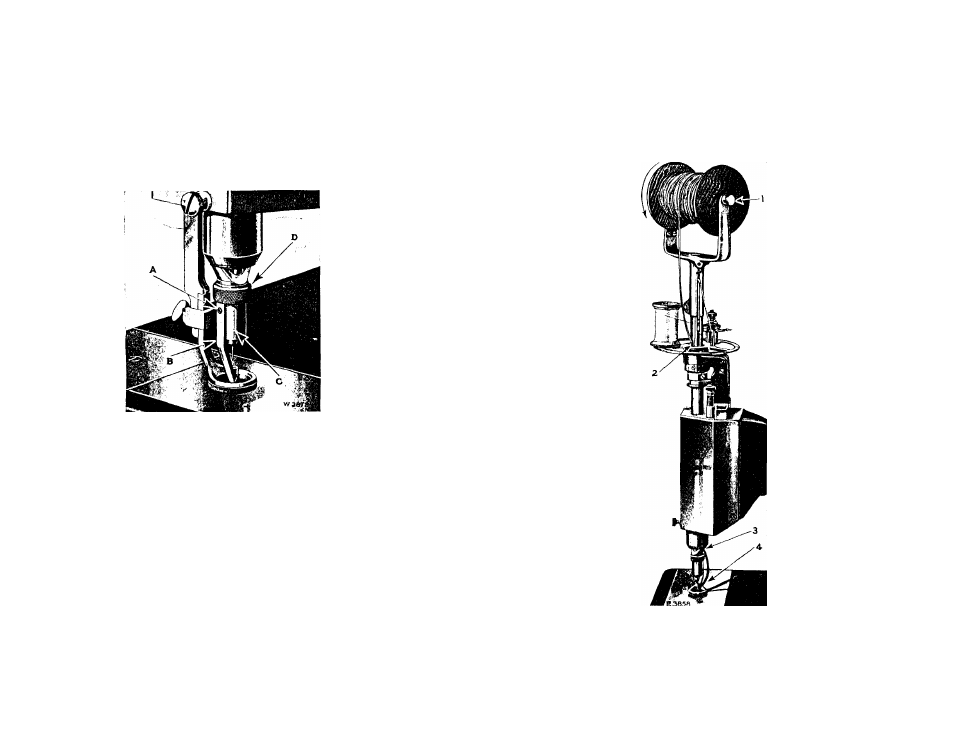
Turn the knurled ring (D, Fig. 20) over to the right or
upward as far as it will go, then pull out the braid guide (B, Fig. 20)
to remove it from the machine.
To Remove and Replace the Braid Guide
To Sew Braid “Flat on” with Invisible Stitches
(S
ee
F
io
. 21)
Select the braid guide according to the size of braid to be
used and place it in the back groove in the braid guide carrier
as instructed on page 16.
T-
Fro.
20. B
haii
) G
uide
in
P
osition
in
L
eft
G
roove
OF B
raid
G
uide
C
arrier
There are two grooves in the braid guide carrier (C, Fig. 20)
and in replacing the braid guide care should be taken to see
that the guide is placed in the correct groove. To determine
the correct groove, turn the handle (A, Fig. 5, page 5) toward the
front of the machine. The groove at the back of the carrier
should be used when sewing the braid “flat on” with invi.sible
stitches. The groove at the left of the carrier should be used
when stitching the braid “edge on” for what is known as “stand
ing” braid and when stitching round braid.
Having placed the braid guide into the correct groove in the
carrier, see that the small pin on the guide enters the hole in the
groove, then turn the knurled ring (D) over to the left or down
ward as far as it will go to fasten the guide securely in position.
F
ig
. 21.
'P
hreading
B
raid
for
S
ewing
B
raid
“]'’
lat
on
”
WITH I
nvisihle
S
titches
Place the spool of braid on the spool pin (1, Fig. 21) and
place it in the machine with the large end of the spool pin towards
you when the handle (A, Fig. 5, page 5) is towards the front.