Procedure for making bar-^tack buttonholes, Man. mam, R-....t – SINGER 714 Graduate User Manual
Page 29
Attention! The text in this document has been recognized automatically. To view the original document, you can use the "Original mode".
PROCEDURE FOR MAKING
BAR-^TACK BUTTONHOLES
With needle position dial at
L,
set stitch width
dial on
2
Y
2
for side stitching of buttonhole.
Place work under needle, aligning center mark
ing of buttonhole with slot in the presser foot.
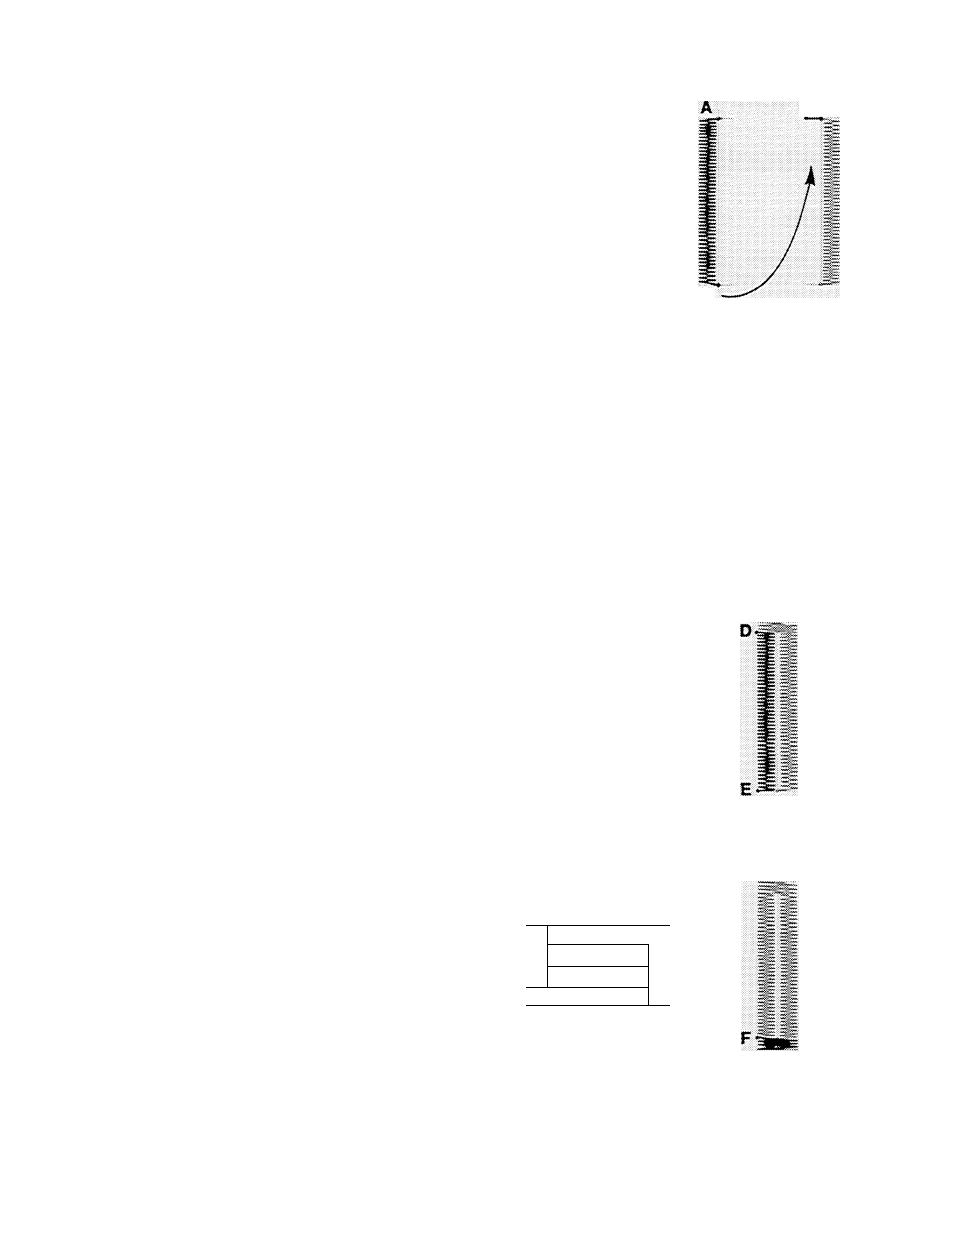
Side Stitching: Position needle in fabric at
point A. Lower the foot and stitch to end of
marking. Leave needle in fabric at point B,
Raise the foot and pivot work on needle. Lower
the foot. Take one stitch without changing
width setting, bring needle to point C.
■"■¿iUUij.,
±i
it
EmShiiiiä
C B
Side Stitching
Bar Tack: Adjust stitch width for bar tacks and
take at least six stitches. Stop at point D,
A*::
4 i 1
Bar Tack
Side Stitching: Readjust stitch width for side
stitching. Complete work to point £. Leave
needle in fabric.
1
rrrm
Uilniiiiilii
4 5
Side Stitching
Final Bar Tack: Adjust stitch width for bar
tacks, and take at least six stitches in reverse,
ending at point F.
Fastening Stitch: To secure stitching, move
stitch width dial to A and take three stitches.
Remove work, draw threads to underside,
fasten and trim. Cut opening for button with
sharp scissors.
1
man. mam
----;r-....T
Ar*.
4
nrrrrrn
1-
Final Bar Tack
27