Buttonholes, Buttonhole length, Stitch width settings – SINGER 714 Graduate User Manual
Page 28: Iermftfj, Iviarking lines, Atzva
Attention! The text in this document has been recognized automatically. To view the original document, you can use the "Original mode".
buttonholes
• Pattern: Plain Zig-Zag |
• Stitch Widtix: i^V
2
and 5 or to suit fabric
• Needle Position: L
• Stitch Control: FINE
• Zig-Zag Throat Plate
• Zig-Zag Foot or Special Purpose Foott
Always make a test buttonhole on a sample of
your fabric. Be sure to duplicate the thickness
of the garment and include interfacing if ap
propriate,
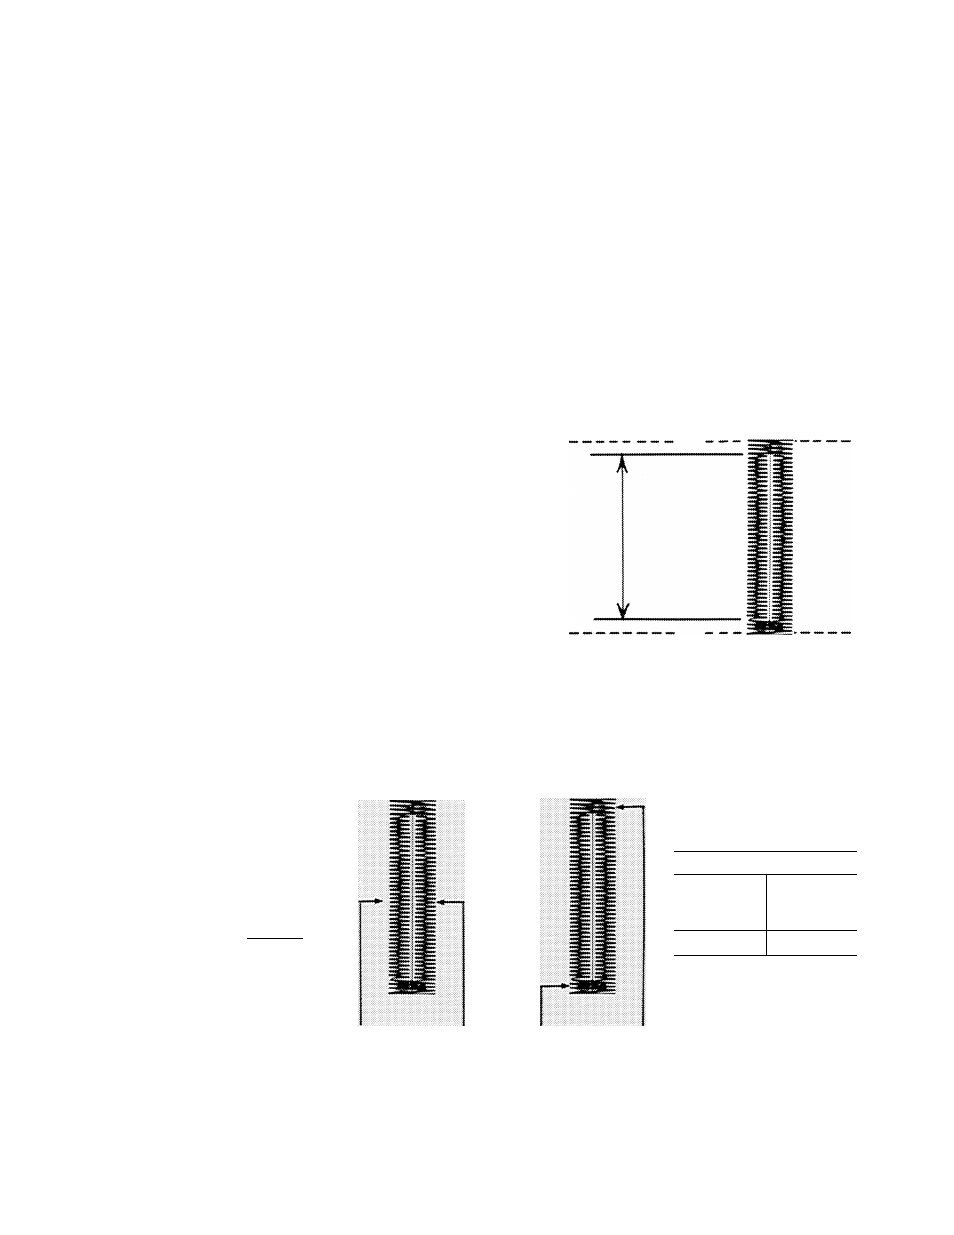
BUTTONHOLE LENGTH
First decide how long the opening needs to be.
This will depend on the diameter and the thick
ness of the button. To find the right length, cut a
small slit in a scrap of your fabric and gradually
enlarge it until the button slips through easily.
Then add at least 1 /8 inch or 3mm (1 /16 inch or
1.5mm for each bar tack), and mark the fabric as
illustrated. This bar-tack measurement Is ap
proximate: on some buttonholes, you may need
to increase it to arrive at pleasing proportions.
STITCH WIDTH SETTINGS
Next, determine the two stitch width settings
that you will need: one for side stitching and
one for bar tacks (closings at ends of button
hole). Settings 2Vz and 5 are illustrated below,
although other combinations may be used, as
long as the combined width of side stitching
does not exceed the width of the bar tacks.
IVIarking Lines
Length of
Cutting Space
Bar Tacks and
Side Stitching
m
rrrTTmnV
.iiiiiiiiiiiiiiitiiitiiiiiUiiii
m
Selector
atZVa
Side Sistching
i
I
ErmfTfj
TïïïïïïiilJl
Selector
atS
Bar Tacks
tlhe Special Purpose Foot described on page 47 is designed to aid in making buttonholes,
26