Straight stitching, Preparation, Setting the machine – SINGER 714 Graduate User Manual
Page 16: Choosing accessories, Starting to sew, Preparation starting to sew
Attention! The text in this document has been recognized automatically. To view the original document, you can use the "Original mode".
3. STRAIGHT STITCHING
s;
: i > ;'
■ ■' - :i; ! ;
•vrm-
I
X
I Ij IJ I I
,i II II II l
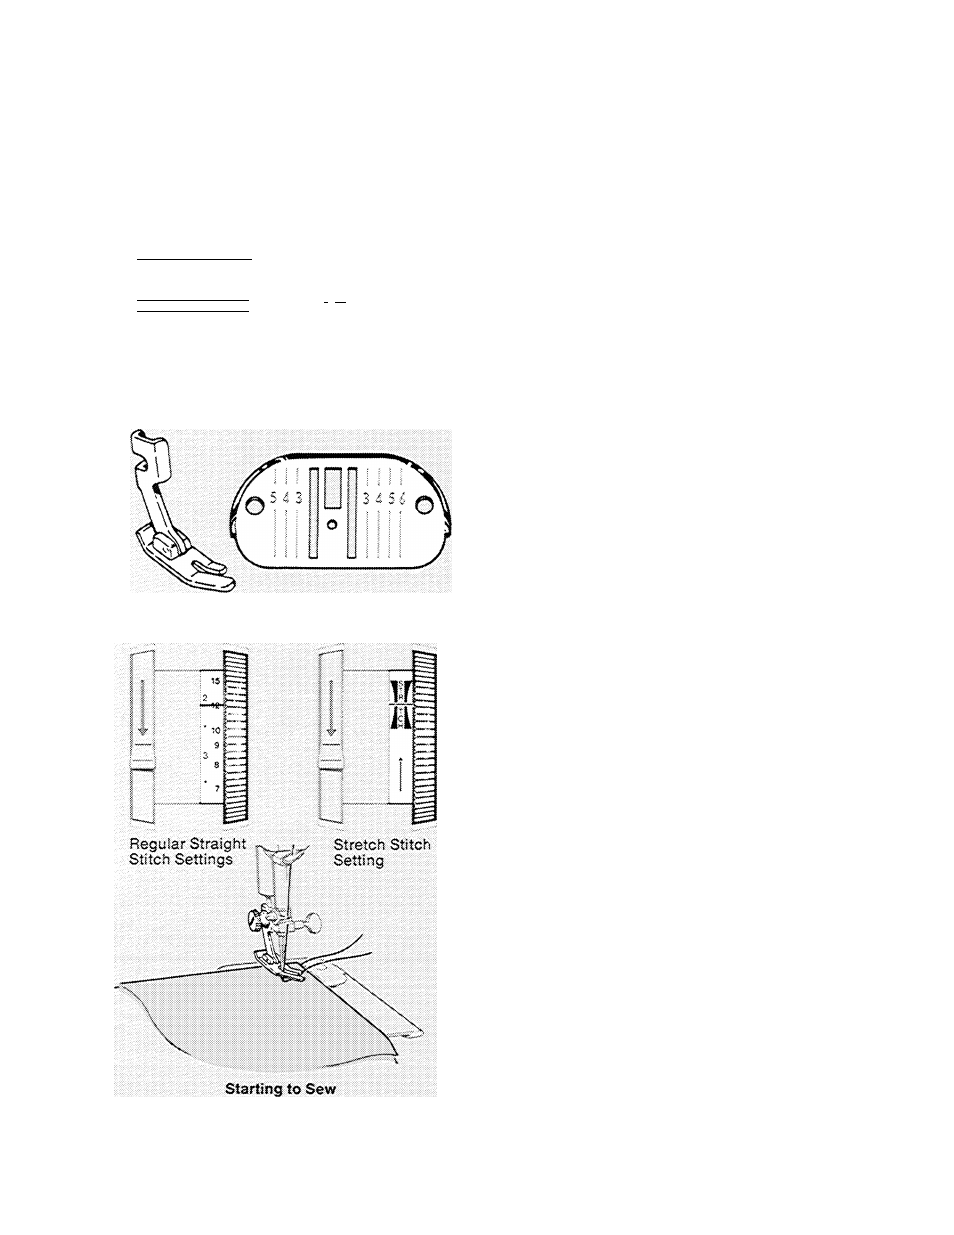
Dials Set for Straight Stitching
Straight Stitch Foot an
Pattern: Straight Stitch
Needle Position:
A
Stitch Width: A
Stitch Control: To suit fabric
Straight Stitch Throat Plate o;
Zig-Zag Throat Plate
Straight Stitch Foot or
Zig-Zag Foot
preparation
Before you set the dials for straight stitching,
turn the hand wheel toward you until the needle
is above the throat plate.
SETTING THE MACHINE
5
1. Set pattern dial selector at .
2. Move needle position dial to
A .
3. Set stitch width dial on
A *
4. Set stitch control for desired stitch length.
For regular straight stitching, turn dial to
a numbered setting; for straight stretch
stitching, turn dial to STRETCH setting.
CHOOSING ACCESSORIES
Best results will be obtained if you use the
straight stitch foot and throat plate. However,
the zig-zag foot and throat plate may also be
used.
starting to sew
♦ Place needle and bobbin threads under pres-
ser foot and draw to back of machine.
♦ Position the needle in the fabric where de
sired for stitching start.
♦ Lowerihe presser foot and start the machine.
To sew perfectly on a wide variety of fabrics
adjust stitch length, pressure and thread ten
sion as instructed on the following pages.
For information on straight stretch stitching,
turn to page 34.
14