Buttons and buttonholes, Buttons – SINGER 714 Graduate User Manual
Page 27
Attention! The text in this document has been recognized automatically. To view the original document, you can use the "Original mode".
5. BUTTONS AND BUTTONHOLES
buttons
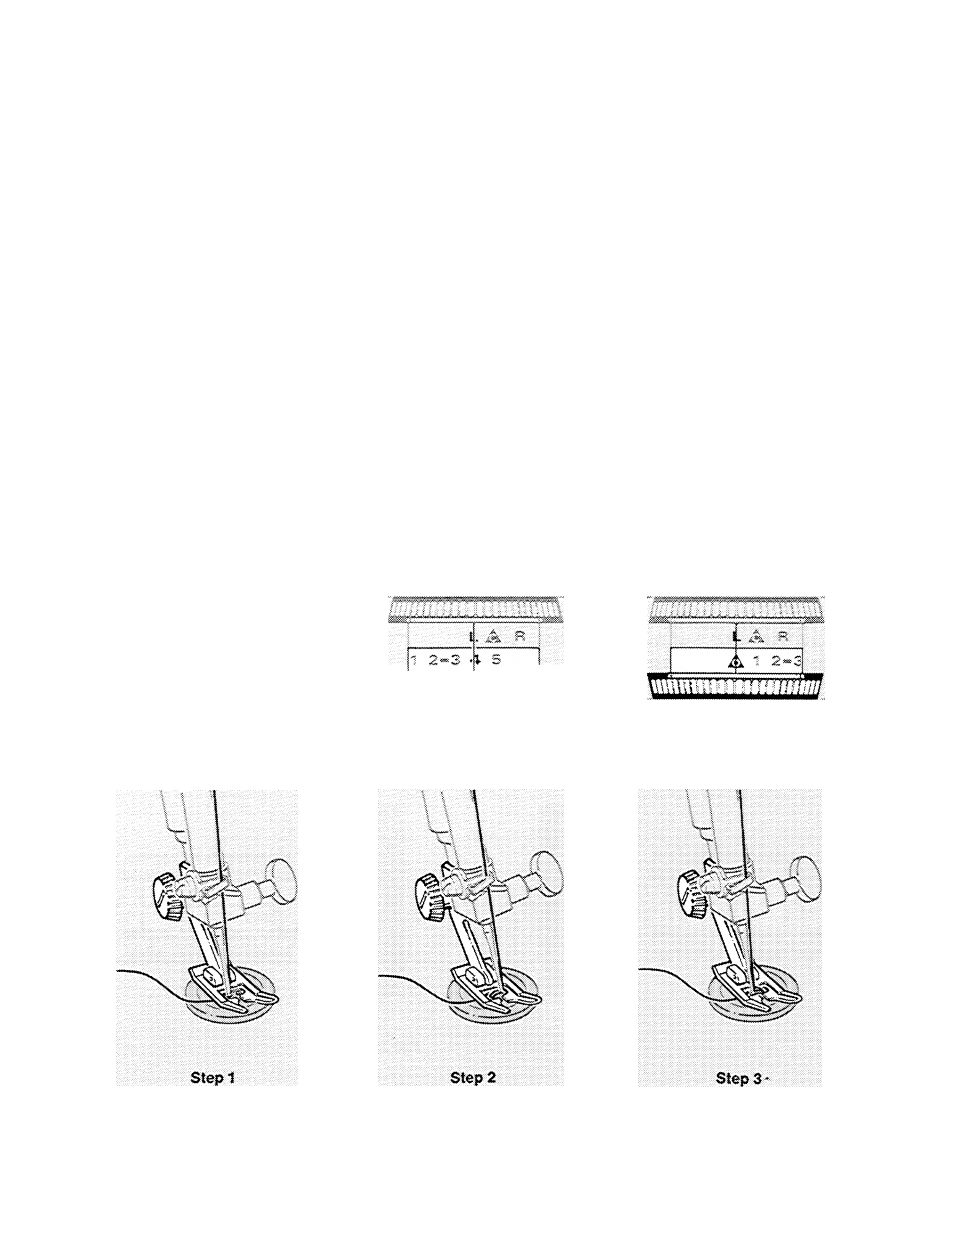
Pattern: Plain Zig-Zag I
Stitch Width: À and 4
Needle Position: L
Feed Cover Throat Plate
Zig-Zag Foot
The space between the holes in the button de
termines the stitch width settings. The A set
ting must always be used to position the needle
over the left hole and fasten stitching. For but
tons with standard hole spacing, use settings
A and 4. For buttons with unusual hole spac
ing, use setting A and increase or decrease
the width setting 4 as necessary.
To sew on two- or four-hole buttons, approxi
mately one inch ( 25 mm) in diameter or larger:
1. Set stitch width dial at A . Position button
under foot so that the needle will enter the
left hole. Lower foot. Turn hand wheel to
ward you until needle rises out of button
and is just above the foot.
2. Set stitch width at 4. Then, when you begin
to stitch, the needle should enter the right
hole of button. Take six or more zig-zag
stitches at this setting, ending on left side.
3. To fasten stitching, return to stitch width
A and take about three stitches.
For best results with buttons smaller than one
inch (25mm) in diameter, it is recommended that
the Button Sewing Foot be used. See page 47.
mwmbuhrnlllll
25