Buttonholes – SINGER W1166 User Manual
Page 21
Attention! The text in this document has been recognized automatically. To view the original document, you can use the "Original mode".
20
BUTTONHOLES
Buttonholes of various lenghs can be made automatically
by just turning the buttonhole control knob.
l o establish the correct length buttonhole required, add
M inch to the cutting space for bar tacks.
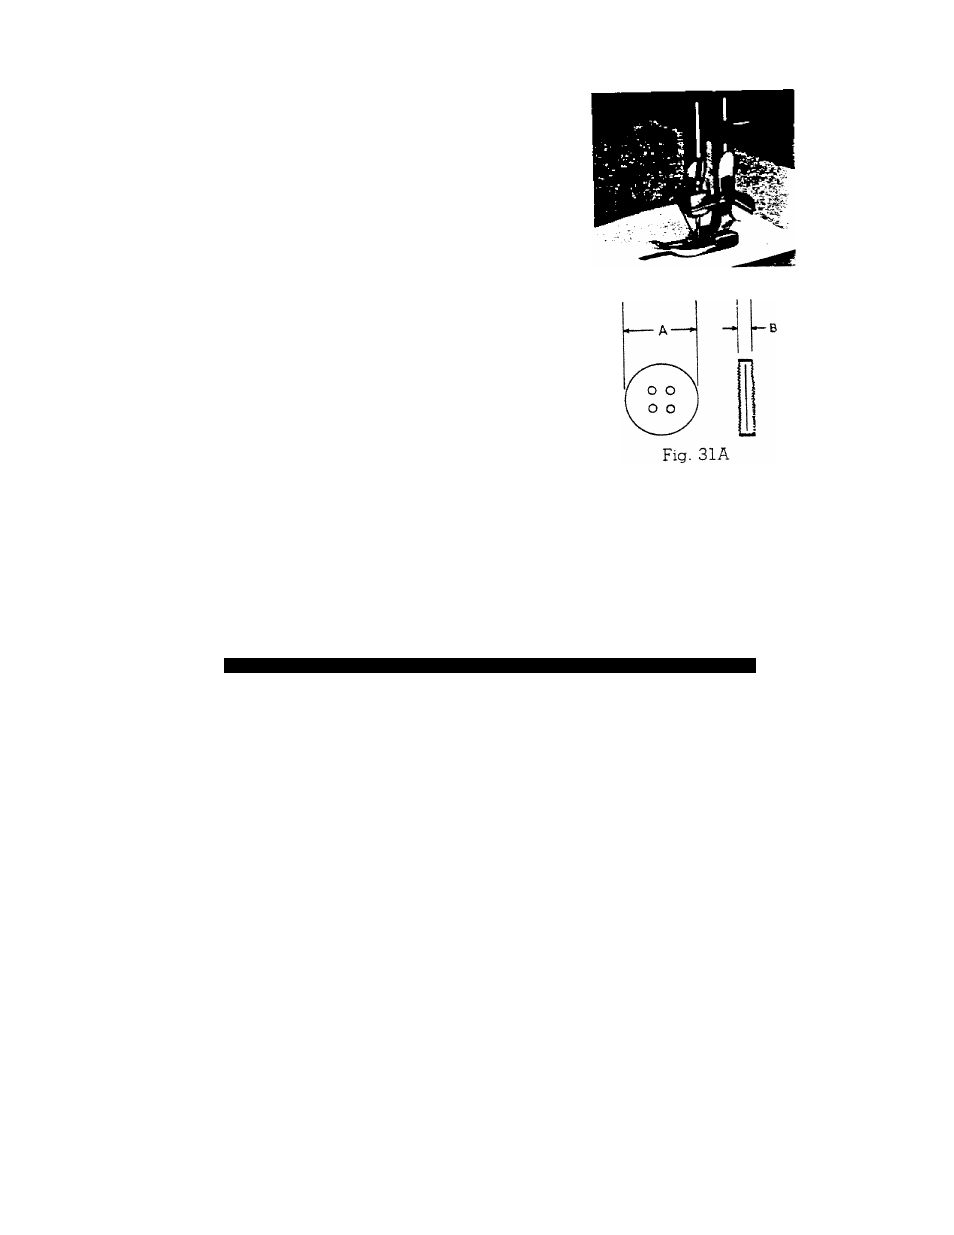
To obtain the length of the cutting space, the opening
through which the button passes is measured by adding the
width “A” and thickness “B” cf the button (Fig. 31 A)
First mark the beginning and end of the butfconholeon
the fabric with a basting line or tailor’s chalk Make one
or two buttoiihole on scrap fabric (following directions
below) to be sure the machines adjustments are correct.
(1)
Set decorative design at number A-1 and zigzag
stitch width control at 0.
(2)
Replace presser foot with special purpose buttonhole
foot. It provides maximum visibility and allows
closely spaced stiches to feed evenly (Fig. 31)
(3)
Set stitch length knob 12 (Fig. 1) as near 0 as
possible without stopping the feeding action.
(4) Set buttonhole control knob (Fig. 33) at 0 and
then to the first buttonhole setting, number 1.
This will automatically set the width of the
buttonhole sides.
i'5) Lower needle carefully into the mark on the
fabric indicating the start of thè buttonhole.
Lower presser foot and sew full length of left
hand side of the buttonhole (Fig. 32, Step 1).
Fig. 31
= 1
is
P 5:
il
f
1
s f
ES
V
Fig. 32
%
5
C.
Cl
C-
m - f