Straight stitching – SINGER W1166 User Manual
Page 14
Attention! The text in this document has been recognized automatically. To view the original document, you can use the "Original mode".
1^
a
13
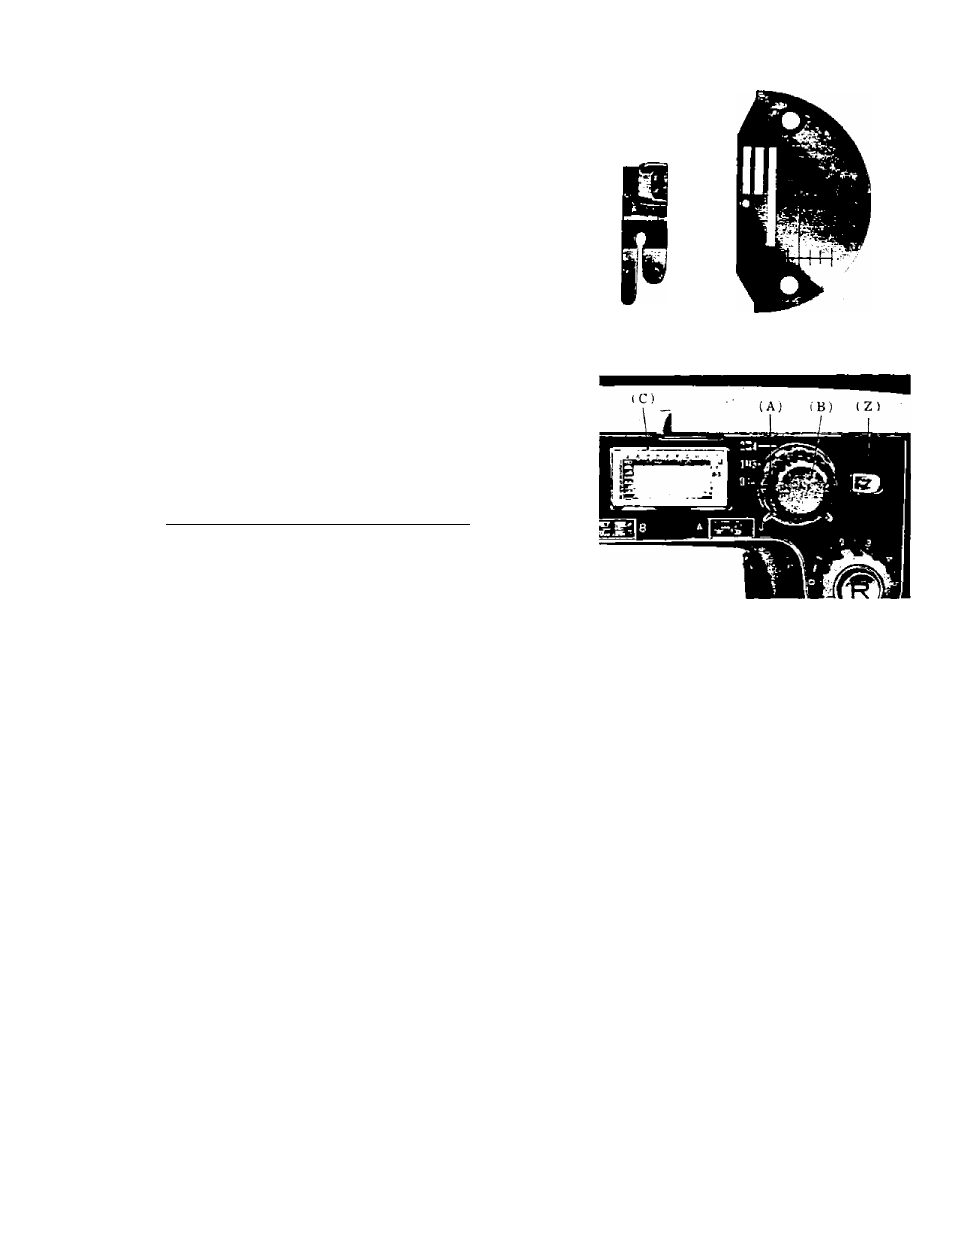
STRAIGHT STITCHING
For straight sewing on fine fabric or very soft ma
terial, you may want to use the straight stitch presser
foot and the straight stitch needle plate which are in
cluded in your accessory box. Both have narrow needle
slots.
Changing the Presser Foot and Needle Plate:
(1)
Presser Foot
(A)
Loosen thumb screw 19, Fig. 1, and remove
zigzag presser foot.
(B)
Replace with straight stitch presser foot.
Fig. 22A.
(2)
Needle Plate
(A)
Slide cover plate 17, Fig. 1, to the left as
far as possible.
(B)
Remove screws holding needle plate 16,
Fig. 1, to bed plate. ,
(C)
Remove zigzag needle plate.
(D) Replace with straight stitch needle plate
22R
Be sure to set the stitch width at 0, or the needle
will break in striking the foot or plate.
Grasp outer rim of zigzag dial A, Fig. 23, and press
down on lock B. Turn dial as far to the left as possible.
Pointer will then be on the zero mark.
Fig. 22A
Fig. 22B
Fig. 23