5b-1, 5b-2 – SINGER 1500 Izek User Manual
Page 34
Attention! The text in this document has been recognized automatically. To view the original document, you can use the "Original mode".
,BUTT0NH0LES\,^'I1,„>1.^^:-1|^M
Buttonhole foot needs to be attached, and buttonhole lever needs to be
lowered before starting the machine. (Refer to page 62 - 64)
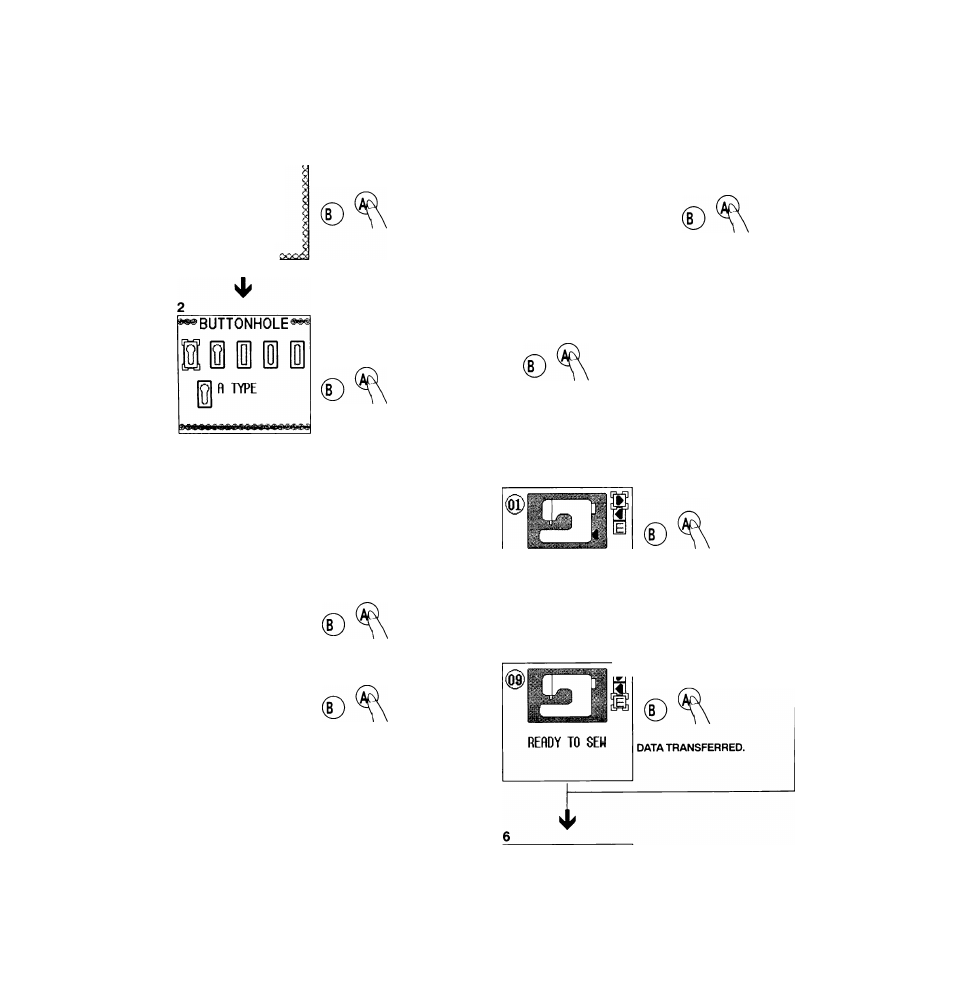
Use the (Y) Control Pad to select
1
^ MENU '«'«'^.■BU^ONHOLES-
in'’
PfiTTFRNS
► BUnONHOLES
LETTERS
FfiUORITES
CUSTOM
p COLORS
Push the A Button
Use the (►) and/or (-^) Control
Pad to select the type of buttonhole.
Push the A Button
^BUTTONHOLE®^
fi TYPE
(
oüü
^C
j
I
dl
DENSITY WIDTH
Use the Control Pad to select the
stitch density and the cutting width.
(The stitch density can be set to one
of three densities: 0.5 mm, 0.8 mm,
and 1.0 mm.
The cutting width can be set to one
of two widths; Wide and narrow.)
Push the A Button
BUTTONHOLE
fl TYPE
► DfiTfl ■mfiNSFER
RETURN
Push the A Button
You can use the ( ▼) Control Pad
to return to the previous screen.
5A
^BUTTONHOLE
fi TYPE
SEE SET-UP GUIDE?
---------^YES
If you do not wish to view the
set-up guide screen.
Push the A Button
DATA TRANSFERRED.
-If you wish to view the
set-up
guide
screen,
push the (
) Control
Pad to select “YES”.
Push the A Button
5 B - 1
CONNECT POWER PLUG
SEE
SETTING
UP
THE
MQCHINE IN MONURL
Push the A Button
"SET-UP GUIDE SCREEN"
see page 21.
5 B - 2
rsi Push the A Button
P^BUTTONHOLE^
fi TYPE
TUfiNSFERRED
STfiRT
SEWING MfiCHINE
start the machine.