Check adjustment of clutch cables – Sears 247.8867 User Manual
Page 5
Attention! The text in this document has been recognized automatically. To view the original document, you can use the "Original mode".
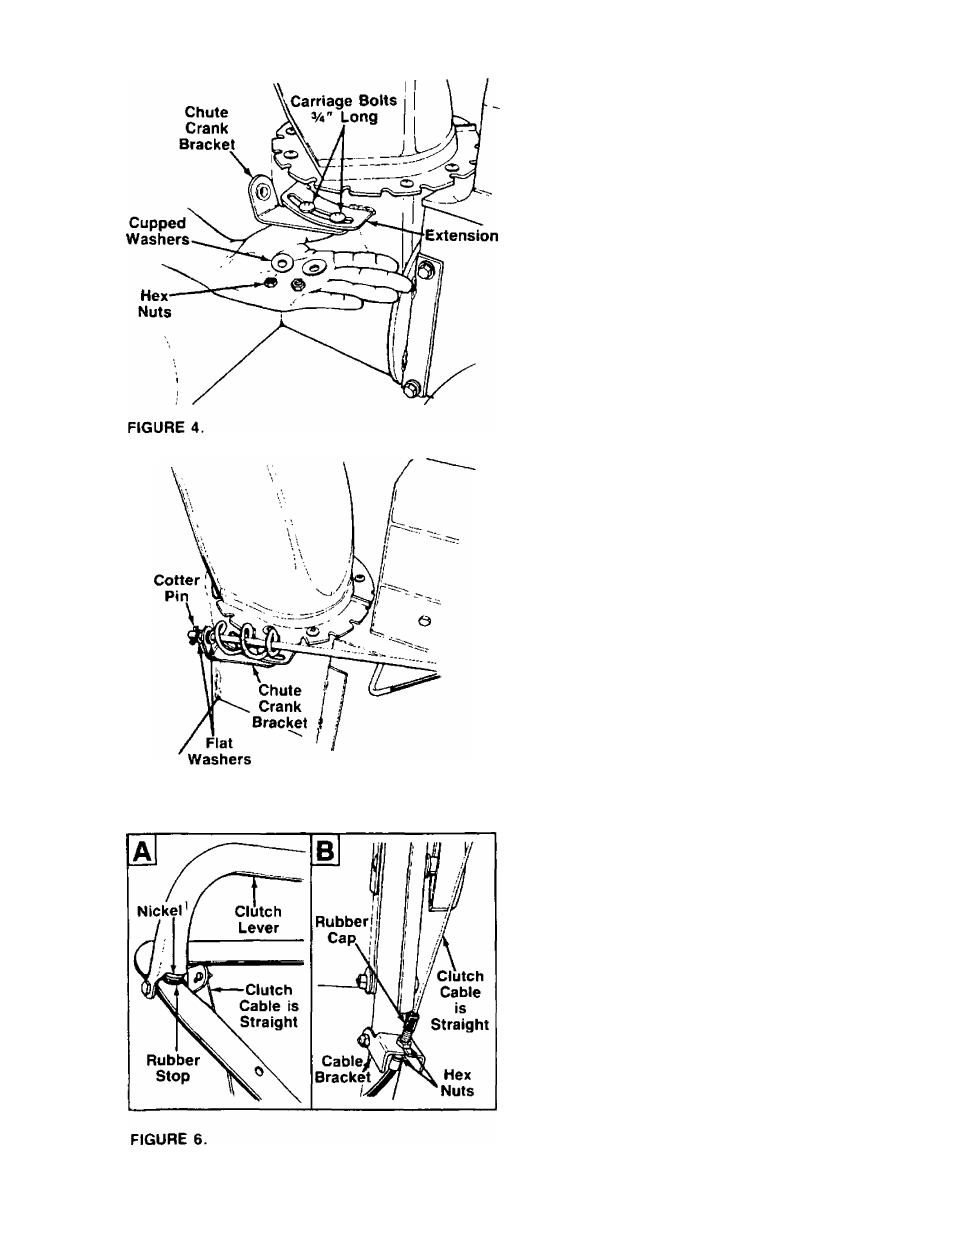
FIGURE 5.
4. Rotate the discharge chute so the opening is fac
ing the front of the snow thrower.
5. Attach chute crank bracket to the extension on the
left side of the chute opening (bracket goes
----- beneath the extension) as shown in figure 4.
Secure with two long carriage bolts, 5/16"
cupped washers (cupped side of washers go
against the chute bracket) and hex nuts. Do not
tighten at this time.
6. Place one 3/0" flat washer on the end of the chute
crank assembly. Insert the end of the crank into
the plastic bushing in the chute crank bracket. See
figure 5.
■^NOTE
If necessary, adjust the hex nuts on the
eyebolt so the chute crank does not
touch the engine.
7. Place the other 3/8" flat washer on the end of the
chute crank, and insert the cotter pin into the hole
in the end of crank. Secure by bending the ends
of the cotter pin in opposite directions.
8. Adjust the chute crank bracket so the spirals on
the chute crank fully engage the notches on the
chute. Tighten the hex nuts to secure the bracket
in this position.
9. Tighten the hex nuts on the eyebolt at the handle
panel.
10. Tighten the hand knobs which secure the upper
and lower handles.
CHECK ADJUSTMENT OF CLUTCH CABLES
The clutch cables have been adjusted at the factory.
However, check the adjustment before operating the
snow thrower. Working on one side of the unit, proceed
as follows.
Place a nickel on top of the rubber stop on the upper
handle. See figure 6A. Raise the clutch lever so it is
just touching the nickel.
The clutch cable should be straight without putting
any pressure on the rubber stop beneath the nickel.
-See figure 6B. There should be no tension on the
cable.
If adjustment is necessary, adjust the hex nuts at the
cable bracket as instructed in the Adjustment section
on page 13.
Check the adjustment for the other clutch cable in the
same manner.
A
t WARNING t
There must not be any tension on
either of the cables with the clutch
levers in the released position. Make
certain the rubber cap is in place over
the threaded end of the cable casing.
This rubber cap prevents water from
seeping into the casing, which could
freeze and cause the controls not to
operate correctly.