Note – Sears 247.8867 User Manual
Page 14
Attention! The text in this document has been recognized automatically. To view the original document, you can use the "Original mode".
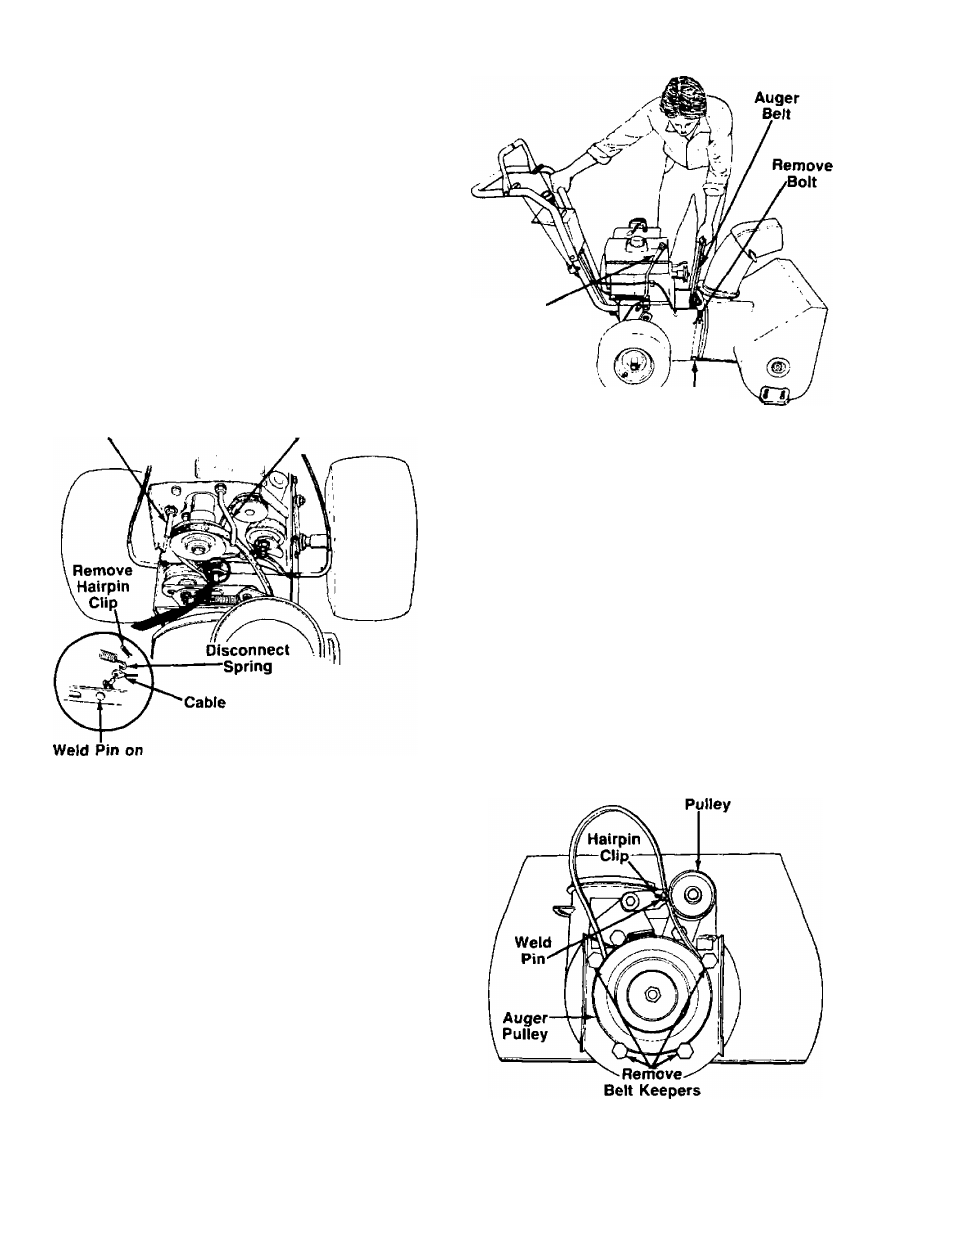
4. Remove the hairpin clip shown in figure 23.
Unhook the brake spring from the weld pin on the
idler bracket.
■^NOTE
Figure 23 is show with the chute
assembly removed for clarity only.
It is not necessary to remove the
chute when replacing the belts.
5. Using a 1/2" wrench, loosen upper left hand belt
guard and pivot out of the way. Remove the right
hand belt guard and cupped washer. A 9/16"
wrench is required.
6. Roll belt off the engine pulley.
7. Unhook the cable from the weld pin on the idler
bracket. See figure 23.
Right
Belt Guard
Upper Left
Belt Guard
Idler Bracket
FIGURE 23.
8. Separate the snow thrower into two halves as
follows.
a. Move weight transfer lever to the “Packed
Snow" position.
b. Using a 9/16" wrench, remove the top bolts
which attach the auger housing to the frame
assembly. Loosen (do not remove) the bottom
bolls. See figure 24.
c. Lift up on the auger drive belt to pull the auger
housing off the frame assembly. The snow
thrower will separate into two halves.
d. Tip the auger housing forward so it rests on the
front of the housing.
Weight
Transfer
Lever
Loosen
(Do Not Remove)
FIGURE 24.
NOTE
Be certain to check the condition of
the drive belt when the two halves of
the unit are separated. Replace if
necessary.
9. Using a 15/16" wrench, remove the four shoulder
bolts and cupped washers which act as belt
keepers. See figure 25.
10. Roll belt off the auger pulley.
11. Remove the second hairpin clip from the weld pin
on the idler bracket.
12. Push the idler to the right to extend the spring.
Remove belt from between idler pulley and weld
pin. See figure 25.
13. Reassemble new belt in reverse order.
Idler
FIGURE 25.
14