Install mulcher plate (see figs. 5 and 6), To convert to bagging or discharging, Assembly – Sears EZ3 917.258473 User Manual
Page 9
Attention! The text in this document has been recognized automatically. To view the original document, you can use the "Original mode".
ASSEMBLY
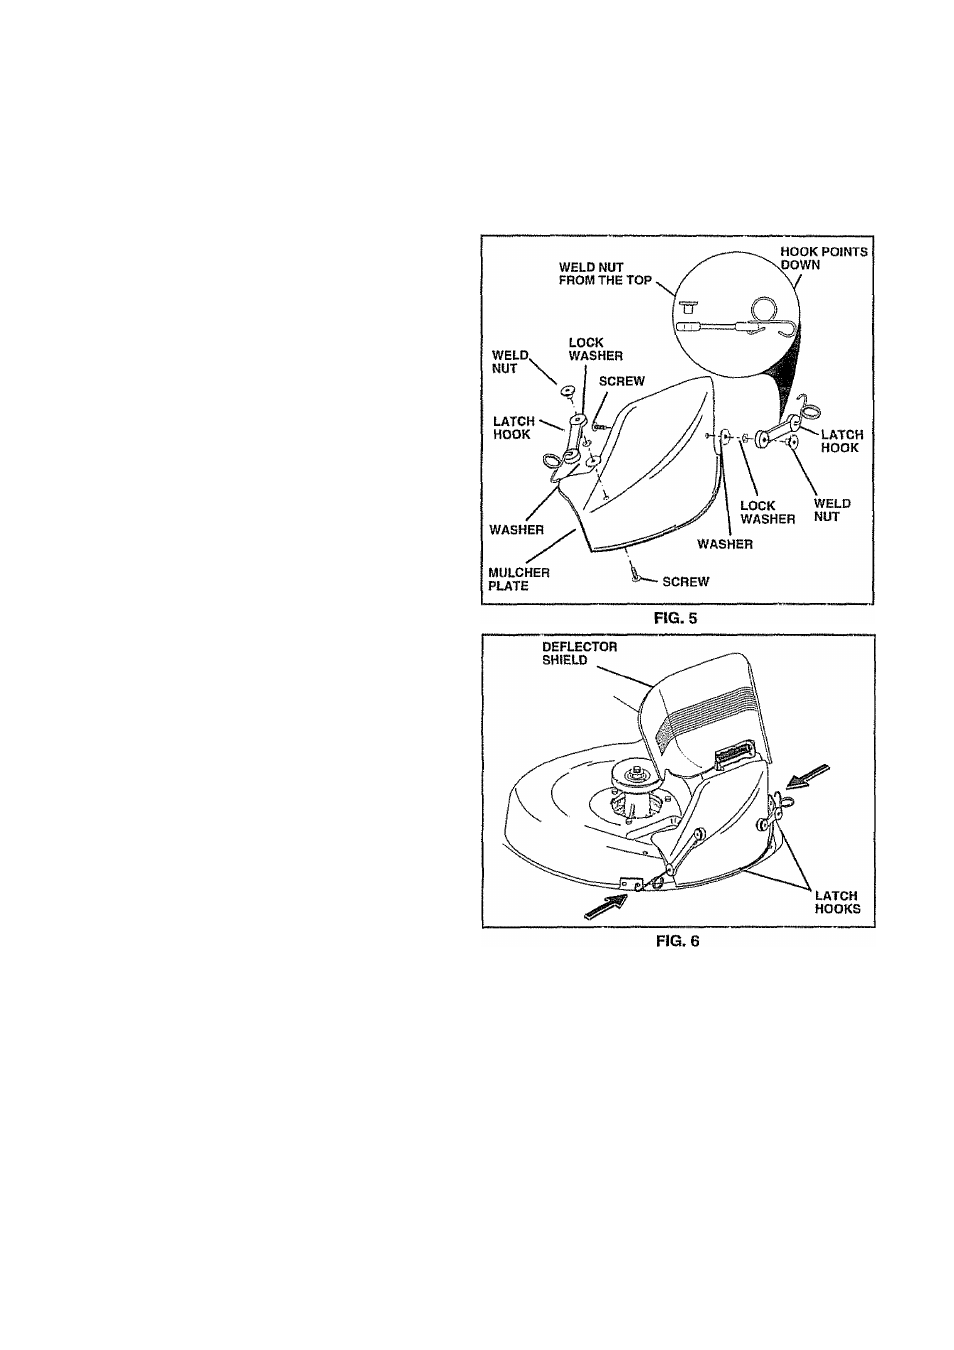
INSTALL MULCHER PLATE
(See Figs. 5 and 6)
» Install two latch hooks to mulcher plate using screw,
washer, lock washer, and weld nut as shown.
NOTE:
Pre-assemble weld nut to latch hook by inserting
weld nut from the top with hook pointing down.
» Tighten hardware securely,
• Raise and hold deflector shield in upright position.
"
Place front of mulcher plate over front of mower deck
opening and slide into place, as shown.
» Hook front latch into hole on front of mower deck.
» Hook rear latch into hole on back of mower deck.
A
CAUTION: Do not remove discharge
guard from mower. Raise and hoid
guard when attaching mulcher plate
and allow it to rest on plate while in
operation.
TO CONVERT TO BAGGING OR
DISCHARGING
Simply remove mulcher plate and store in a safe place.
Your mower is now ready for discharging or installation of
optional grass catcher accessory.
NOTE:
It is not necessary to change blades. The mulcher
blades are designed for discharging and bagging also.