Add gasoline, To start engine (see fig. 9), Mowing tips – Sears 917.25597 User Manual
Page 14: Operation
Attention! The text in this document has been recognized automatically. To view the original document, you can use the "Original mode".
OPERATION
ADD GASOLINE
» Fill fuel tank. Use fresh, clean, regular unleaded
gasoline. (Useof leaded gasoline will increase carbon
and lead oxide deposits and reduce valve life).
IMPORTANT:
WHEN OPERATING IN TEMPERATURES
BELOW 32°F(0°C), USE FRESH, CLEAN WINTER GRADE
GASOLINE TO HELP INSURE GOOD COLD WEATHER
STARTING.
WARNING:
Experience indicates that alcohol blended
fuels (called gasohol or using ethanol or methanol) can
attract moisture which leads to separ ation and for mation of
acids during storage. Acidic gas can damage the fuel
system of an engine while in storage. To avoid engine
problems, the fue! system should be emptied before stor
age of 30 days or' longer. Drain the gas tank, start the
engine and let it run until the fuel lines and carburetor are
empty. Use fresh fuel next season. See Storage Instruc
tions for additional information. Never use engine or
carburetor cleaner products in the fuel tank or permanent
damage may occur.
CAUTION: Fill to bottom of gas tank
filler neck. Do not overfill. Wipe off any
spilled oil or fuel. Do not store, spiii or
use gasoline near an open flame.
TO START ENGINE (See Fig. 9)
When starting engine for the first time or if engine has run
out of fuel, it will take extra cranking time to move fuel from
the tank to the engine.
» Depress the clutch/brake pedal and set the parking
brake.
» Place gearshift lever in "NEUTRAL” position.
“ Move attachment clutch to “DISENGAGED" position.
“ Pull choke control out to “CHOKE" position for cold
engine start. For warm engine start do not use choke
control.
" Move throttle control to midway between “FAST" and
“SLOW" positions.
» Turn ignition key clockwise to “START" position and
release key as soon as engine starts. Do not run
starter continuously for more than fifteen seconds per
minute. If engine does not start after several attempts,
move throttle control to "FAST” position, wait a few
minutes and try again.
“ When engine starts, slowly push choke control in,
« Move throttle control to “FAST” position.
“ Allow engine to warm up for a few minutes before
engaging clutch/brake pedal or attachment clutch
switch.
NOTE: If at a high altitude (above 3000 feet) or in coid
temperatures (below 32° F), the carburetor fuel mixture
may need to be adjusted for best engine perfor mance. See
“TO ADJUST CARBURETOR” in the Service and Adjust
ments section of this manual
MOWING TIPS
^ Tire chains cannot be used when the mower housing
is attached to tractor.
■> Mower should be properly leveled for best mowing
performance. See “TO LEVEL MOWER HOUSING" in
the Service and Adjustments section of this manual.
® Use the runner on the right hand side of mower as a
guide, The blade cuts approximately an inch outside
the runner (See Fig , 11}„
■» The left hand side of mower shouid be used for trim
ming,
° Drive so that clippings are discharged onto the area
that has been cut. Have the cut area to the right of the
tractor. This will result in a more even distribution of
clippings and more uniform cutting.
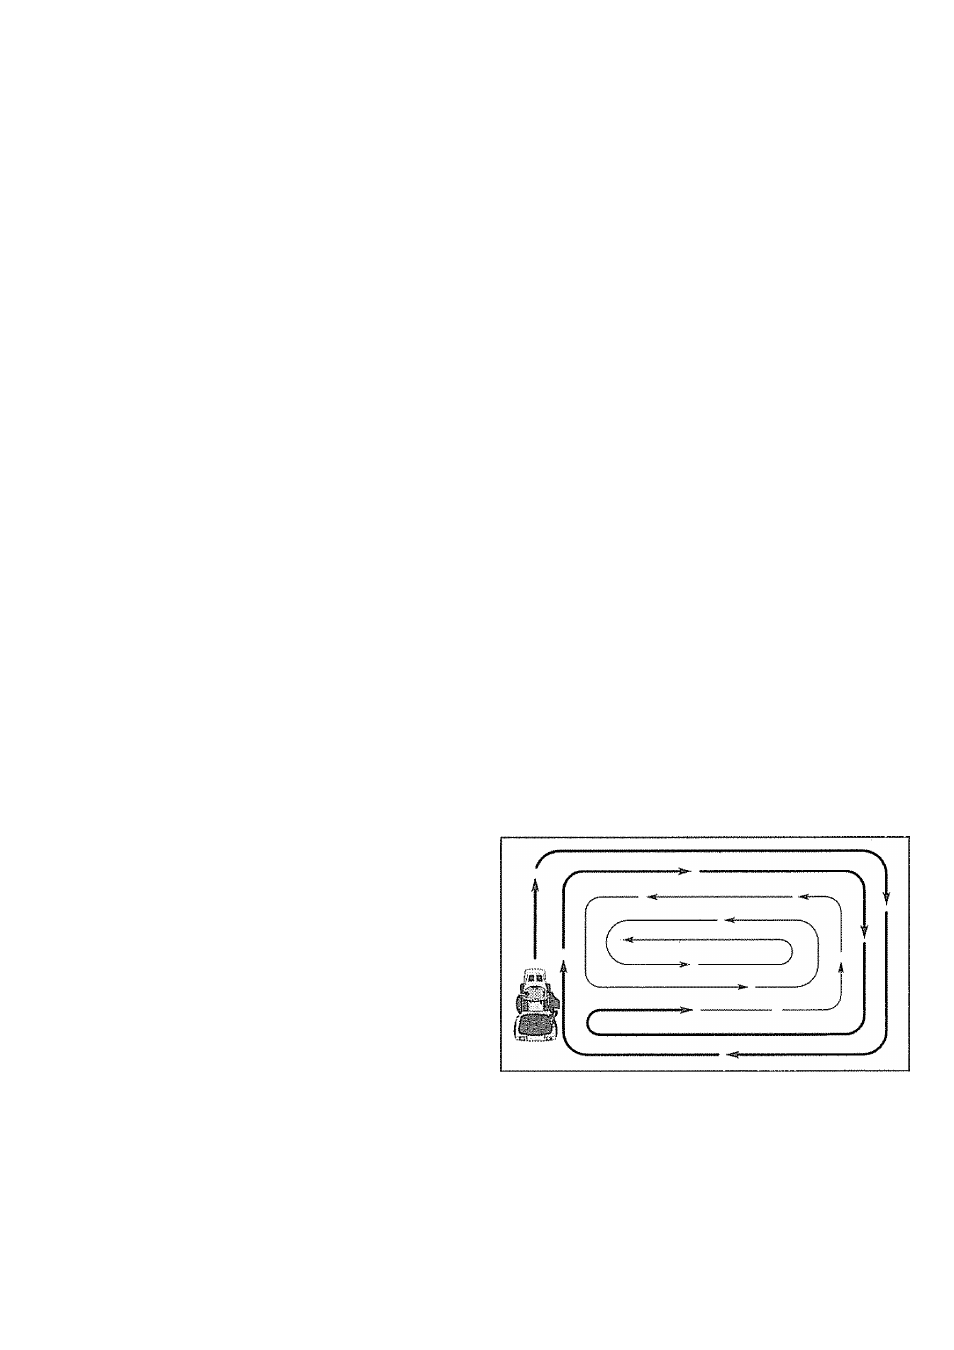
« When mowing large areas, start by turning to the right
so that clippings will discharge away from shrubs,
fences, driveways, etc. After one or two rounds, mow
in the opposite direction making left hand turns until
finished (See Fig. 13).
» If grass is extremely tali, it should be mowed twice to
reduce load and possible fire hazard from dried clip
pings. Make first cut relatively high; the second to the
desired height.
« Do not mow grass when it is wet,. Wet grass wiii plug
mower and leave undesirable clumps. Allow grass to
dry before mowing.
® Always operate engine at fuil throttle when mowing to
assure better mowing performance and proper dis
charge of material Regulate ground speed by select
ing a low enough gear' to give the mower cutting
performance as well as the quality of cut desired.
° When operating attachments, select a ground speed
that will suit the terrain and give best performance of
the attachment being used.
FIG. 13
14