Operation – Sears 315.10924 User Manual
Page 10
Attention! The text in this document has been recognized automatically. To view the original document, you can use the "Original mode".
OPERATION
TO CROSS CUT OR RIP CUT
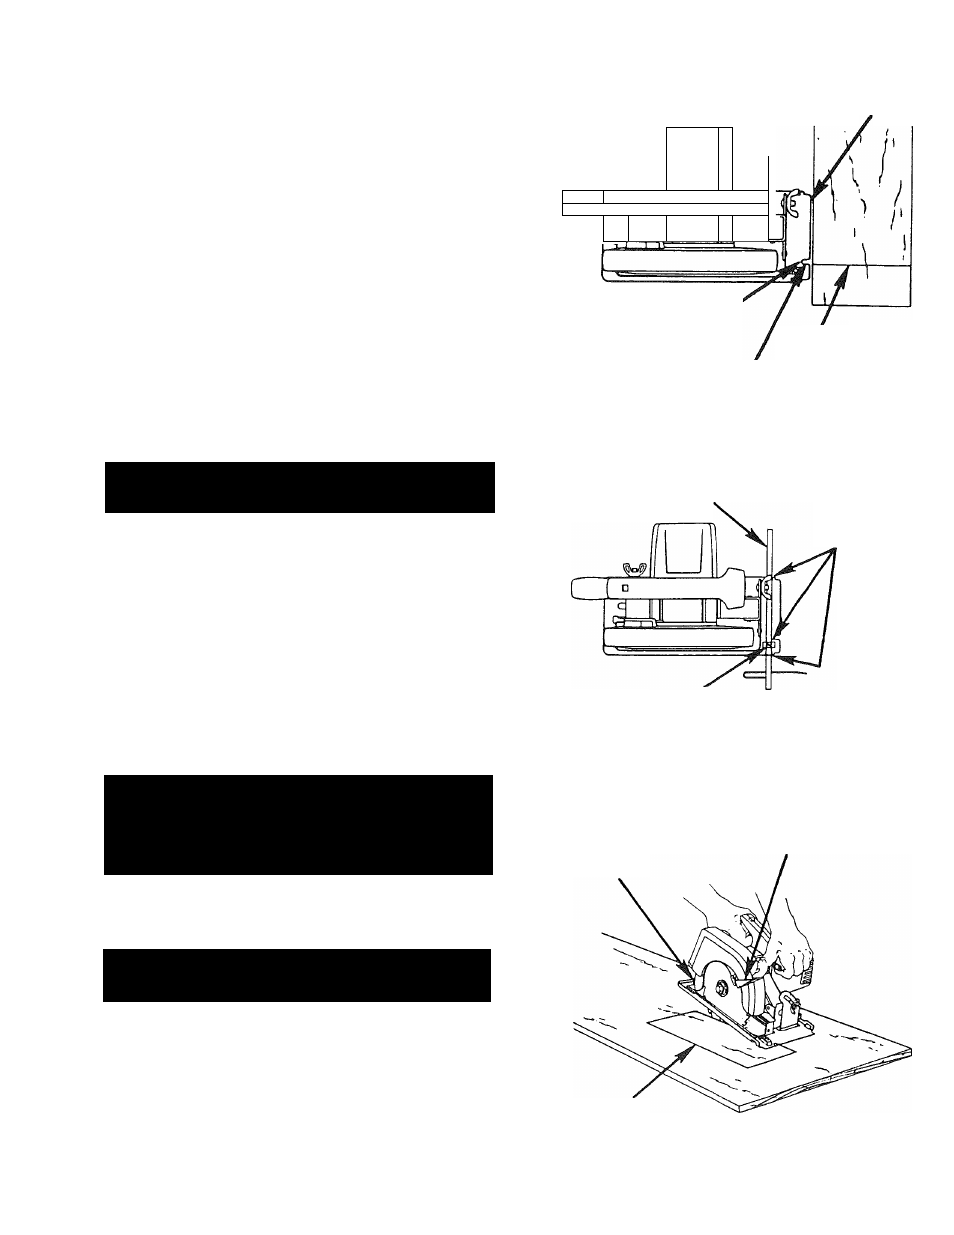
When making a cross cut or rip cut, align your line of
cut with the outer edge of the notch in the saw base
as shown in figure
12
. Since the thickness of blades
vary, always make a trial cut in scrap material along a
guideline to determine how much, if any, the
guideline must be offset to produce an accurate cut.
NOTE: The distance from the line of cut to the
guideline is the amount you should offset the
guideline.
RIP GUIDE
Use a rip guide when making rip cuts up to five
inches wide. It helps prevent the blade from twisting
in a cut. The blade twisting in a cut causes kickback.
If needed. Rip Guide Cat. No. 9 27679 is available at
your Sears Catalog Order or Retail Store.
TO ASSEMBLE RIP GUIDE
1. UNPLUG YOUR SAW.
ikWARNING: FAILURE TO UNPLUG YOUR SAW
COULD RESULT IN ACCIDENTAL STARTING
CAUSING SERIOUS INJURY.
2. Place rip guide through holes in saw base as
shown in figure 13.
3. Adjust rip guide to the length needed for the cut.
4. Tighten screw securely.
When using a rip guide, hold the face of the rip guide
firmly against the edge of work. This makes for a true
cut without pinching the blade. The guiding edge of
work must be straight for your cut to be straight. Use
caution to prevent the blade from binding in the cut.
TO POCKET CUT
^WARNING: ALWAYS ADJUST BEVEL SETTING
TO ZERO BEFORE MAKING A POCKET CUT. AT
TEMPTING A POCKET CUT AT ANY OTHER SET
TING WILL RESULT IN LOSS OF CONTROL OF
YOUR SAW POSSIBLY CAUSING SERIOUS IN
JURY.
.......
With the bevel setting adjusted to zero, swing the
lower blade guard up using the lower blade guard
handle.
ikWARNING:
ALWAYS
RAISE
THE
LOWER
BLADE GUARD WITH THE HANDLE TO AVOID
SERIOUS INJURY.
While holding lower blade guard by the handle, firm
ly rest the front of the base flat against the
workpiece with the rear of the base raised so the
biade does not touch the work. See Figure 14. Push
the iock-off button down and squeeze the switch
trigger. ALWAYS LET THE BLADE REACH FULL
SPEED THEN SLOWLY LOWER BLADE INTO THE
WORK UNTIL BASE IS FLAT AGAINST WORK.
TOP VIEW OF SAW
FRONT OF SAW
—
c
II
NOTCH IN SAWiBASE
GUIDELINE
ALIGN OUTER EDGE OF NOTCH IN SAW
BASE WITH LINE OF CUT AS SHOWN
WHEN MAKING CROSS CUTS OR RIP CUTS
Fig.
12
TOP VIEW
RIP
GUIDE
OF SAW
PLACE RIP
GUIDE THRU
HOLES
SCREW
Fig. 13
LOWER
BLADE
GUARD
LOWER BLADE
GUARD HANDLE
POCKET CUT
Fig. 14
Page 10