Service and adjustment, Carburetor, Engine speed – Sears 247.37638 User Manual
Page 13: Rear trail shield, Belt removal and replacement, Transmission
Attention! The text in this document has been recognized automatically. To view the original document, you can use the "Original mode".
SERVICE AND ADJUSTMENT
CARBURETOR
Your carburetor has been completely adjusted at the
factory. If your engine does not operate properly due
to suspected carburetor problems, take your mower to
an authorized Sears Service Center for repair and
adjustment.
ENGINE SPEED
Your engine slow and fast speeds have been factory
set. Do not attempt to increase engine speed or it
may result in personal injury. If you believe that the
engine is running too fast or too slow, take your
mower to an authorized Sears Service Center for
repair and adjustment.
REAR TRAIL SHIELD
The rear trail shield, attached between the rear
wheels of your mower, is provided to minimize the
possibility that objects will be thrown out the rear of
the mower toward the operator.
If the shield becomes damaged, it should be replaced.
BELT REMOVAL AND REPLACEMENT
• Place shift lever in third speed.
• Disconnect the spark plug wire and ground it
against the engine.
• Drain the fuel tank or place a piece of plastic
beneath the cap to prevent gasoline leakage.
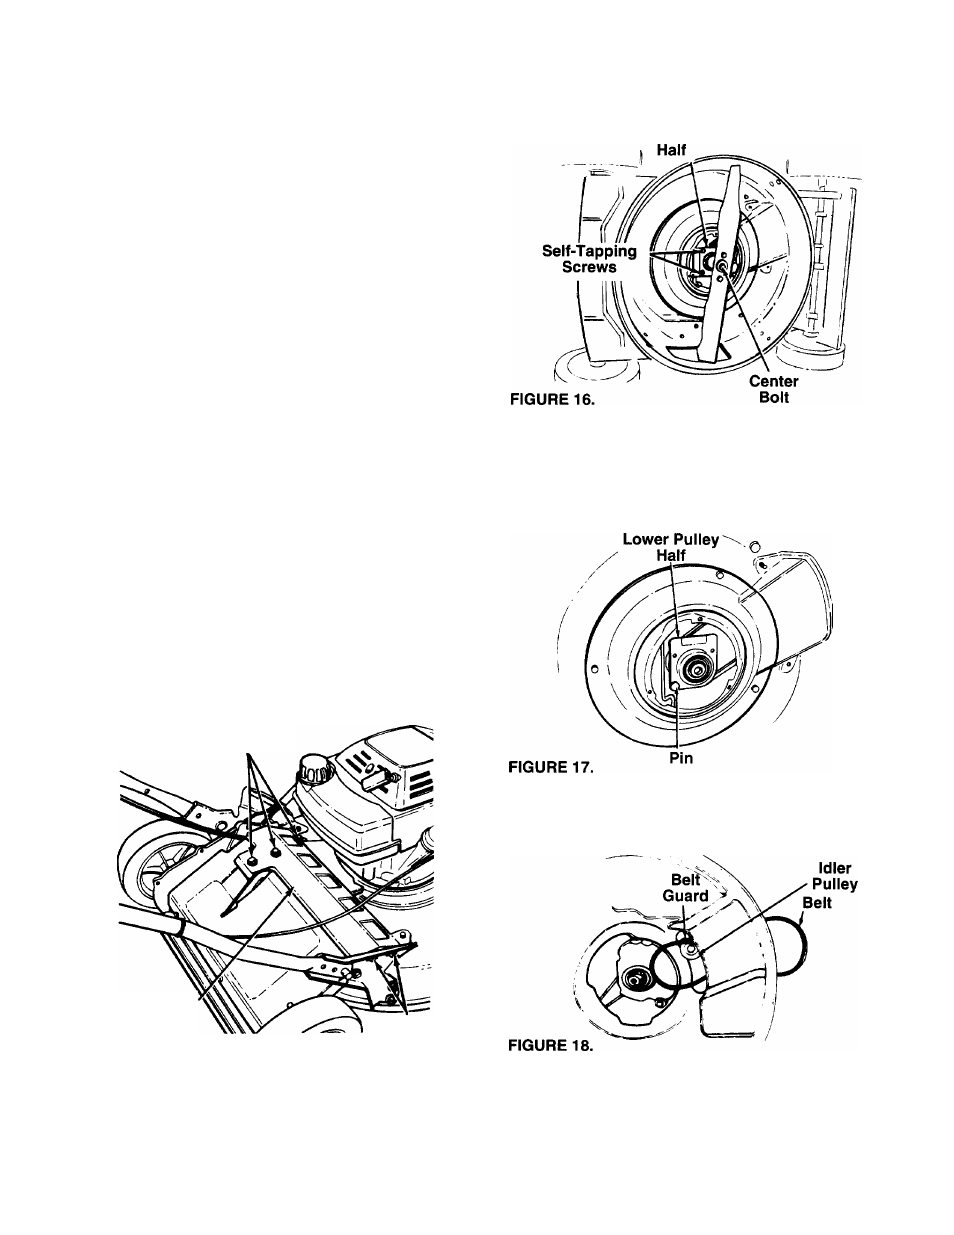
• Remove the transmission belt cover by removing
five self-tapping screws. See figure 15.
Self-Tapping
Screws
Lower Pulley
Transmission
Belt
Cover
FIGURE 15.
Self-Tapping
Screws
Tip the mower on its side. Block securely.
Remove the center bolt which secures the blade to
the crankshaft. See figure 16. Remove the blade
and blade adapter.
Remove the two-self-tapping screws which secure
the lower pulley half. See figure 16. Rotate the
lower pulley half 90° clockwise (see figure 17) and
remove from the mower. Remove the belt from
around the crankshaft.
• Remove the belt from between the idler pulley and
the belt guard on the idler pulley bracket. See
figure 18.
Remove the belt from the transmission pulley.
Assemble the new belt as follows.
Push the idler pulley up out of the way as shown in
figure 18.
15