How to sit-up youh mowir – Sears 917.372301 User Manual
Page 6
Attention! The text in this document has been recognized automatically. To view the original document, you can use the "Original mode".
Your ¡awn
mower
has been completely assembled at the factory, except for the grass catcher and grass
catcher frame. To
se#-up
and attach grass catcher, follow the steps under "GRASS CATCHER".
The following parts are included not assembled:
?
Gross
Catcher Frame
1
Grass Catcher Top
1
Grass Catcher Bottom
1
Hardware Package
HOW TO SIT-UP YOUH MOWIR
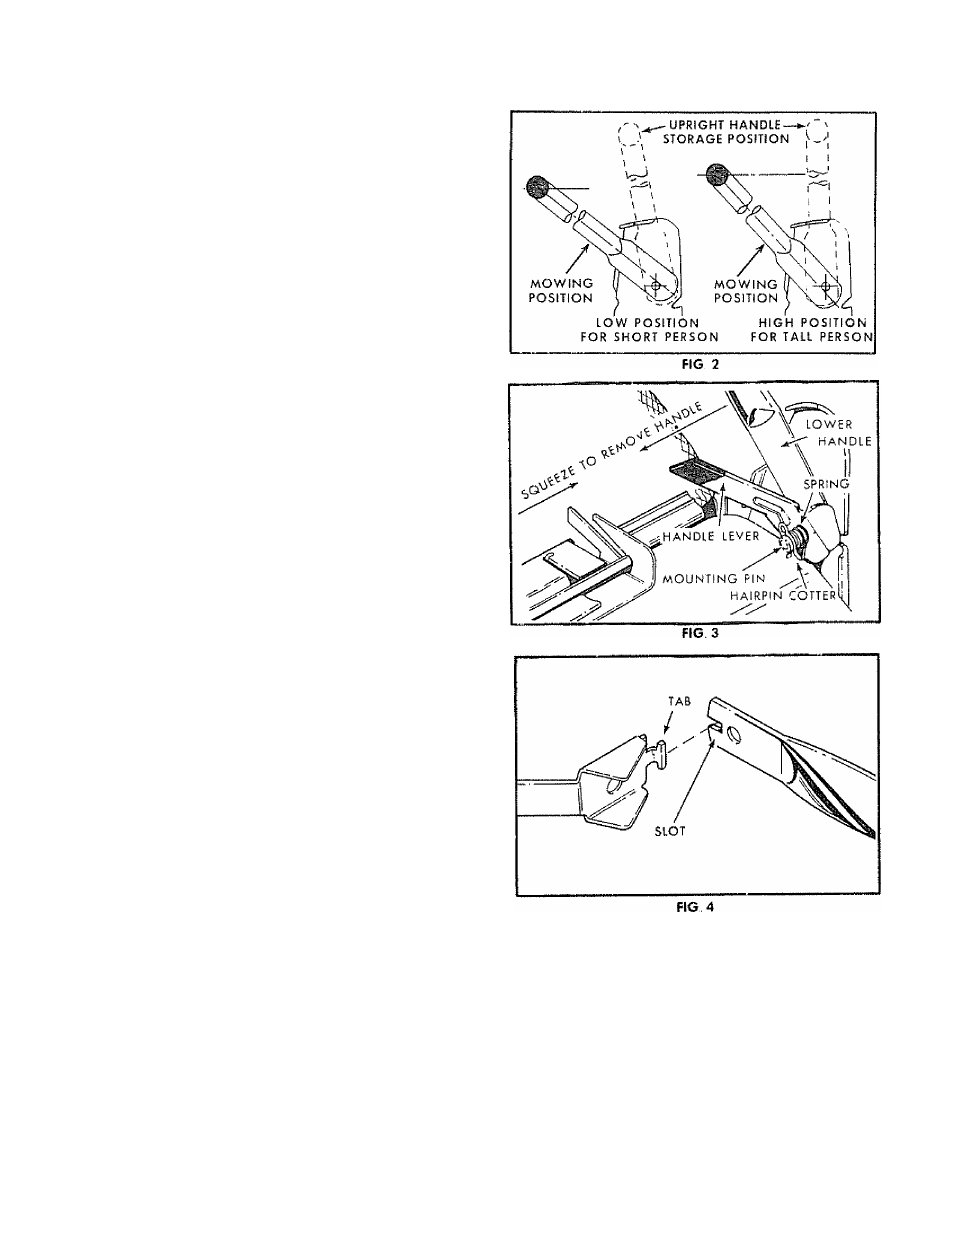
TO UNFOLD HANDLE
1. Raise the handles until the lower handle is in
mowing position (See Fig. 2),
NOTE: The lower handle automatically locks info
mowing position when raised from shipping to
mowing position.
2.
Raise the upper handle into position on the
lower handle and tighten the two (2) handle
knobs.
NOTE: The anti-pivot bracket
on
your mower
handle prevents folding upper handle the wrong
way which can bend control cables (See Fig. 5).
3. The handle can be mounted in high or low
position to suit the comfort of the user. The
handles are shipped mounted in the high
position.
4. If the handle feels too high for you:
a. Remove the two (2) screws and one (I)
bolt, washer and locknut holding the trim
plate and rope guide to lower handle.
Keep for
re-assembly (See Fig.
1).
b. Remove the handle
knobs and
bolts from
upper and lower handle.
c. Remove the hairpin cotters (See Fig. 3).
d. Turn handle over, position handle levers
in place
fSee
Fig. 4).
e. Put handle back on mounting pins (See
Fig. 3).
f. Put
springs
and hairpin cotters back in
mounting pins (See Fig. 3).
g. Put upper handle on lower handle using
handle
bolts
and
knobs
previously re
moved.
NOTE: Be sure anti-pivot bracket is
on right hand
side
of your handle (See Fig. 5).
h. Put trim plate and rope guide back on
lower
handle, removed in (a)
above.
Tighten the two (2) screws and one (1)
bolt (See Fig. 1).
NOTE: Be sure washer is between trim plate and
rope guide bracket.
i. Snap cable clip over cable and lower
handle (See Fig. 1).
5. To fold handle for storage,
squeeze
the handle
levers until lower handle clears handle brack
ets, then move handle forward (See Fig. 3).
CAUTION: WHEN FOLDING HANDLE FOR TRANS
PORTING OR STORAGE, BE SURE TO FOLD HAN
DLE AS SHOWN IN FIG. 5. IF YOU FOLD HANDLE
THE WRONG WAY, YOU MAY BEND THE CON
TROL CABLES.
TO ADJUST HEIGHT OF CUT
NOTE: The wheels are set in a low cut position for
shipment, and should be adjusted for
the
cutting
height desired before use. NOTICE: Lowering
wheels raises the height of cut.