Sears BODYLEFT 831.159412 User Manual
Page 5
Attention! The text in this document has been recognized automatically. To view the original document, you can use the "Original mode".
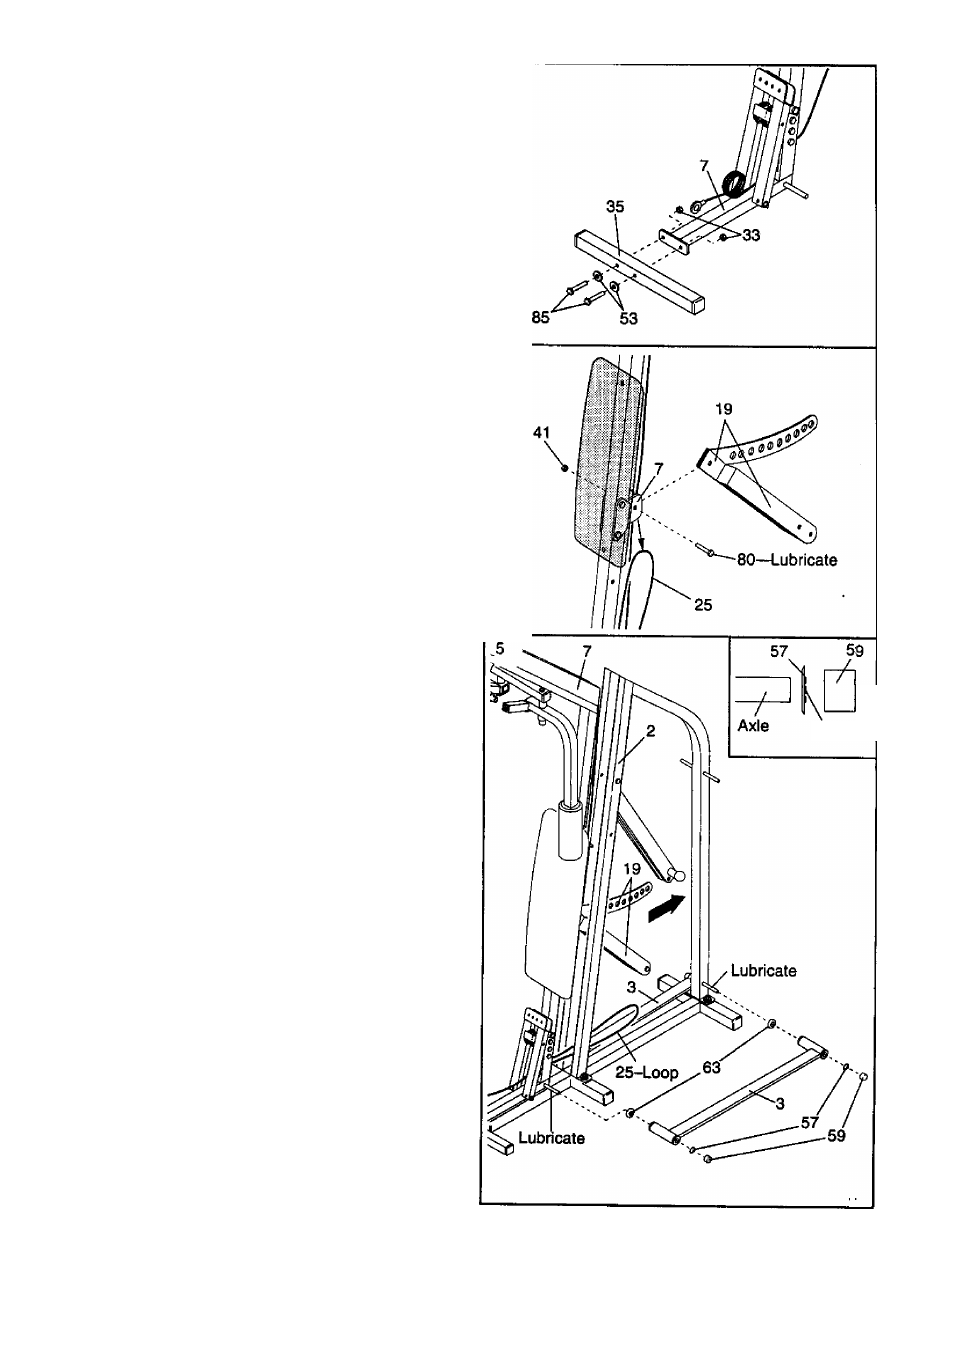
3.
Attach the Footrest (35) to the Front Upright (7)
with two 3/8" X 2 3/4" Bolts (85). two 3/8” Flat
Washers (53), and two 3/8” Nylon Locknuts (33)
as shown.
4.
Remove the 3/8" x 1 1/2" Carriage Bolt (80) and
the 3/8” Nylon Jam Nut (41) from the Indicated
brackets on the Front Upright (7). Remove the
loop of Cable (25) from the brackets.
Lubricate the 3/8" x 1 1/2” Carriage Bolt (80).
Attach the Selector Plate (19) to the brackets on
the Front Upright (7) with the Carriage Bolt and the
3/8” Nylon Jam Nut (41).
5.
With the help of a second person, hold the Front
Upright (7) in front of the Rear Upright (2), with the
Selector Plate (19) between the sides of the Rear
Upright.
Insert the loop of Cable (25) through the sides of
the Rear Upright (2).
Slide a Weld Cover (63) onto each of the indicat
ed axles on the Front and Rear Uprights (7,2).
The Weld Covers must be turned so the open
sides are facing the Uprights, Lubricate the axles.
Slide a Long Riser (3) onto the axles. The Long
Riser must be turned as shown.
Hold a 3/4” Retainer (57) and a 3/4” Retainer Cap
(59) against the end of one of the axles. The teeth
on the Retainer must bend toward the Retainer
Cap (see the inset drawing). Tap the Retainer and
Retainer Cap onto the axle. Tap a 3/4" Retainer
(57) and a 3/4” Retainer Cap (59) onto the other
axle.
Attach the other Long Riser (3) to the lower axles
on the other side of the Front and Rear Uprights
(7,2) in the same manner.
Teeth