Assembly, Before beginning assembly, carefully read the, Two (2) adjustable wrenches – Sears BODYLEFT 831.159412 User Manual
Page 4: One (1) standard screwdriver, One (1) phillips screwdriver, One (1) rubber mallet i
Attention! The text in this document has been recognized automatically. To view the original document, you can use the "Original mode".
ASSEMBLY
Before beginning assembly, carefully read the
following Information and instructions:
• Assembly requires two people.
• Due to the size of the BODYLIFT, it should be
assembled in the location where it will be used.
• Place all parts of the BODYLIFT in a cleared area
and remove the packing materials; do not dis
pose of the packing materials until assembly is
completed.
• Read through each assembly step before you
begin.
• For help identifying the small parts used in
assembly,
remove the PART IDENTIFICATION
CHART from the center of this user’s manual.
Note: Some small parts may have been pre
attached for shipping purposes. If a part is not
found in the parts bag, check to see if it has been
pre-attached.
• As you assemble the BODYLIFT, make sure that
all parts are oriented exactly as shown in the
drawings.
• Tighten all parts as you assemble them, unless
instructed to do othenvise.
THE FOLLOWING TOOLS (NOT INCLUDED) ARE
REQUIRED FOR ASSEMBLY:
Two (2) adjustable wrenches
One (1) standard screwdriver -
One (1)
Phillips
screwdriver
One (1) rubber mallet i
Assembly will be more convenient if you have the
following tools: A socket set, a set of open-end or
closed-end wrenches, or a set of ratchet wrenches.
1. Before you begin, read the information and
Instructions at the top of this page. Note: The
BODYLIFT requires a minimum ceiling height
of 71/2 feet.
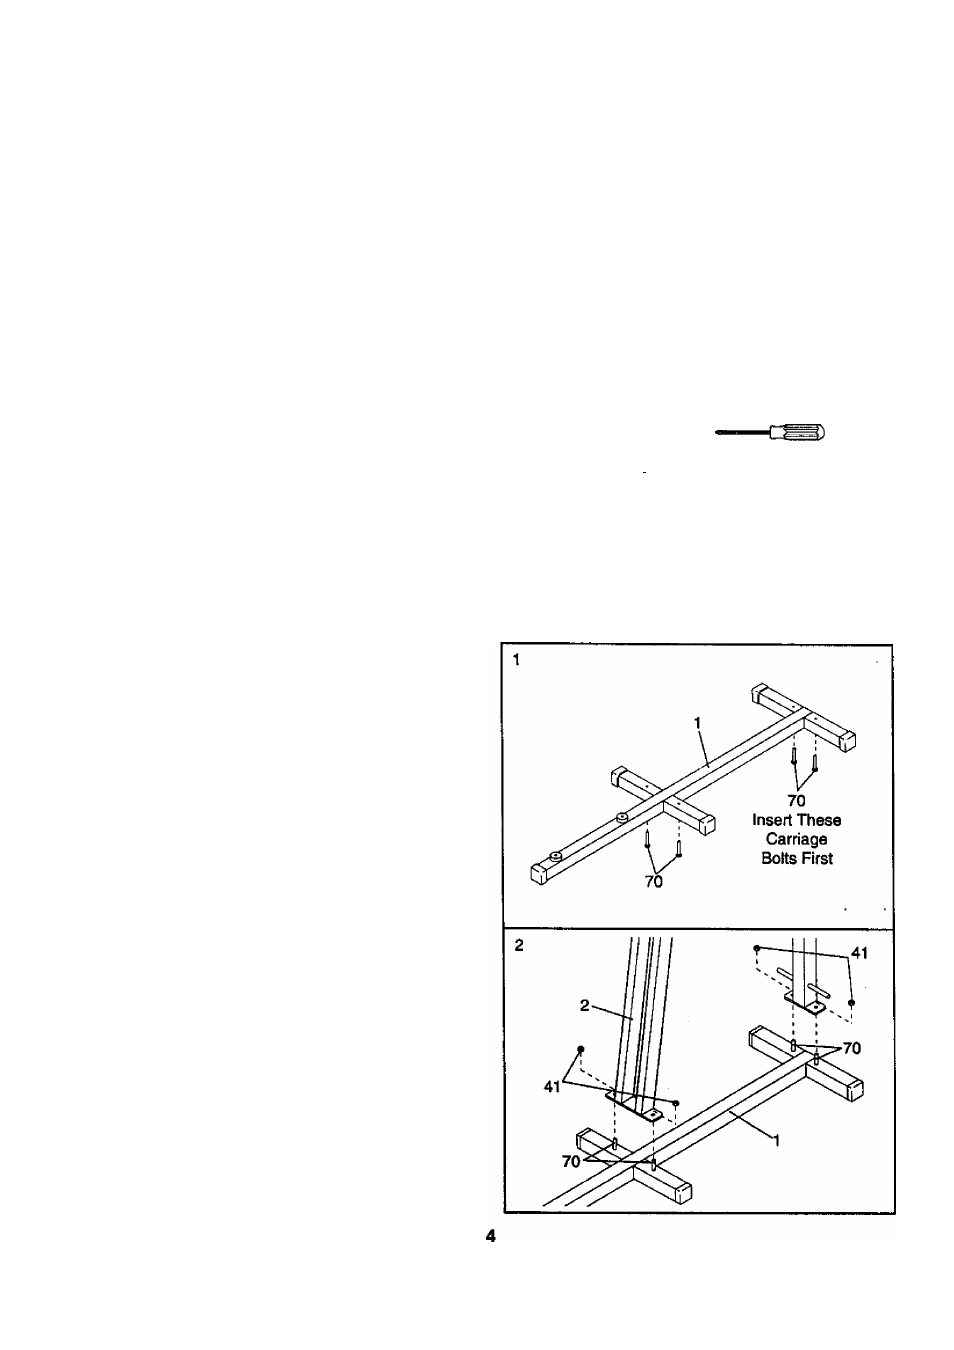
Insert the four 3/8” x 21/2” Carriage Bolts (70) up
through the indicated holes in the Base (1).
2. Slide the Rear Upright (2) onto the four 3/8" x
2 1/2” Carriage Bolts (70) in the Base (1). Make
sure that the Rear Upright is turned as shown.
Tighten a 3/8" Nylon Jam Nut (41) onto each
Carriage Bolt.