Installation step 6, Hang the opener, A warning – Chamberlain 2000SDC 1/2HP User Manual
Page 16
Attention! The text in this document has been recognized automatically. To view the original document, you can use the "Original mode".
Installation Step 6
Hang the Opener
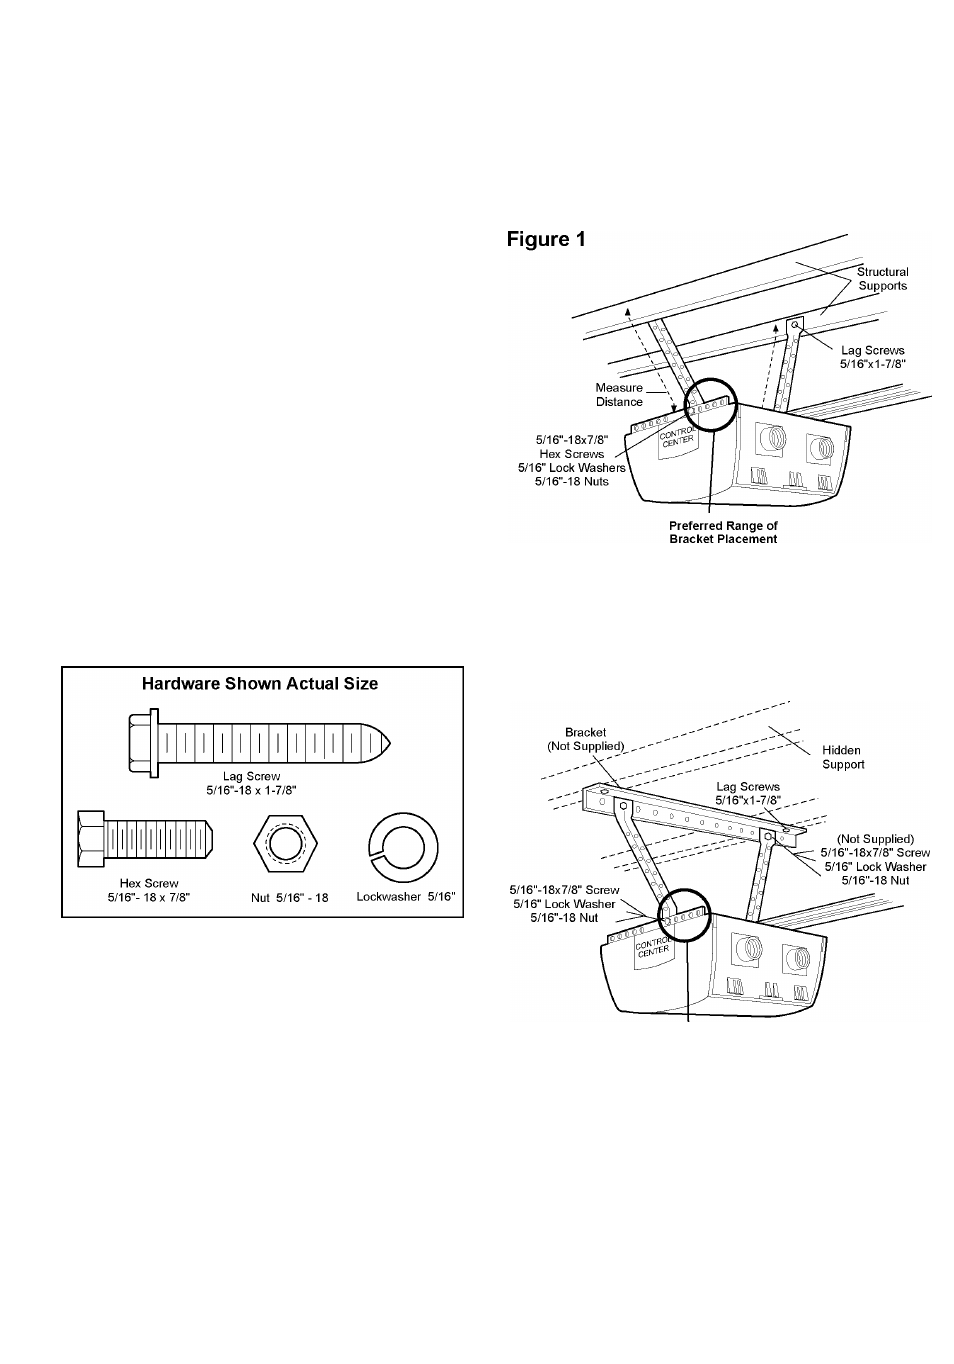
Two representative installations are shown. Yours
may be different. Hanging brackets should be angled,
Figure 1, to provide rigid support. On finished ceilings,
Figure 2, attach a sturdy metal bracket to structural
supports before installing the opener. The bracket and
fastening hardware are not supplied.
• Measure the distance from each side of the opener to
the structural support.
• Cut both pieces of the hanging bracket to required
lengths.
• Drill 3/16" pilot holes in the structural supports.
• Attach one end of each bracket to a support with
5/16"x1-7/8" lag screws.
• Fasten the opener to the hanging brackets with
5/16" - 18x7/8" screws, lock washers and nuts.
• Check to make sure the rail is centered over the door
(or in line with the header bracket if the bracket is not
centered above the door).
• Remove the 2x4. Operate the door manually. If the
door hits the rail, raise the header bracket.
A WARNING
The opener could fall and injure someone if it is not
properly secured. Fasten the opener securely to
structural supports of the garage.
Figure 2
— FINISHED CEILING —
Preferred Range of
Bracket Placement
16