Personal, Surf, Tape deck 1 open – Philips FW890P37 User Manual
Page 14: Repeat, Balance l/r, H center, M test tone, H mute, Di sleep timer, Demonstration mode
Attention! The text in this document has been recognized automatically. To view the original document, you can use the "Original mode".
CONTROLS
OPERATING THE SYSTEM
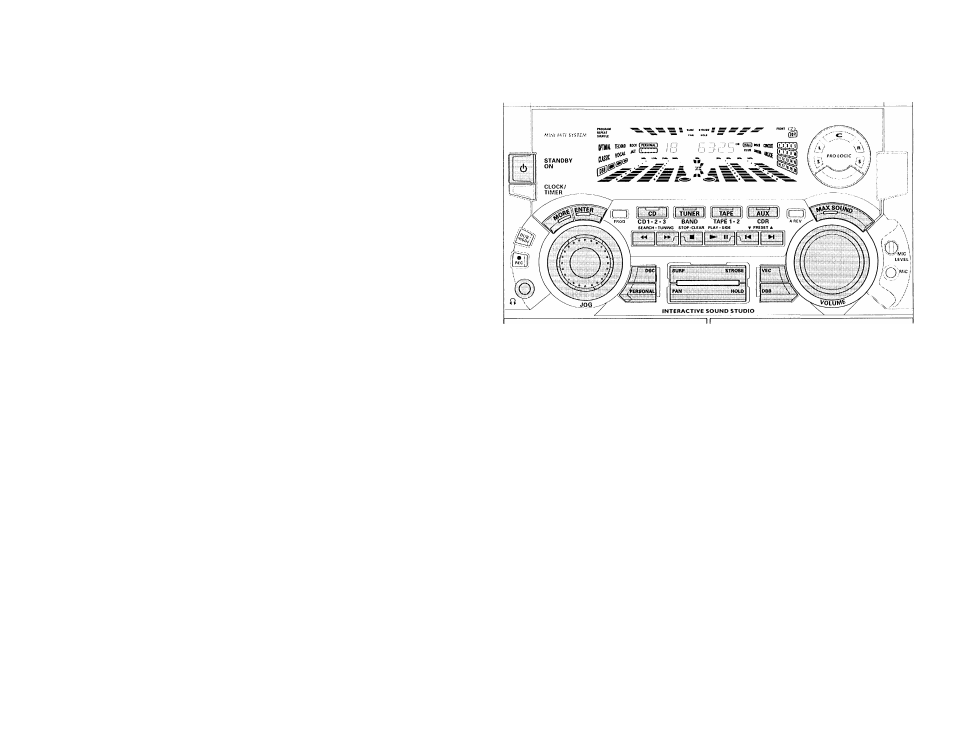
INTERACTIVE SOUND STUDIO
DIGITAL SOUND CONTROL (DSC)
to select the desired sound effect:
OPTIMAL, TECHNO, ROCK, CLASSIC,
VOCAL or JAZZ.
PERSONAL
to select or set personal equalizer
setting
SURF
to switch on or off the SURF feature.
STROBE
to switch on or off the STROBE
feature.
PAN
to switch on or off the PAN feature.
HOLD
to switch on or off the HOLD feature
during CD playback only.
VEC
to select the desired sound effect;
HALL, DISCO, CONCERT, CLUB,
CINEMA or ARCADE.
DYNAMIC BASS BOOST (DBB)
to select a bass boost level or to
switch off bass boost.
TAPE DECK 1
OPEN
to open tape deck 1.
REPEAT
to repeat a CD track, a disc, or all the
available discs.
BALANCE L/R
to balance the sound level of the Front
Left and Right speakers.
M
rear
+/-
-
to adjust the sound level of the
surround speakers.
(H CENTER +/-
-
to adjust the sound level of the center
speaker.
M TEST TONE
-
to check the sound level of the Front
Left, Front Right, Center and Surround
speakers.
H MUTE
-
to switch off the sound temporarily.
di SLEEP TIMER
-
to switch the system to standby mode
at a selected time period.
[37]
SHUFFLE
-
to play all the available discs and their
tracks in random order.
M
(!)
-
to switch the system to standby mode.
Notes for remote control:
- First select the source you wish to
control by pressing one of the
source select keys on the remote
control (e.g. CD, TUNER, TAPE 7/2
orAUX).
- Then select the desired function
( P - , H , H,etc.).
Important:
Before you operate the system,
complete the preparation procedures.
Demonstration mode
The system has a demonstration mode that
shows the various features offered by the
system.
When the system is switched
on for the first time, the demonstration
mode will start automatically.
Notes:
- During the demonstration, if you press
any source (or standby-on) button, the
system will switch to the respective
mode (or standby).
- When the system is switched to standby
mode, the demonstration will resume
five seconds later.
To stop the demonstration mode
• Press and hold ■ (on the system only)
for
five seconi/s when the system is in
demonstration mode.
— The demonstration will stop.
"DEMO OFF" is displayed.
The system will switch to standby
mode.
— About 5 seconds later, the system
will go into an energy saving mode
(< 2 watts). The low power
STANDBY ON LED will be lit.
Note:
- Even though the AC power cord is
removed from and reconnected to the
wall socket, the demonstration will
remain off until it is switched on again.
14