Compaq 110 User Manual
Page 81
Removal and Replacement Procedures
Maintenance and Service Guide
5–13
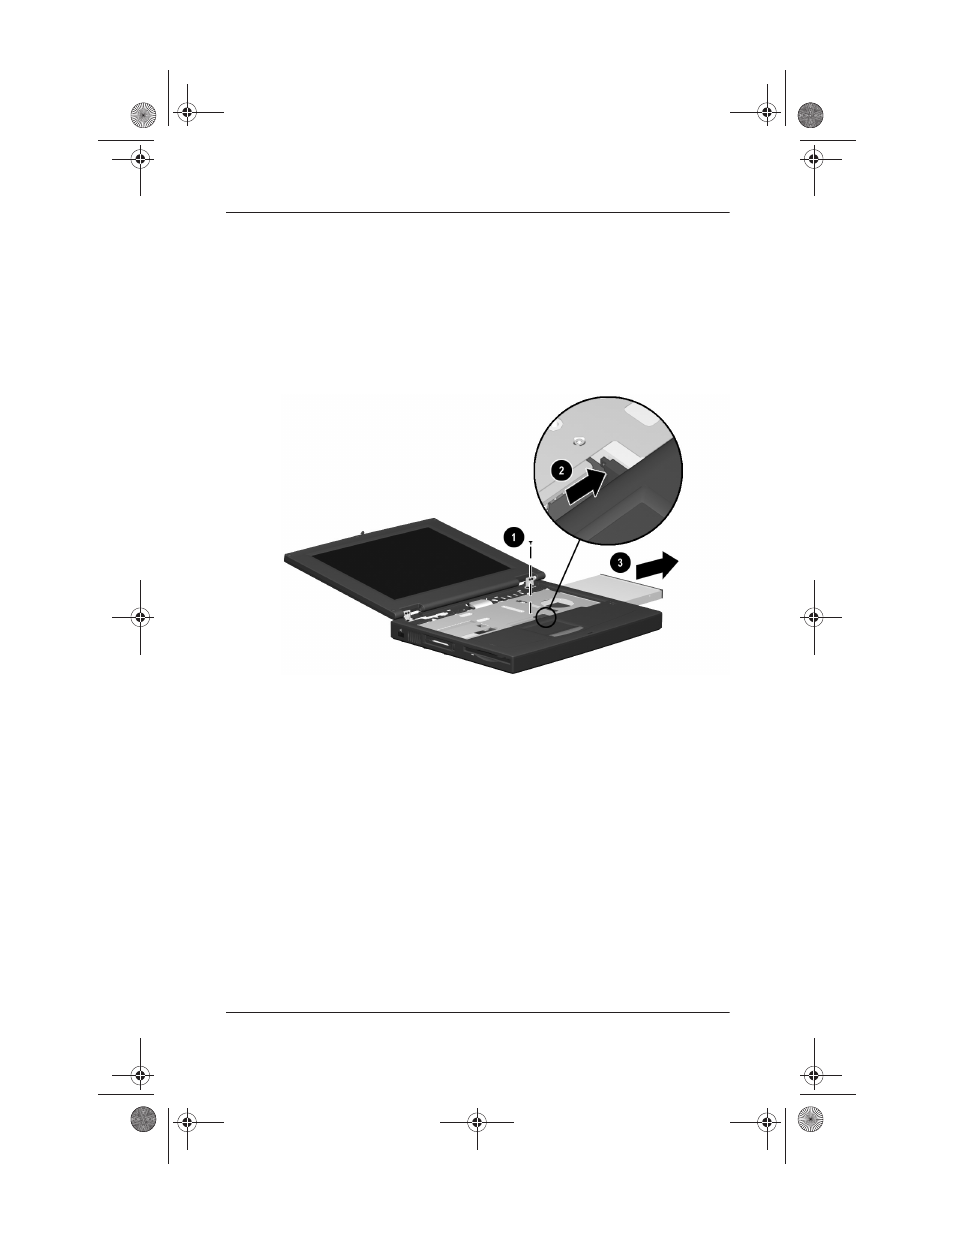
2. Remove the
M2.5 × 4.5 screw that secures the optical drive to
the heat sink 1 (Figure 5-8).
3. Push the back edge of the optical drive 2 to the right to
disconnect it from the connector on the system board.
4. Slide the optical drive out of the base enclosure 3.
Figure 5–8: Removing the Optical Drive
Reverse the above procedure to install the optical drive.
238850-003.book Page 13 Friday, December 21, 2001 2:53 PM
See also other documents in the category Compaq Notebooks:
- 3000 Series (24 pages)
- XL181 (127 pages)
- 100S (13 pages)
- 1600 Series (54 pages)
- 1200 (158 pages)
- 1400 (164 pages)
- 1800 Series (71 pages)
- 1800 (2 pages)
- W6000 (46 pages)
- V6200 (2 pages)
- 102 (119 pages)
- 285558-001 (98 pages)
- 170 (15 pages)
- 1600XL (150 pages)
- 1600 (2 pages)
- 2510p (39 pages)
- XL115 (132 pages)
- V5245eu (1 page)
- HP TC1 100 (23 pages)
- V6600 (148 pages)
- 1900 (2 pages)
- 233789-371 (101 pages)
- 272637-001 (56 pages)
- 1750 (15 pages)
- XL280 (134 pages)
- 1500C (14 pages)
- 1700 (2 pages)
- V300 (162 pages)
- 2800 (181 pages)
- V6133EU (1 page)
- 307502-001 (48 pages)
- Notebook Series (56 pages)
- V5100 (242 pages)
- 267644-001 (34 pages)