Step 4 – birdscreen (continued), Step 5 – hood rails, Step 6 – hood end panel – Twin City Modular Gravity Hood - MGR, MGI - IM-4720NFL User Manual
Page 3
Twin City IM-4720NFL
3
Removable
Birdscreen
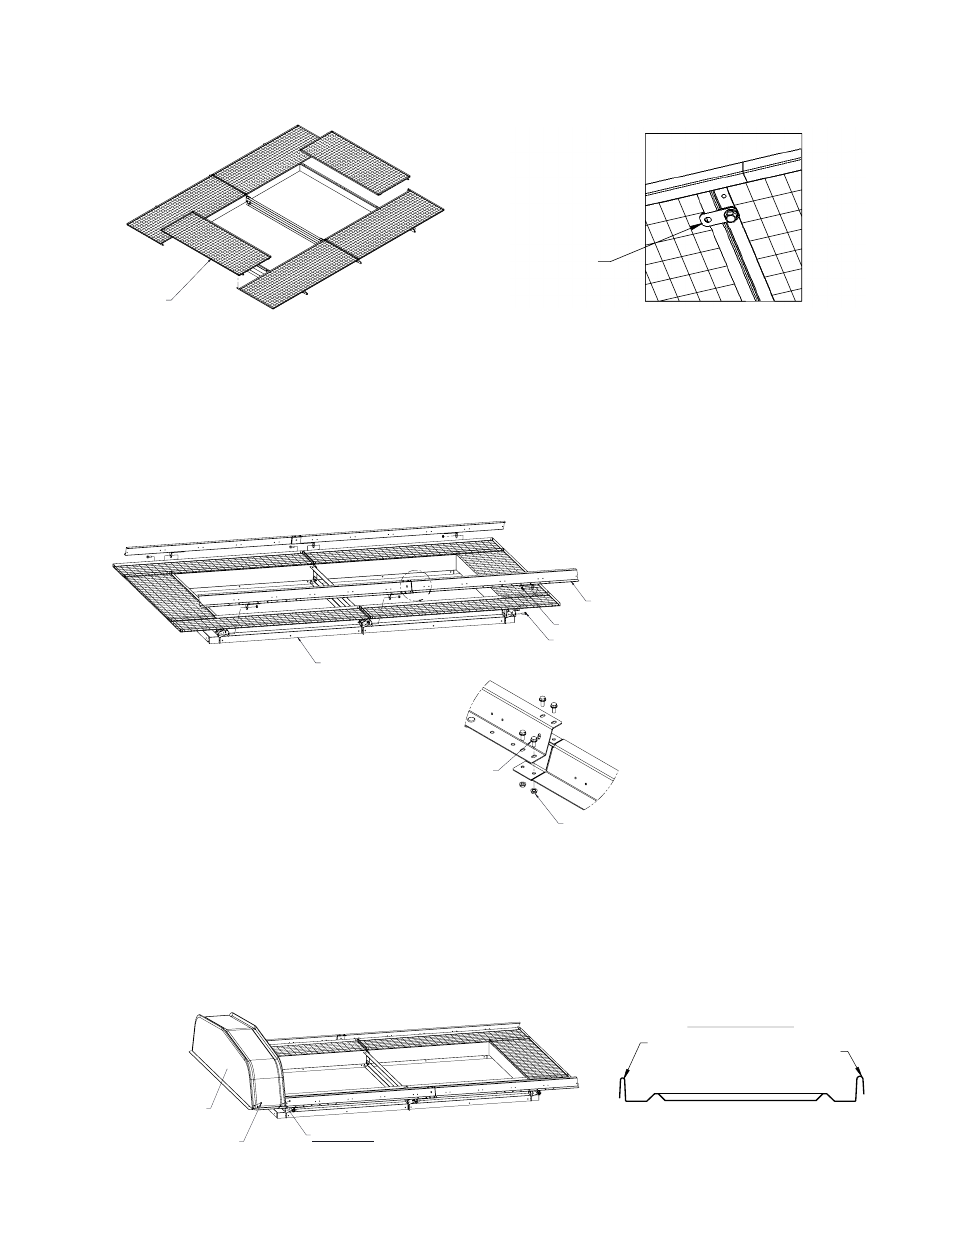
Step 4 – Birdscreen (Continued)
Install two
Removable Birdscreens. After positioning the assemblies, rotate the locking tabs in place and tighten.
Figure 5.
Locking Tab,
rotate into place
and tighten
Step 5 – Hood Rails
Fasteners (Kit #3) –
Note: There may be extra fasteners.
For hoods 120" and longer, see Detail A in Figure 6 and bolt together
Hood Rail Sections with 5/16" hardware. Install
two
Hood Rail Assemblies to the Hood Mount Bars using cap screws and nuts. Do not fully tighten fasteners. They will
be tightened in Step 8.
A
Hood Rail Assembly
Screw, Flanged Head
Hex Nut, Flanged Head
Base Assembly
DETAIL A
FOR HOODS 120" AND LONGER
Screw, Flanged Head
Hex Nut, Flanged Head
Figure 6.
Step 6 – Hood End Panel
Fasteners (Kit #4B or #4C and Kit #5) –
Note: There may be extra fasteners.
Install
Male End Panel Assembly using #12 screws.
End Panel Assembly
-Male-
Sheet Metal Screw
IMPORTANT - This flange must be
male. Refer to Figure 8.
Figure 7.
Detail of locking tabs
End Panel Assy,
Male
IMPORTANT
- This flange must
be male. Refer to the detail below.
Male Flange
(Narrow)
Female Flange
(Wide)
End View of Panel
Figure 8.