TriangleTube Mini Smart User Manual
Page 8
General Installation
5
2
1
”
C
e
n
tr
e
r
to
C
e
n
te
r
M
o
u
n
ti
n
g
H
o
le
s
E
n
su
re
H
e
a
te
r
is
V
e
rt
ic
a
ll
y
P
lu
m
b
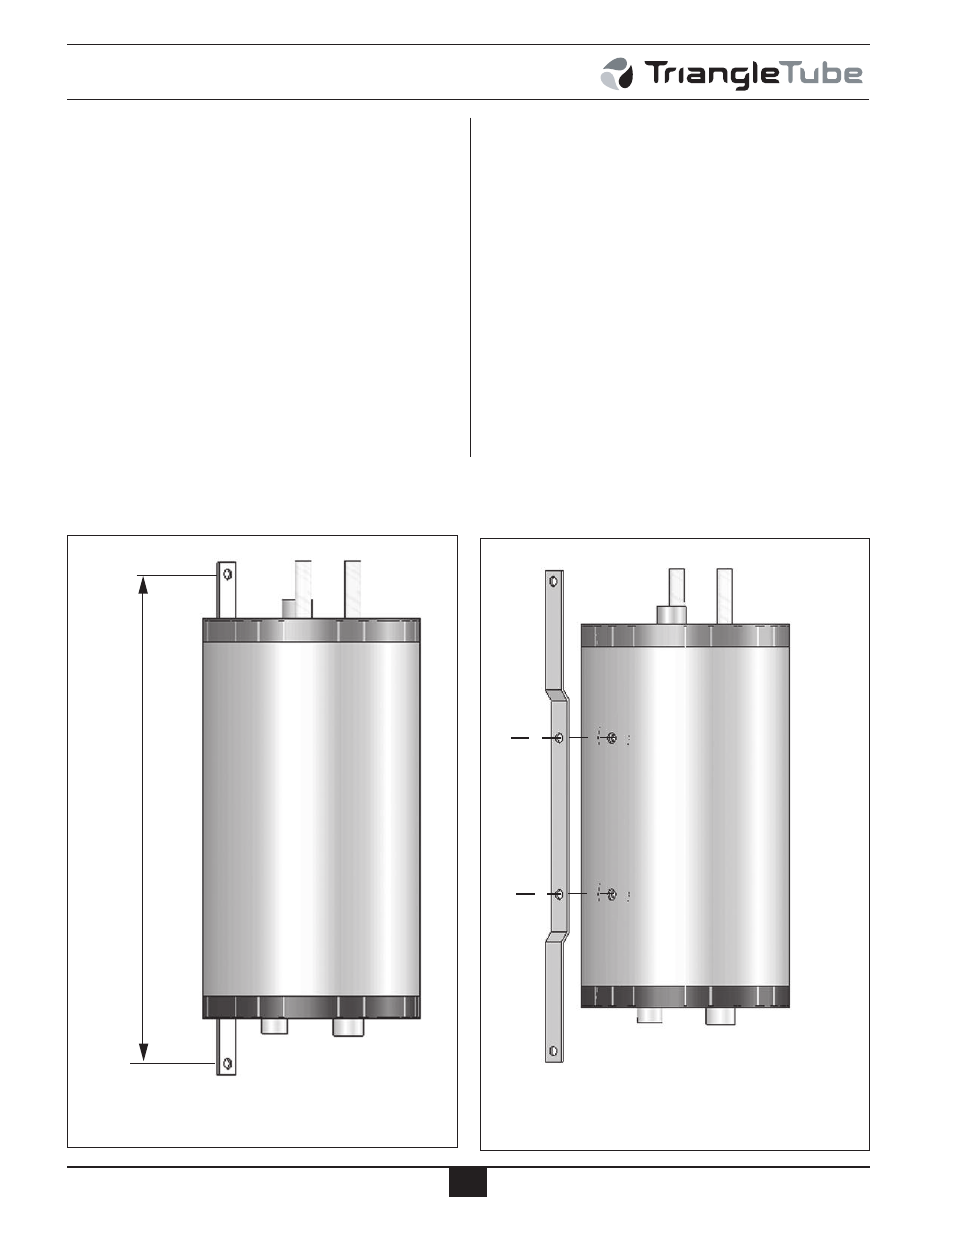
Fig. 1 : Mounting Bracket Hole Spacing
Fig. 2 : Mounting Bracket Assembly
MOUNTING INSTALLATION – SOLID WALLS
1. Locate the general location of the water heater
placement.
2. Place the water heater mounting bracket against the
wall, vertically plumb the mounting bracket and use
a pencil to mark the location of the mounting holes.
See Fig. 1.
3. Remove the bracket from the wall and drill the
required diameter and depth hole for the wall
anchors, position in the center of each mark.
4. Mount the anchors flush or slightly recessed in the
drilled holes with threaded side of anchor inside the
wall.
5. Mount the bracket onto the water heater using the
provided mounting bolts. Ensure the mounting bolts
are fully tightened and the bracket is securely fas-
tened to the water heater. See Fig. 2.
6. Reposition the bracket and water heater onto the
wall and align the bracket and wall anchor holes.
Insert the two mounting bolts through the mounting
holes and loosely tighten.
7. Vertically plumb the water heater and tighten the
mounting bolts securely.