Top Flite TOPA0405 User Manual
Page 45
❏
6. Trim out the scoop front. Fit and glue it to
the scoop sides.
❏
7. Slide the radiator scoop over the support and
into position. It should slide on far enough to
overlap F-8C about 1/32". Check for binding or
resistance. Trim or sand the formers or scoop if
required for a good fit.
❏
8. Glue the plywood scoop support to the wing.
❏
9. Mark the aft edge of the scoop along the
edge of F-8C. Trim the scoop flush with the aft
surface of F-8C.
❏
10. Mount the wing to the fuse. Test fit the
scoop and check its fit with regard to the fuse and
wing. Make slight adjustments if necessary.
❏
11. Apply fiberglass around the inside of the
scoop along the seams.
❏
12. Before painting the scoop, fill the seams
and other imperfections with filler.
❏
13. After the filler has cured, sand it flush with
the plastic. Wet sand the entire cowl with 400-grit
sandpaper in preparation for primer.
NOTE: You may glue the scoop on now with CA or
epoxy, fillet it in and finish it with the rest of the
airplane. However, the easiest thing to do, as done
on our prototypes, is to paint the scoop separately
and glue it on after the rest of the model is
finished. This technique does not give you an
upper fillet (between the scoop and the wing), but
an upper fillet is not important for sport flying.
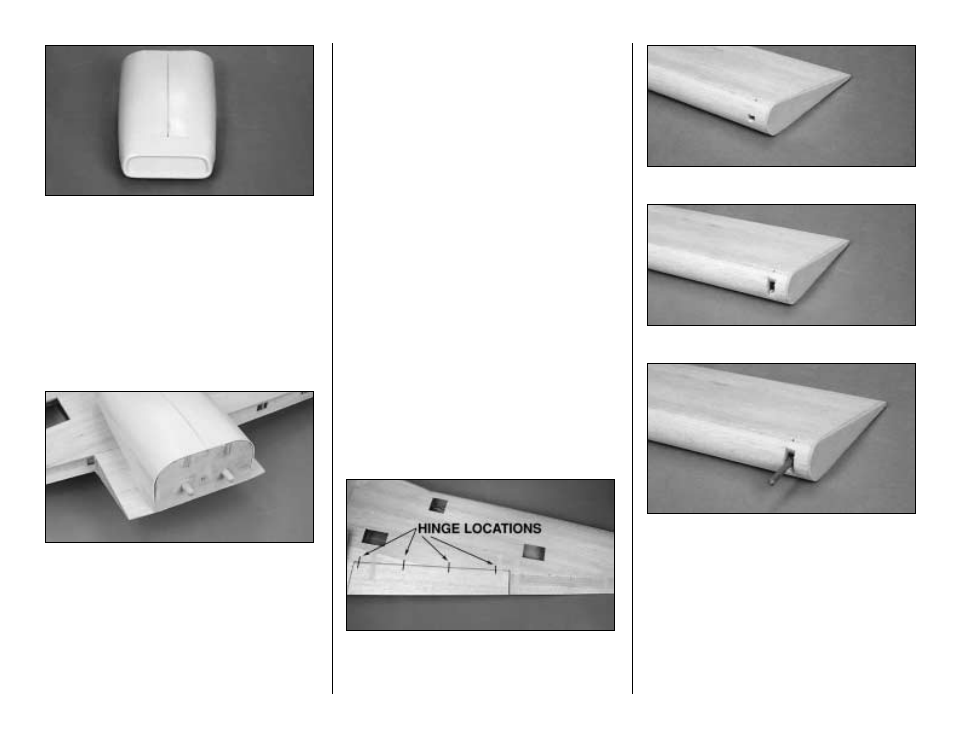
HINGING THE CONTROL
SURFACES
❏
1. Place the flaps and ailerons over the wing plan
in their proper locations and mark the hinge
locations. Tape the flaps and ailerons onto the wing
and transfer the hinge locations onto the wing.
❏
2. At each hinge location drill a 3/16" hole
(depending on the type of hinges you are using)
centered on the TE of the wing and LE of the flap
and aileron. Use a sharp hobby knife to make a
V-notch in the LE of the flap as shown. This will
allow the hinge point pivot to be at the center of
the radius of the flap LE.
NOTE: The hinges are not glued in until after the
finish has been applied.
- 45 -