Top Flite TOPA0405 User Manual
Page 28
❏
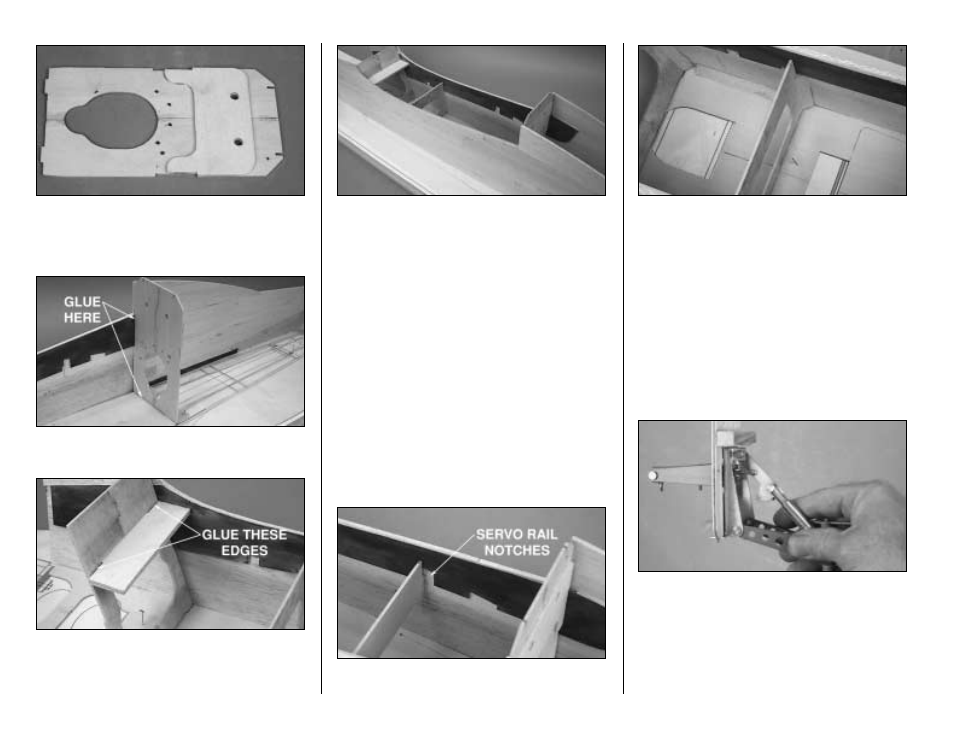
16. Use 6-minute epoxy to glue the die-cut
plywood sub-former F-8D to the aft face of former
F-8A/B. Make sure the 3/8" holes line up. This
assembly is now called F-8.
❏
17. Glue former F-8 to the crutch and tack glue
it to the plywood doubler near the notch.
❏
18. Test fit the 1/4" fuselage bolt plate into
the fuselage. It may be necessary to bevel the
forward outboard edges slightly to provide an
interference-free fit.
❏
19. Fit the right fuselage side into place. Check
that all the notches fit properly or make
adjustments. Make sure the tip edges of the fuse
are against the building surface.
❏
20. Use 6-minute epoxy to securely glue the
fuselage bolt plate to the fuse sides and former
F-3. Before the epoxy cures, use CA to glue
formers F-3 and F-5 to the right side and finish
gluing them to the left fuselage side. Glue the fuse
sides to the crutch from the notch in front of former
F-3 to former F-5. Make epoxy fillets around the
bolt plate.
❏
21. Glue former F-8 to both fuselage sides from
the wing saddle area to the middle of F-8. Do not
glue it near the crutch area.
❏
22. Glue the die-cut 1/8" plywood former F-7 to
the fuse sides at the front of the servo rail notches.
❏
23. Glue 3/8" x 30" triangle reinforcements at the
joints between former F-3 and the balsa fuse sides,
F-5 and the balsa fuse sides and the crutch and the
balsa fuse sides between formers F-3 and F-5.
❏
24. For the Robart retractable tail wheel
(ROBQ2225 not included) use 6-minute epoxy to
glue the retractable tail wheel rails, cut from the
3/8" x 1/2" x 7-1/2" basswood stick, to the die-cut
1/8" plywood former F-10. It’s best to glue the
bottom rail on first, let the epoxy cure, place the
retractable tail wheel on the bottom rail and glue
the top rail in place. This will give you the best fit.
- 28 -