Toa PC-2268WP User Manual
Page 8
8
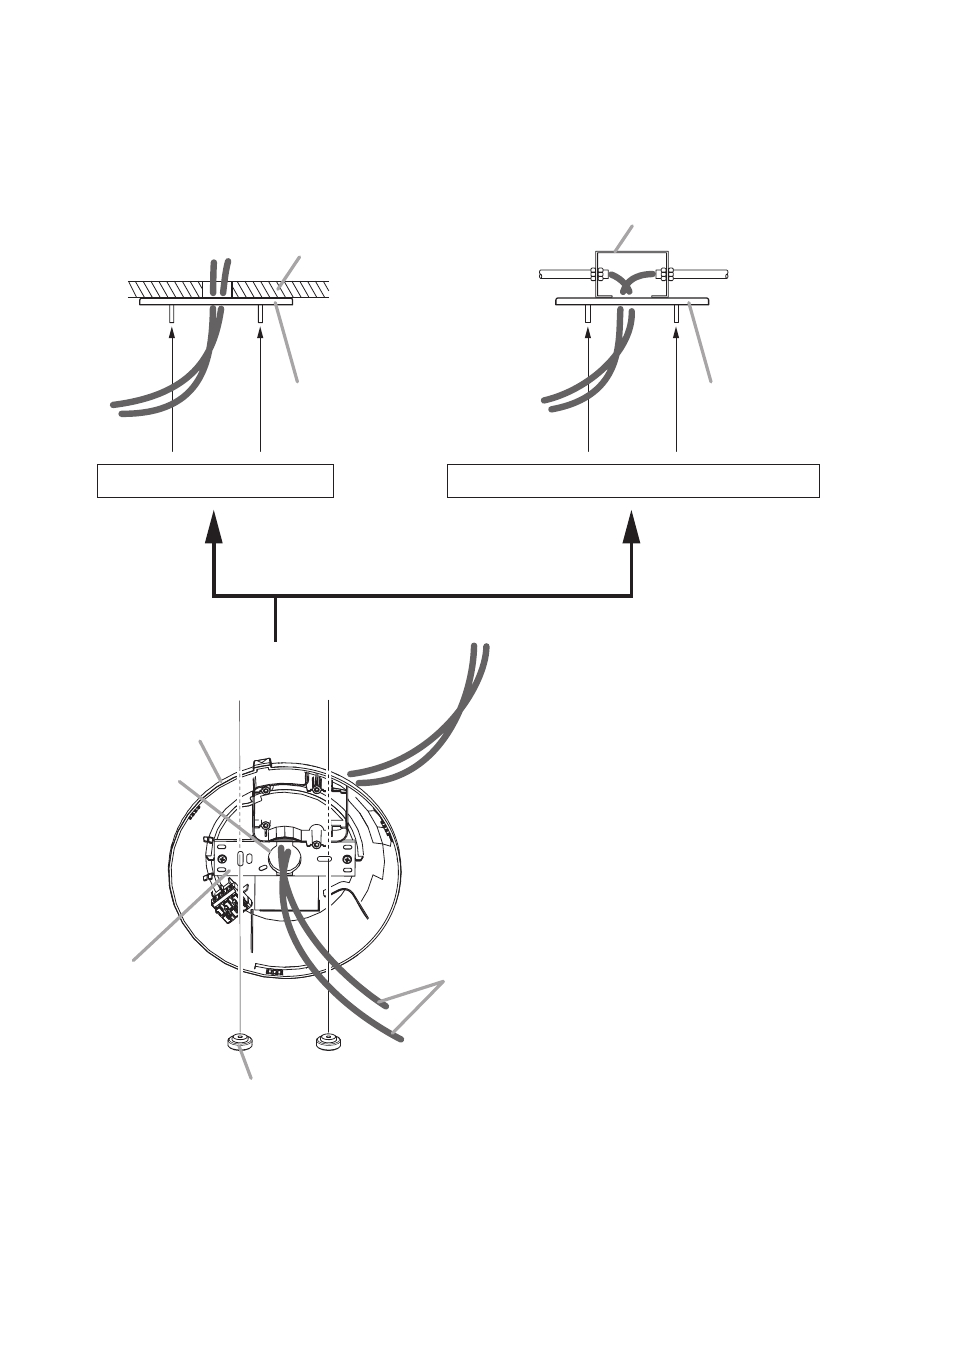
Step 3. Route the speaker cables through a cable entry opening (ø30 mm) in the rear case, then secure the
rear case to the speaker mounting panel with the supplied knob nuts. The knob nut can be finger-
tightened.
Ceiling
Speaker mounting panel
secured to the ceiling
When installing to a ceiling
Exposed electrical box
Speaker mounting panel
secured to the box
When installing to the exposed electrical box
Insert to the speaker mounting panel secured
to the ceiling or electrical box.
Rear case
Cable entry
hole
Reinforcement
bracket
Knob nut (accessory)
Speaker cables (input line and bridge line)
Note
Finger-tighten the knob nuts securely.
If not securely tightened, rainwater could enter the unit, and the aging of parts may cause the unit failure.
Note
When routing the speaker cables, do not pull them out more
than 30 cm.
If pulled out more than that, the speaker cables may not be
housed inside the case.
- F-2000B (20 pages)
- F-2322CU2 (16 pages)
- F-2352SC (12 pages)
- F-2852CU2 (16 pages)
- FB-100 (8 pages)
- FB-120B (4 pages)
- FB-150B (4 pages)
- FG-C0651 (1 page)
- H-1 (12 pages)
- H-2 (12 pages)
- H-3 (12 pages)
- HB-1 (12 pages)
- HS-1200BT (8 pages)
- HS-120B (8 pages)
- HX-5B (16 pages)
- HX-7B (20 pages)
- HY-0871CL (2 pages)
- HY-0871WS (2 pages)
- HY-1200VB (16 pages)
- HY-60D (2 pages)
- HY-AH1 (2 pages)
- HY-BC1 (2 pages)
- HY-BH10B (1 page)
- HY-C0801 (1 page)
- HY-CL10B (1 page)
- HY-CN1B (4 pages)
- HY-CN7B (8 pages)
- HY-CW1B (1 page)
- HY-MS7B-W (8 pages)
- HY-MT7 (4 pages)
- HY-PF1B (4 pages)
- HY-PF7B (4 pages)
- HY-RR1 (2 pages)
- HY-RR2 (2 pages)
- HY-ST1 (1 page)
- HY-TB1 (2 pages)
- HY-TM7B-WP (4 pages)
- HY-TR1 (2 pages)
- HY-VM7B (12 pages)
- HY-W0801 (1 page)
- HY-WM1B (1 page)
- HY-WM2B (1 page)
- HY-WM7B (2 pages)
- PC-1867F (4 pages)
- PJ-100W (2 pages)