Installation, Specifications – Toa HY-RR1 User Manual
Page 2
Printed in Indonesia
533-06-105-70
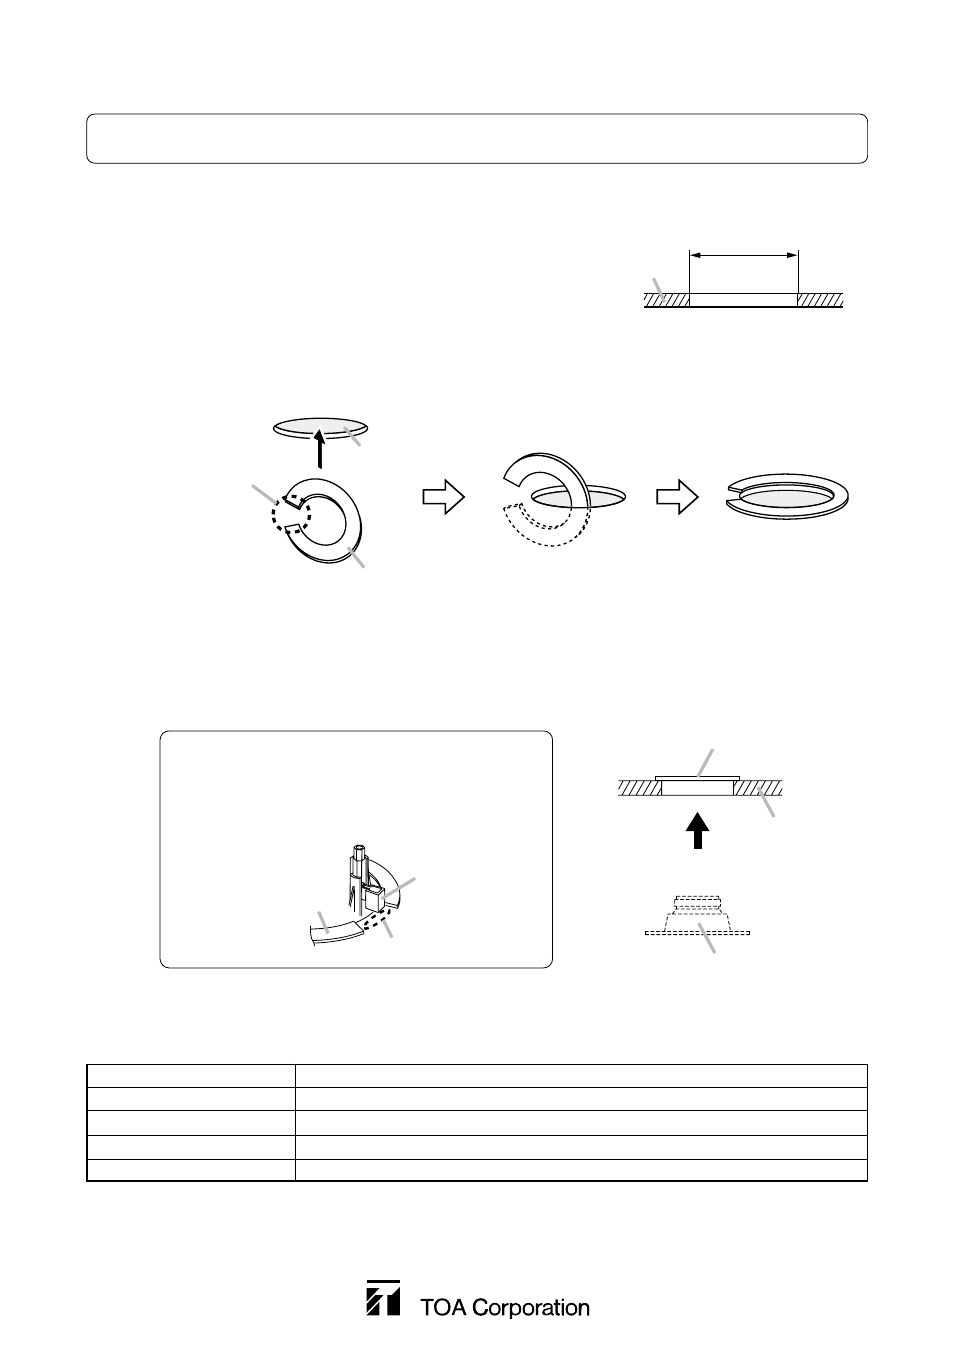
3. INSTALLATION
Refer to the F-1522SC speaker's instruction manual for information.
Step 1. Cut a ø135 mm (5
5
/
16
") hole in the ceiling.
To position and trace the hole, use the paper pattern
included with the F-1522SC.
4. SPECIFICATIONS
Note: The design and specifications are subject to change without notice for improvement.
Mounting Hole Diameter
ø135 mm (5
5
/
16
")
Finish
Surface-treated steel plate
Dimensions
ø175 mm (1.2 mm in thickness) or ø6
57
/
64
" (3/64" in thickness)
Weight 80
g
Usable Speaker
F-1522SC
Ceiling panel
ø135
±5 mm
(5
5
/
16
±
13
/
64
" )
Step 2. Insert the HY-RR1 into the ceiling using its cut-out section and place it on the ceiling as shown below.
Mounting hole
Cut-out section
HY-RR1
HY-RR1 placed on
ceiling panel
Step 3. Mount the F-1522SC speaker.
Refer to the instruction manual included with the F-1522SC for correct mounting procedure.
Ceiling panel
Speaker unit
Install the speaker.
HY-RR1
Mounting tab
HY-RR1
Caution
Install the speaker so that its mounting tab does not
come to the cut-out section of the HY-RR1.
Ensure that the mounting tab presses the HY-RR1.
Cut-out section
Avoid this way.