Warning – Toa HS-150W User Manual
Page 6
6
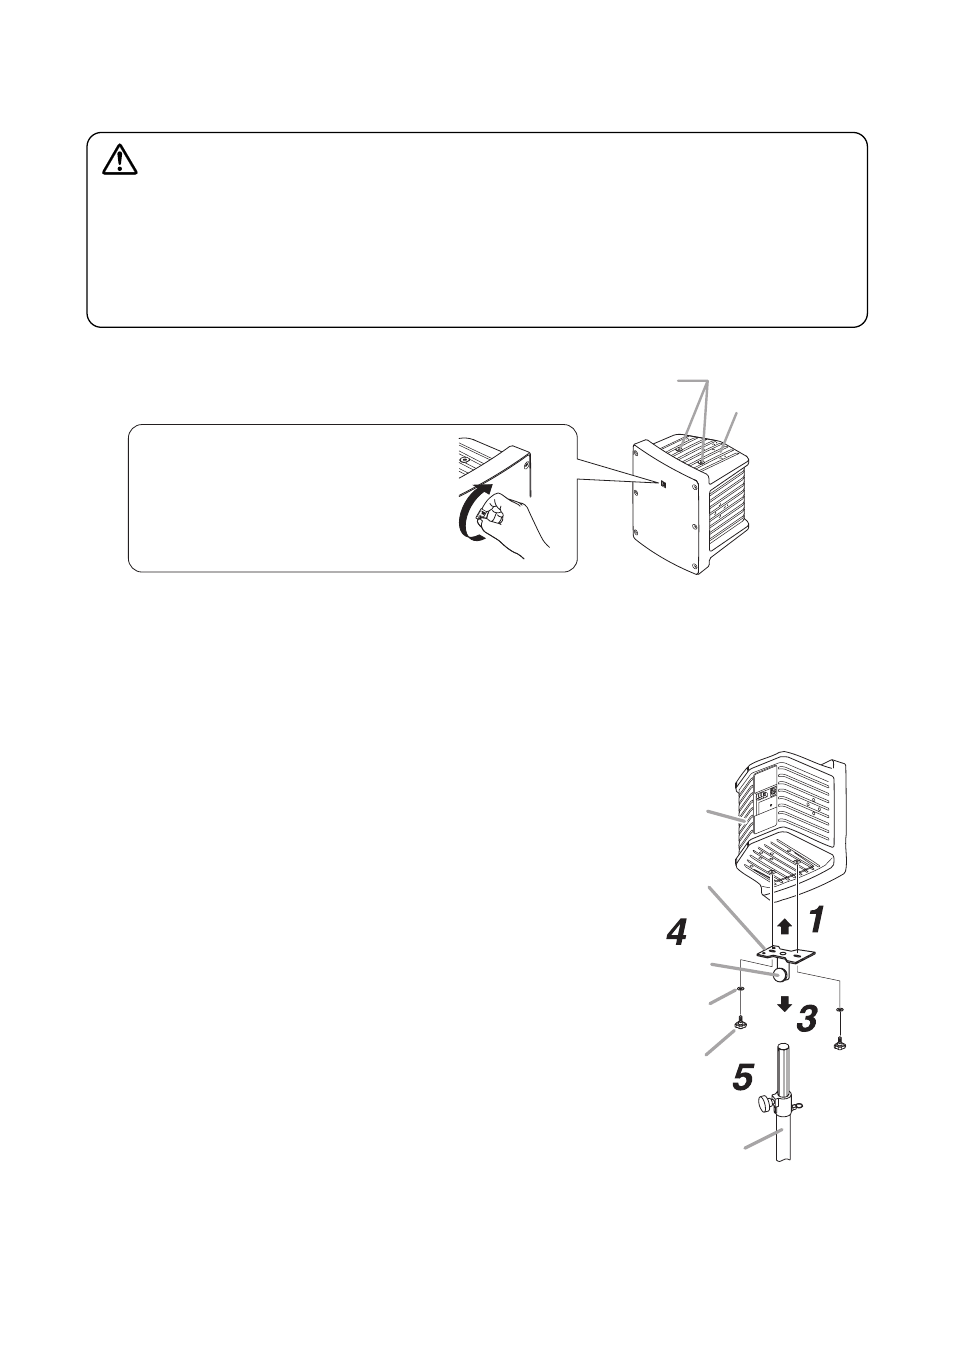
7.2. Mounting on the ST-33B Speaker Stand (optional)
Note
Refer to the instruction manual enclosed with the Speaker Stand for its mounting details.
Step 1. Fix the bracket supplied with the speaker stand
to the speaker.
Step 2. Spread the tripod legs of the stand to their full
extension.
Note
Spread the tripod legs until the stays extend
horizontally.
Step 3. Mount the speaker with the bracket fixed onto
the stand.
Step 4. Determine the speaker direction, and tighten
the bracket fixing screw.
Step 5. Adjust the stand height.
Speaker
Bracket
(supplied with the Stand)
Bracket fixing screw
Plain washer for M8
(supplied with the Stand)
Speaker mounting screw M8
(supplied with the Stand)
ST-33B Speaker Stand
7.1.5. Safety wire installation (For speaker fall prevention)
When mounting the speaker system to the ceiling or wall, install a safety wire as needed.
Installation position of an M8 bolt
M8 (Screw pitch: 1.25 mm, effective depth: 24 mm)
Note: Unified inch screws cannot be used.
Speaker's
bottom surface
Changing the orientation of
the front panel logo
Turn the logo mark while holding its edges
to change its orientation.
When installing the safety wire, be sure to follow the instructions below.
Failure to do so may cause the speaker to fall off, resulting in personal
injury.
• Use a wire rope of 2 mm (0.08") or more in diameter. (The safety wire is not supplied.)
• Tighten the safety wire to take up the slack. Otherwise, impact shock at speaker fall may cause the wire-
connected parts or wire itself to break.
• Install the safety wire to a place that can structurally support the full weight of load.
• Screw a speaker suspension bolt (M8) into one of the screw holes on the speaker's bottom surface.
Then, connect the safety wire to the bolt.
WARNING