Warning, Speaker installation – Toa F-2352CU2 User Manual
Page 11
11
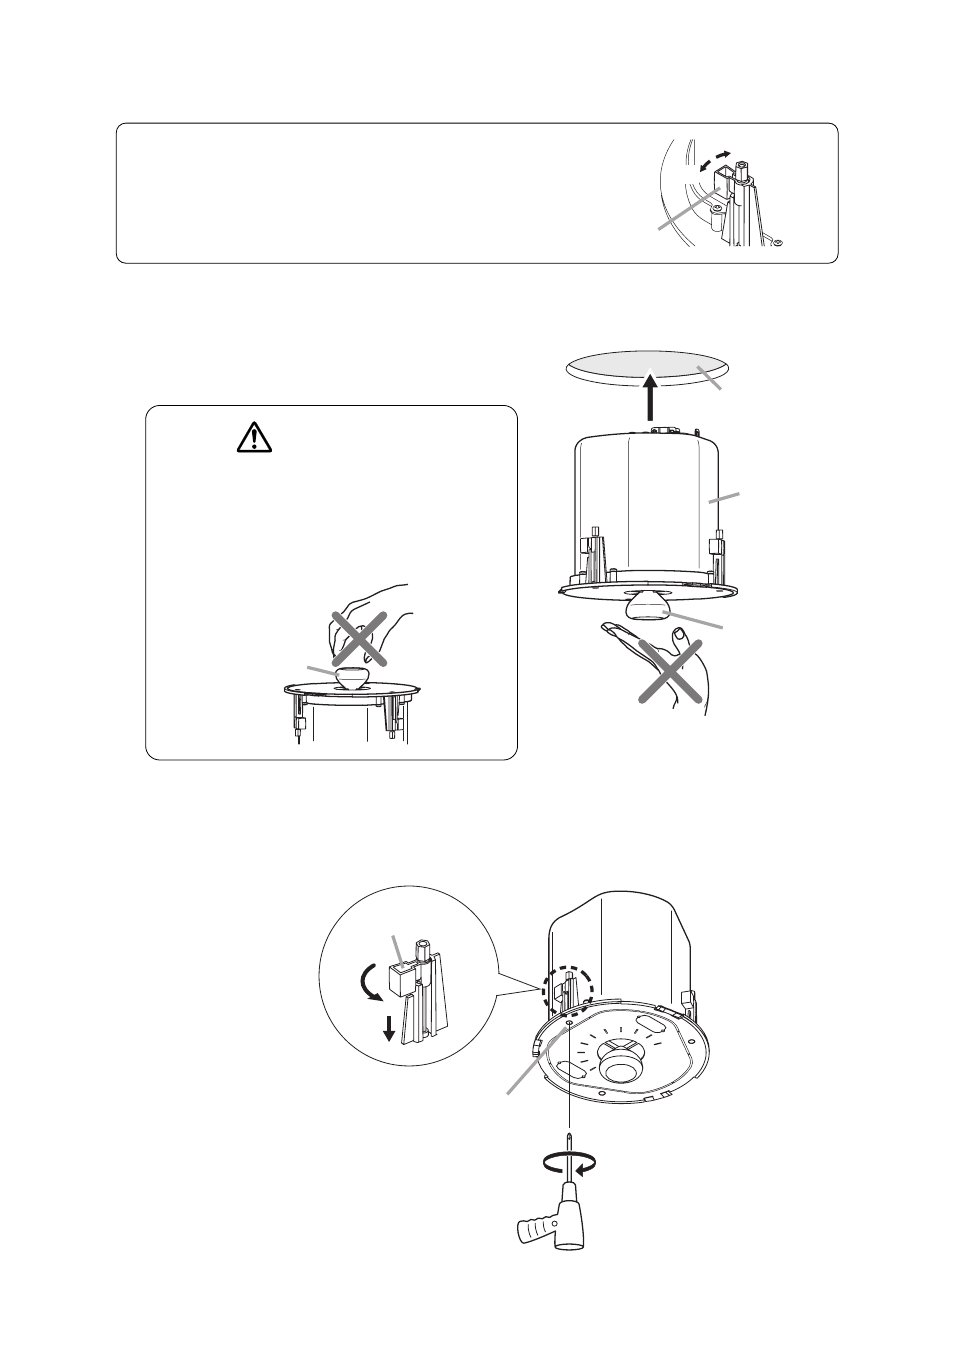
Caution
Before mounting, check to be sure that the speaker's
3 mounting tabs are turned inside the unit as shown
in the figure.
If turned outward, the speaker cannot be inserted
through the mounting hole.
In
Out
Mounting tab
Step 1. Insert the speaker through the mounting hole till it
contacts the ceiling panel.
While doing so, avoid directly touching the speaker's
diffuser section. (F-2352CU2 only)
WARNING
Never hold the F-2352CU2's diffuser section as
a handle to carry the speaker during installation.
If the diffuser breaks off, the unit could fall from
an elevated position, resulting in possible
personal injury.
Step 2. Rotate and tighten the mounting tab axis screws (3 places) on the unit clockwise to their full stop in
order to grip the ceiling panel with the mounting tabs.
Diffuser section
Diffuser section
(Equipped with the
F-2352CU2 only)
Speaker unit
Mounting hole
Mounting tab axis screw
Use an electric screwdriver to tighten.
(Tightening torque: 6 – 10 kgf·cm)
Mounting tab
8. SPEAKER INSTALLATION