Chime switch installation – Toa RM-971 User Manual
Page 28
28
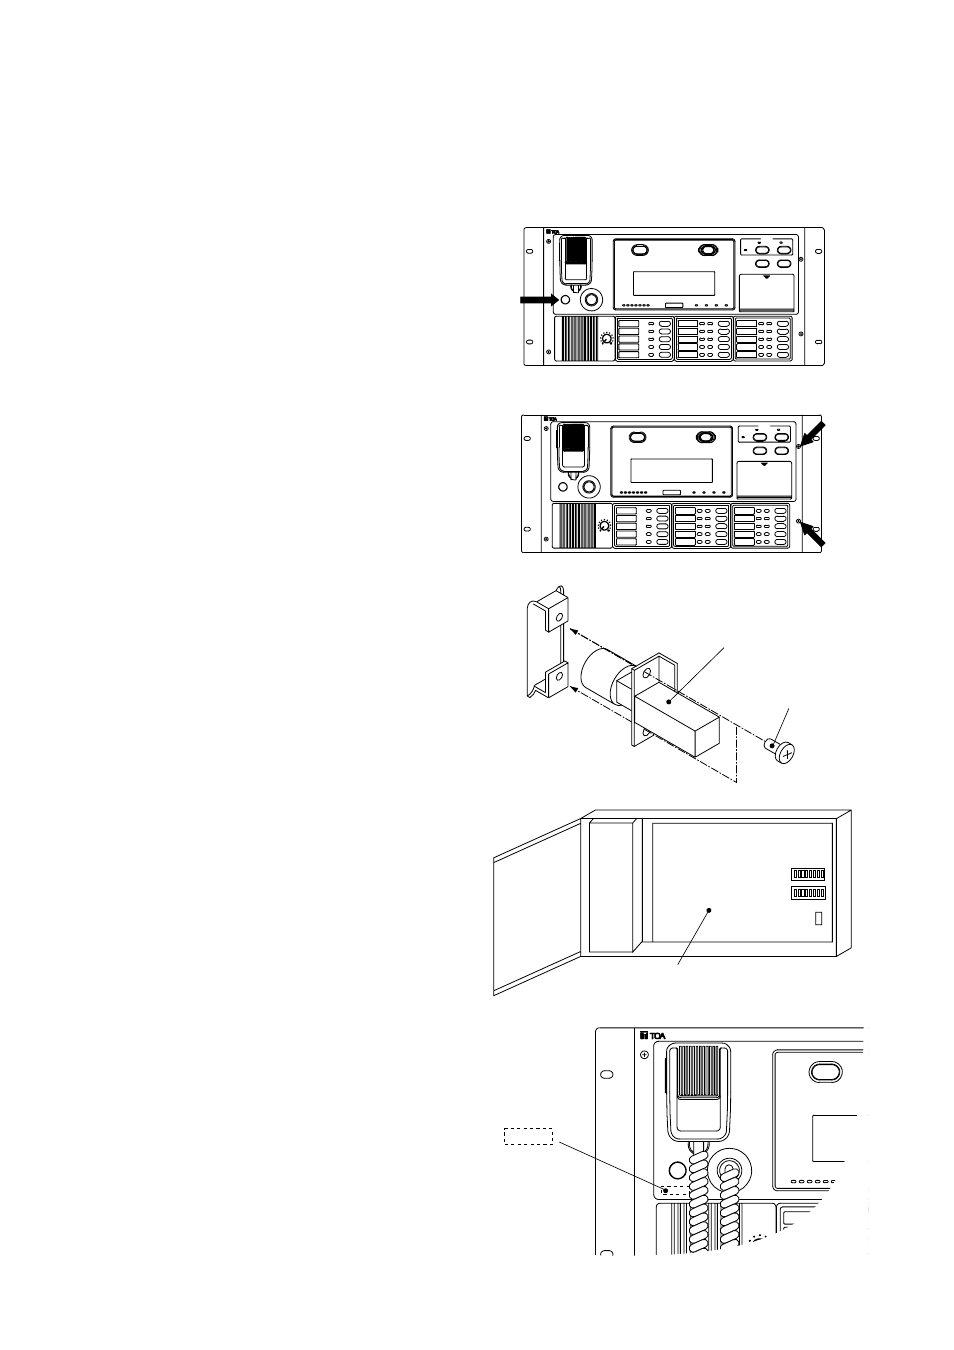
8.2. Chime Switch Installation
Follow the procedures below to install the supplied chime switch used to activate the main rack's chime device
from the remote control unit.
1. Break a chime switch knockout hole in the
control panel.
2. Open the panel by removing two screws on
the right of the control panel.
3. Install the chime switch using the supplied
screws (3x6).
4. Connect the chime switch connector to
CN213 on the control circuit board.
5. Close the panel, and attach the supplied
label.
Chime switch
Screw (3x6)
Mount from the back of the panel.
Control circuit board
SW201
SW202
CN213
(2P)
Supplied label
Chime
Chime