Controls: footswitches – Source Audio Soundblox 2 Stingray Multi-Filter User Manual
Page 15
Controls: Footswitches | 15
1
2
CONTROL
INPUT
OPTION
SELECT
ENV-
ENV+
DEPTH
OPTION
SPEED
DELAY/FREQ
FEEDBACK
VOLUME
TREMOLO
MIX
(HOLD)
DEFAULT
HH
MIDI
EXP
FLANGER
CHORUS
PHASER
RESONATOR
MOD SOURCE
4 STAGE
QUAD
CLASSIC
THRU
ZERO
SHADOW
RES 1
RES 2
VIBE
6 STAGE
8 STAGE
DUAL
12 STAGE
O RB I TAL
MODU
L A T OR
A
B
TAP TEMPO MODE
The STINGRAY’s LFO rate can also be adjusted “on-the-fly” via TAP TEMPO.
To enter TAP TEMPO mode, put the pedal into bypass, then press and hold the
footswitch (A or B), to which you would like TAP TEMPO applied. When the
preset LED opposite the footswitch being held starts to blink, the pedal is in
TAP TEMPO mode. The footswitch below the blinking LED now controls the
LFO rate. Press the footswitch at least two times in rhythm to set a new LFO
rate. The LFO rate is reflected in the blinking LED – the time between each
blink represents one cycle of the LFO. Follow the same procedure to
disengage TAP TEMPO. The footswitch that TAP TEMPO is applied to, is also
the preset it is saved to. When recalled, the speed of the TAP TEMPO will
default to the last used setting.
14 | Controls: Footswitches
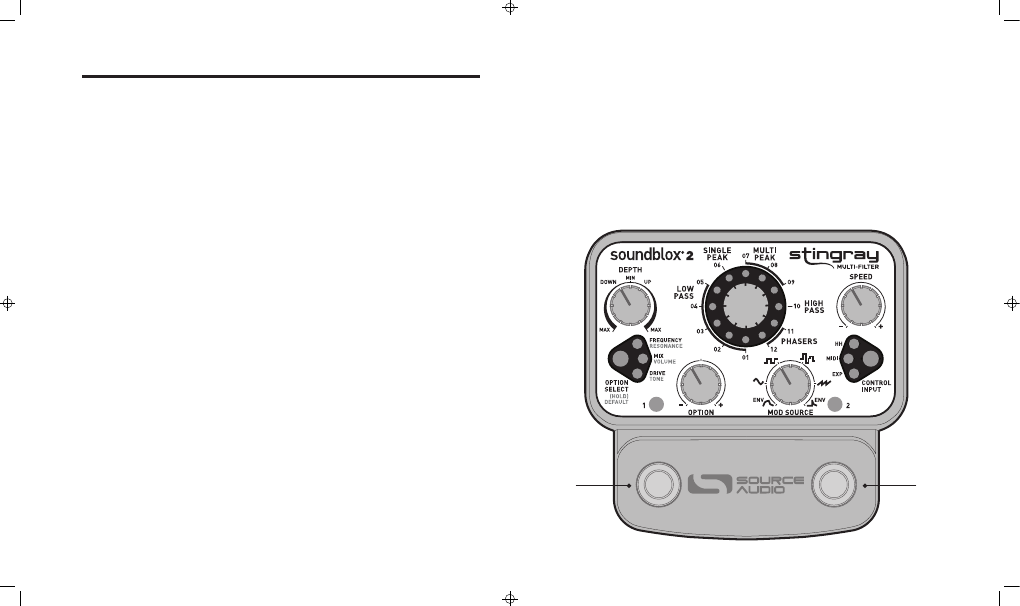
CONTROLS: FOOTSWITCHES
There are two footswitches on the STINGRAY. The left footswitch
corresponds to preset 1, and the right footswitch corresponds to preset
2. Pressing either of the footswitches will engages the respective
preset. Pressing the same footswitch again puts the pedal back into
bypass mode. Pressing the other footswitch engages the other preset
without going into bypass. The illumination of the LEDs labeled “1” and
“2” indicates which preset is currently enabled. While the pedal is in
bypass mode both LEDs remain off.
When a preset is enabled and any sort of adjustment is made, the
indicator LED for that preset will begin to blink, showing that the preset
has been edited. After a preset has been edited, save it by pressing and
holding either footswitch. The corresponding LED will blink quickly to
indicate that the preset has been saved. Once changes are saved, the
LED will be lit solidly (not blinking). An edited preset can be saved to
either of the two preset locations. For example, if preset 1 has been
selected and edited, it can be saved to preset location 2 by pressing and
holding the right footswitch.
Note: Changes made to a preset will be lost if you go into bypass or
switch to another preset without saving.
Stingray Manual - pages 14, 15