5 use the ready-or-not, 1 connect the test tool to the vehicle, Diagnostic connector – ScanTool Ready-or-Not User Manual
Page 14: Use the ready-or-not
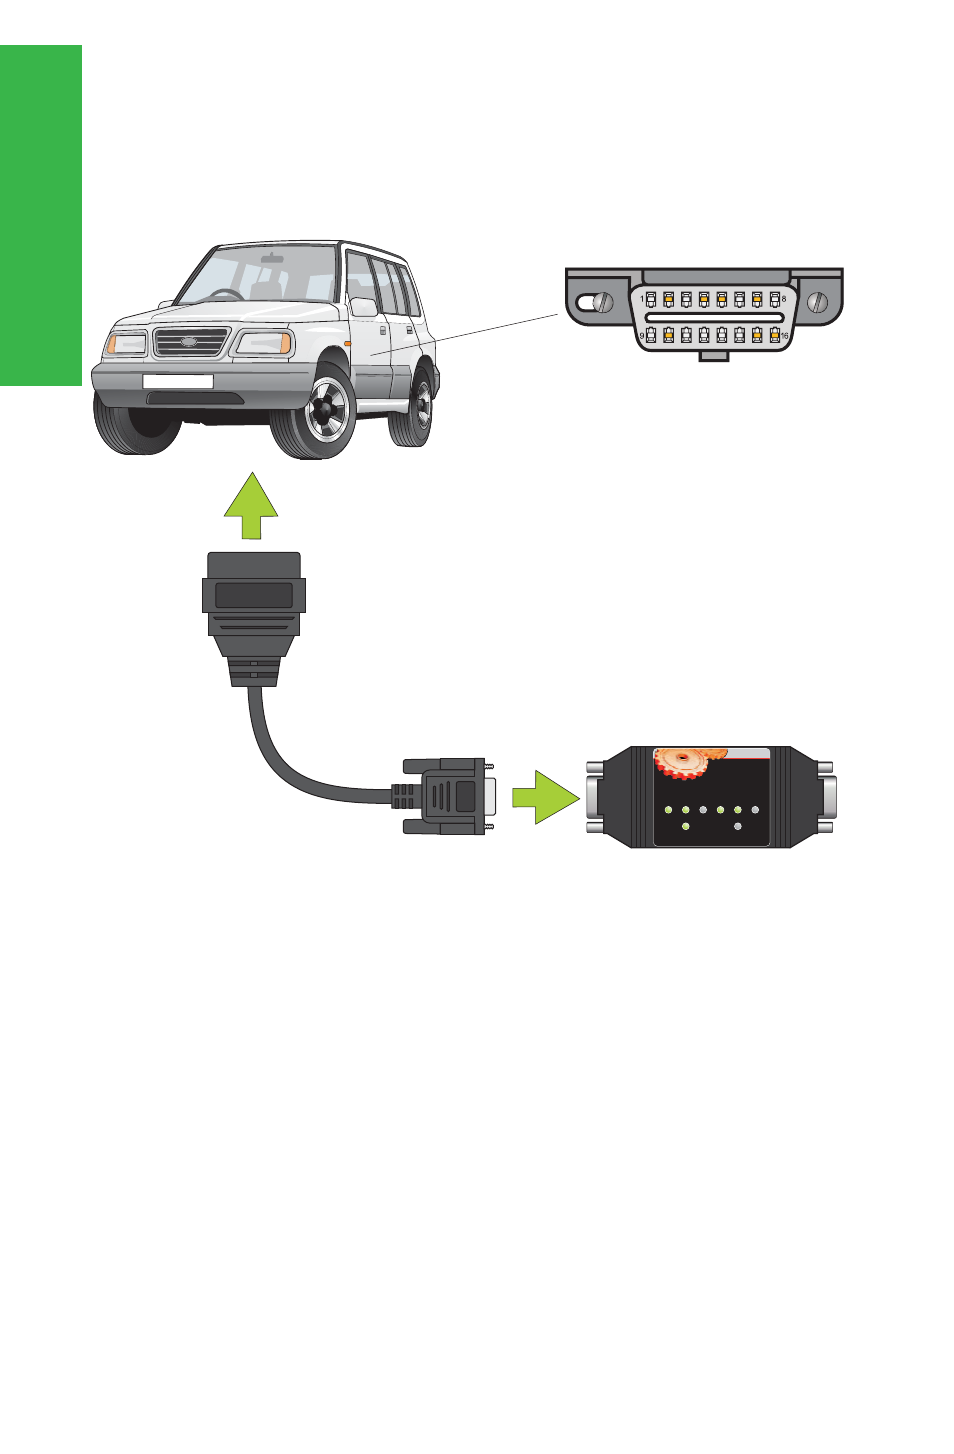
5 Use the Ready-or-Not
5.1 Connect the test tool to the vehicle
To connect the Ready-or-Not test
tool to the vehicle, follow these
steps:
1. Make sure the ignition key is on, and the
engine is running..
2. Plug the
end of the OBD-II
cable into the
connector of
the test tool.
3. Plug the other end of the OBD-II cable into the diagnostic
connector of your vehicle.
When first plugged in to the diagnostic connector, the Ready-or-Not
will perform an LED test (all green LEDs on, followed by all red
LEDs), and emit a short "beep" (unless sound is disabled by user). If
nothing happens when the test tool is connected to the diagnostic
port, refer to the "
" section of this user guide.
The test tool uses very little power in the power-save mode, there-
fore it is safe to leave it plugged into the diagnostic connector for a
few days, even when the vehicle is not being operated.
DB9 female
DB9 male
Hint: The diagnostic connector is most likely just under the edge of
the dash on the driver's side and will look as pictured on the diagram
above (it is "D" shaped and has 16 positions). In some vehicles, it is
on the passenger's side or even behind a small panel or the ashtray.
Troubleshooting
ScanTool.net
Ready-or-Not
Ready-or-Not
Ready-or-Not
Ready
-or-
Not
TM
CA
T
EV
AP
SEC.
AIR
O
2
OH
T
R
2
EGR
READY
NOT READY
o
RDY-OR-NOT
Diagnostic Connector
OBD-II
OBD-II
OBD-II
OBD-II
Use
the
Ready-or-Not
14
Ready-or-Not
User Guide
TM