Installation instructions, Details – Reznor R6GP Option - Installation - Roof Curb - Lt Commercial User Manual
Page 2
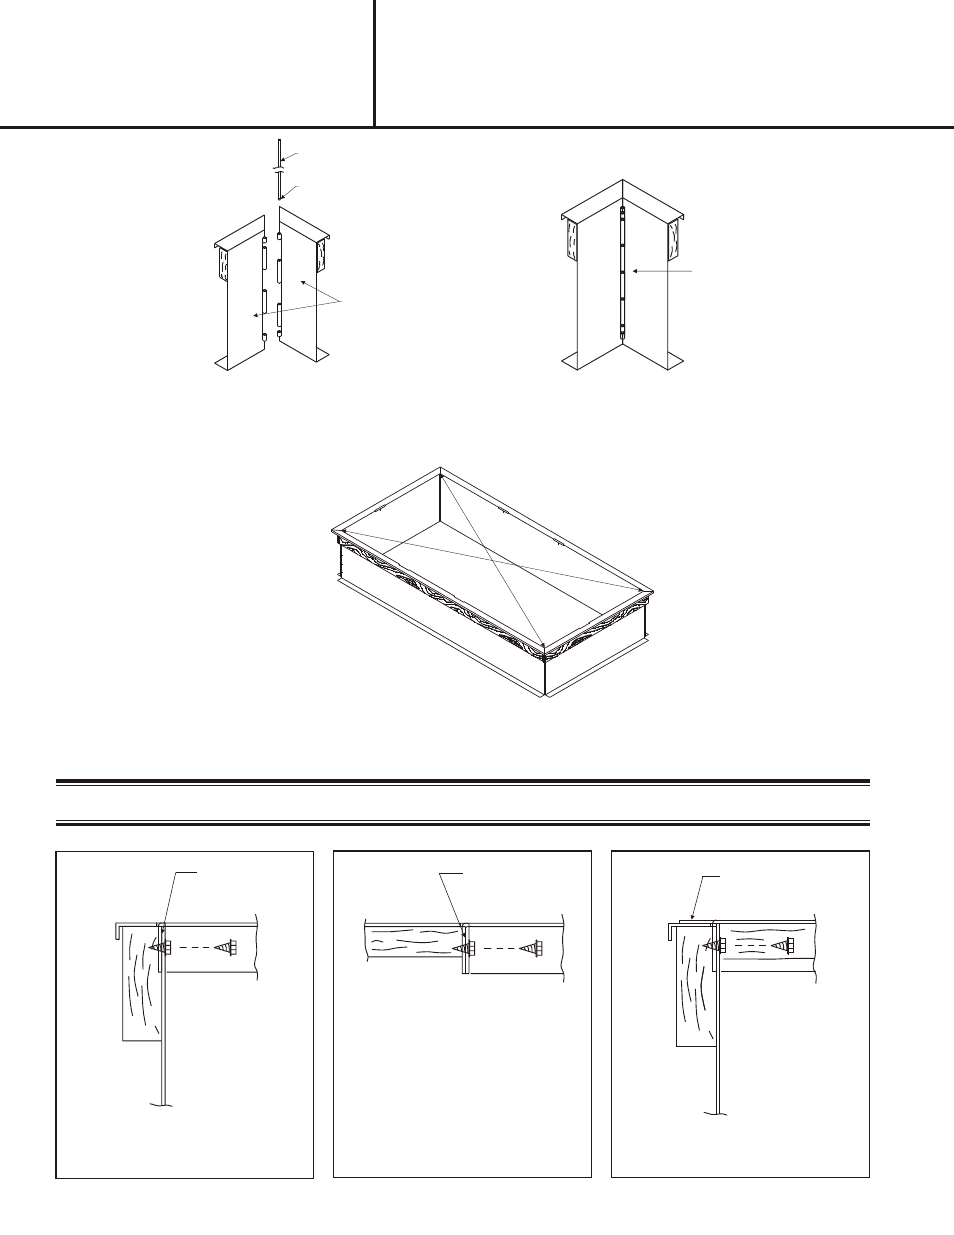
1.
Duct Support flange goes in slot on
curb. Screw Brace to curb.
Brace inter-locks
with curb.
Step 4:
After the four corners are assembled; the curb should be checked to be sure it is in "square". Do this by measuring
diagonally from each opposite corner as shown in Figure 5. The two measurements should be the same for each direction.
Step 3:
Corner Assembly: Align each curb side as shown in Figure 3. Using a hammer, drive the curb "hinge" pin down until the
top of the pin is below the top of the curb as shown in Figure 4.
DETAILS
2.
Duct Support flange goes in slot on
pan or other brace. Screw brace
together.
Brace inter-locks
with pan or other
brace.
3.
Tab rests on top of curb for
added support.
Duct Support is supported by "tabs".
Screw pan to curb.
INSTALLATION INSTRUCTIONS FOR
547860 / 547861 / 547862 / 547863
ROOF CURBS USED WITH Q5SN/Q6SP 090-120
R6GP/P6SP 072-120 / GR4GN/GP4SN 090-120 UNITS
Fig ure 5
INSTALLATION
INSTRUCTIONS
HINGE
Fig ure 4
Fig ure 3
HINGE PIN
TAPERED END
CURB SIDE