2 valve mounting – NORAC UC4+BC+JD7A User Manual
Page 25
22
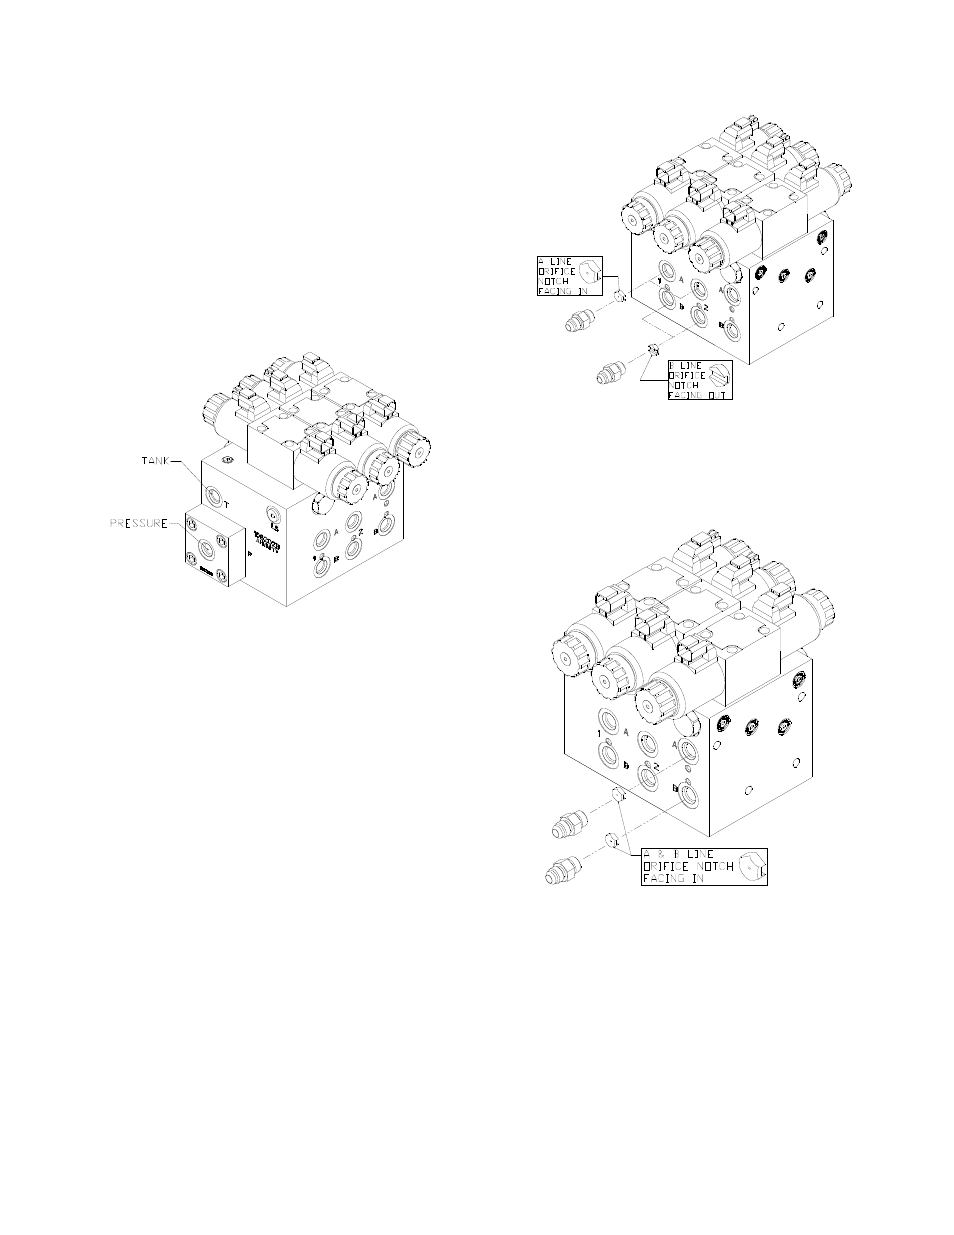
4.7.2 Valve Mounting
1. On a clean surface remove all plastic plugs
from the NORAC hydraulic Valve (V01).
2. Install the 6MB-6MOR fittings (F05) on the
"P" and "T" ports and tighten to 18 ft-lbs.
3. Install the 4MOR-4MB (F06) into the "S"
port and tighten to 11 ft-lbs.
Figure 25: NORAC Valve Block
4. Install two orifices (F08) into the "B" ports
with the notch facing outward as shown
in Figure 26.
5. Install the remaining orifices (F08) into the
"A" ports with the notch facing inward
as shown in Figure 26.
6. Install the 6MB-4MOR fittings (F07) into the
"A" and "B" ports and tighten to 18 ft-lbs.
7. Insert the 0.047” orifice (F07A) into the “B”
port of the 3
rd
station of the block with the
notch facing in (Figure 27).
8. Insert the 0.042” orifice (F07B) into the “A”
port of the 3
rd
station of the block with the
notch facing in (Figure 27).
Figure 26: Valve Block Assembly
9. Mount the 6MB-4MOR fittings (F12) into
the “A” and “B” ports on the NORAC 3
rd
station block.
Figure 27: Orifice Orientation
4. Remove the plug from the Sense Line Bleed
port. Location is shown in Figure 28.
Gently tap the plug with a hammer to loosen
it before attempting to remove it. To access
bleed orifice, remove the valve coil that is
covering it, by unscrewing the nut on the
coil. Remove the Sense Line Bleed Orifice
and discard.