Getting familiar: the rear panel – Muse Research Receptor TRIO/QU4TTRO manual v1.0 User Manual
Page 9
9
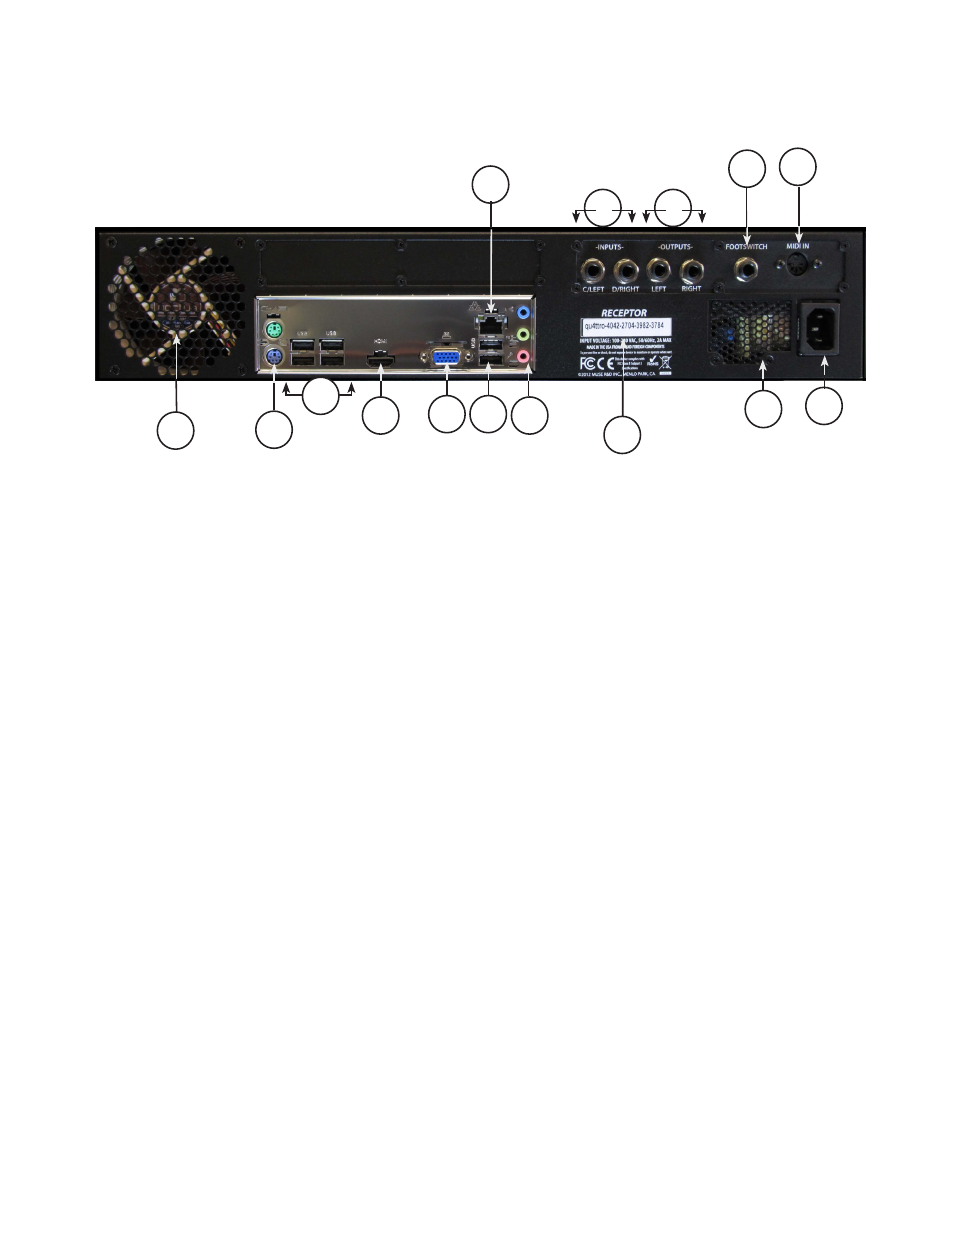
Getting Familiar: The Rear Panel
Connecting your RECEPTOR TRIO or QU4TTRO to your mixer, your amplifier, your computer, or to other
music gear is simple to do with the connectors on the back.
1. AC Power Input: This is where you connect RECEPTOR to a AC mains supply. All RECEPTORs have an
auto-ranging, auto-power factor correction power supply that you can use anywhere in the world, from
100 VAC to 240VAC, 50 / 60 Hz. Power conditioners (other than UPS supplies) are not recommended.
2. Power supply fan outlet: This is exhaust port for the power supply. Please keep it unobstructed at
all times so that the power supply remains at a safe operating temperature.
3. Footswitch Input: The footswitch input accepts either a single 1/4" tip-sleeve jack footswitch (single
action) or a double footswitch with a 1/4" tip/ring/sleeve connection. The footswitch input can be used
for incrementing (or decrementing using a second footswitch) through patches in the unit, making it easy
to change sounds or effects while performing WITHOUT having to send a MIDI program change. This
is particuarly valuable to guitarists who might not have any MIDI devices attached to their RECEPTOR,
or keyboardists who do not have their hands free to select program changes from their keyboard while
performing. Do not connect anything other than a passive, mechanical switch to this port.
4. MIDI Input: This full-size 5-pin DIN connector is where you plug in your standard MIDI keyboard for
controlling the virtual instruments in your RECEPTOR.
Note: RECEPTOR supports USB over MIDI. You can connect one or more device-compliant USB MIDI
keyboards to your RECEPTOR and it will merge that data with anything coming over the 5-pin DIN
connector.
5. Audio Line Inputs (A and B): This input accepts an un-balanced, 1/4" tip/sleeve (TS) line-level
device, such as the output of your keyboard or another sound module, a drum machine, an MP3 player, or
the effects sends of your mixer. The rear input on the left is Input A; the rear input on the right is Input
B; and if you want to use a stereo input, you would connect the left output of your device to Input A and
the right output of your device to input B. Once connected, your line-level inputs can be processed using
the audio effects slots and combined with the sounds being generated by virtual instruments running in
RECEPTOR
.
Warning: Do not connect the output of an amplifier or other "speaker-level signals" to the RECEPTOR line
inputs, and never connect a signal that has +48V phantom power to the line inputs or damage
will result. This type of damage is not covered under warranty.
.
12
4
8
2
10
5
6
3
14
1
13
7
11
10
9