Muse Research Receptor TRIO/QU4TTRO manual v1.0 User Manual
Page 31
31
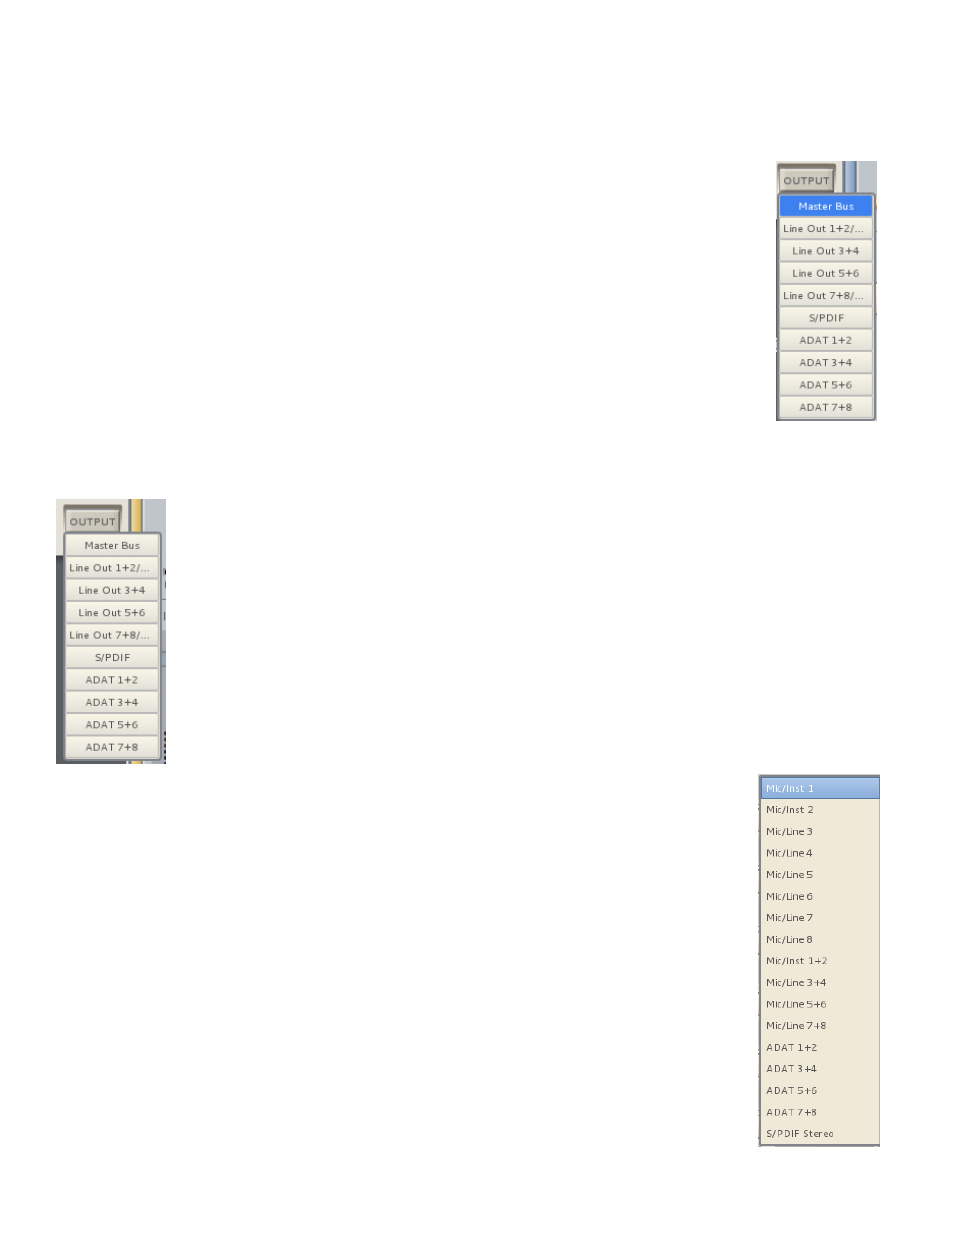
Using the Direct Outputs on a Synth Channel
All of the virtual instruments and effects running in your RECEPTOR feed the master stereo mix bus, and
the resultant stereo mix signal shows up on Outputs 1 and 2 of the AudioBox. You can alter the routing
of any of the audio signals in your RECEPTOR by using the INPUT and OUTPUT selector buttons found in
various places on the Graphical User Interface.
If you wish to send the output of a virtual instrument out its own output, you can do this
by clicking on the OUTPUT button on the lower right hand corner of the channel strip.
When you click on the OUPUT button, you'll see that the synth channel is set to output
its signal to the Master Bus. This allows the system to mix all of the synths together and
send the compbination of all audio signals out the main outputs of the system.
In addition, the output button gives you the option to assign that synth's output to any of
the physical outputs of the AudioBox interface. To create a "direct output" that does not
send the synth to the master outputs, simply de-select the Master Bus assignment, and
assign the synth channel to any of the physical outputs.
You can select more than one output at once, so you can have a channel go to the Master
Mix bus as well as to any or all of the physical outputs simultaneously.
Using the Direct Outputs on Audio Effect Channel
Just like a synth channel, you can alter the default routing of the output of any of the
audio input channels by clicking on the OUTPUT button on the lower right hand corner of
an audio channel. When you click on the OUTPUT button, you can select which outputs
you want the audio channel to send to, including multiple outputs .
Note that the default setting for the individual audio channel outputs is to send to the
Master Bus, which means the output is mixed together with all of the other audio and
synth channels in a combined master stereo mix. If you would prefer to have the the
results of any of the audio inputs be sent to its own independent audio output, simply
de-select the Master Bus from the output matrix, and assign it to its own physical audio
output.
Using the Input Selector on an Audio channe
l
The RECEPTOR combined with the AudioBox interface makes it possible to process
vocals, guitars, basses, other keyboards... anything that generates audio can be
processed through the RECEPTOR and mixed with the other virtual instruments and
effects that are currently loaded into the system.
To select an input, simply open up an audio channel, and use the drop down audio
input selector to choose one of the inputs. Note that you can select inputs individually
or in pairs for use with monoaural or stereo sources.
Note: if you use a digital input such as ADAT or S/PDIF, you MUST choose a
corresponding sample clock source of S/PDIF or ADAT from the"Audio..." menu in the
SETUP tab. Failure to do so will result in audio clicks and pops caused by errors in the
data stream. By definition, digital audio inputs must have a corresonding clock source
to keep the audio properly synchronized and free from data dropouts.
Note: If you use BOTH the ADAT and S/PDIF inputs, those two streams must be
synchronized to each other outside of the AudioBox interface by slaving one or the
other sources to the Word Clock output on the back of the unit, else data errors will
result in the form of audio pops and clicks.