MF Digital Windows 7 - Drive Alignment Guide User Manual
Page 6
Printer and Drive Alignment Guide
REV 3 : 12.30.10
2100 / 9100 / 3100 – 2600 / 9600 Series
PicoJet – Prism Plus – P-55
Page 5
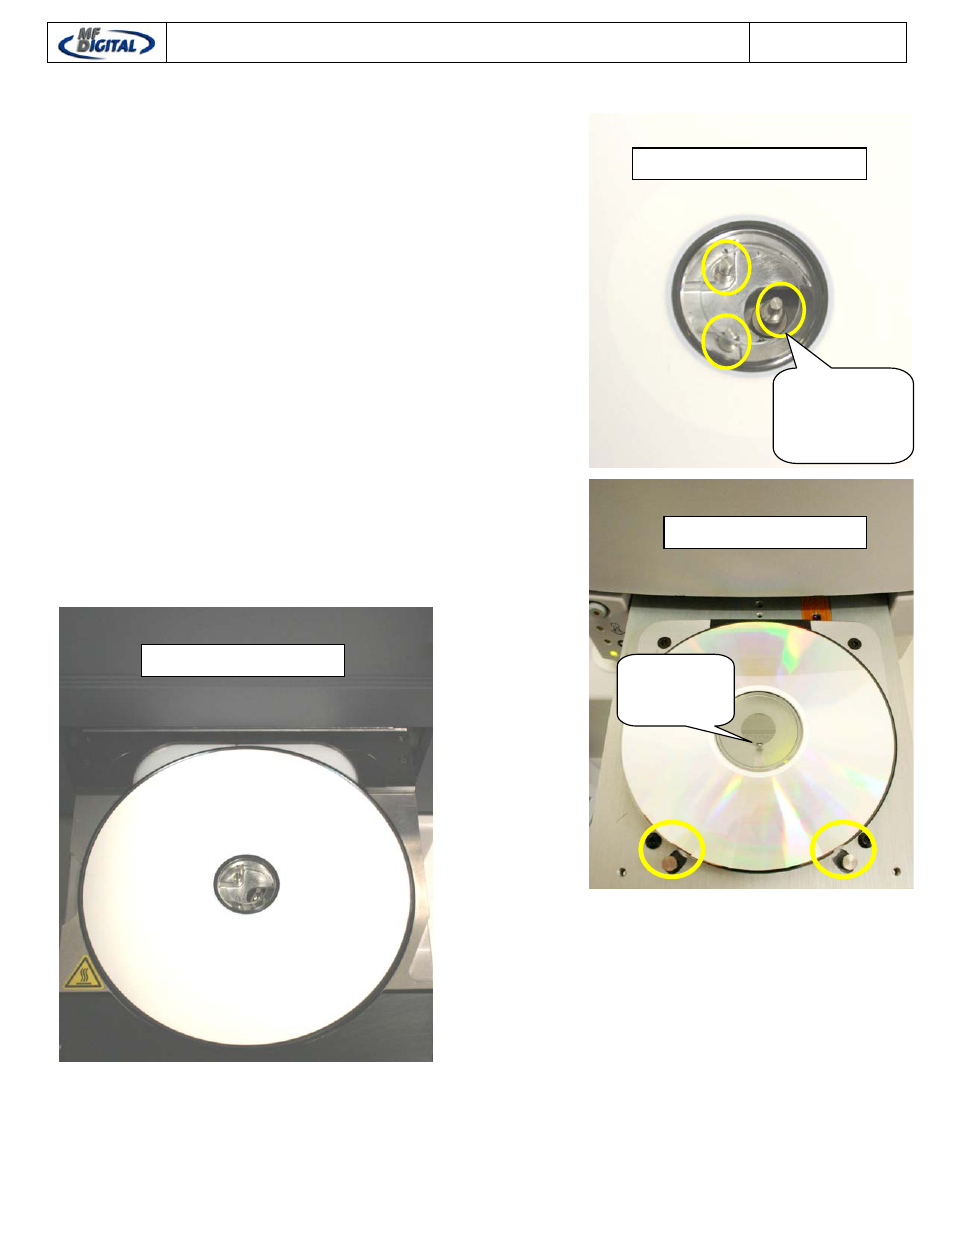
Printer Alignment
Sometimes if may be necessary to adjust the
alignment of your printer. All MF Digital Printers
mount to the right side. So using the CTRL-R /
CTRL-S will assist you. Please keep in mind, if
you adjust this alignment for your printer, you
will affect the alignment for the right side drives.
So a common placement needs to be assured
when adjusting the printer alignment. We
suggest that you check the inserting of your disc
to the drive tray after aligning the printer.
Alignment Commands for Printers:
Prism Plus & P-55
I – Insert disc to open printer Tray
A – Accept disc from open printer tray
CTRL-R – Move disc toward front of printer’s
tray.
CTRL-S – Move disc toward back of printer’s
tray.
The above picture shows a disc in perfect
alignment on prism tray. When you align this
printer, there are three points to consider.
1. Hook in the middle of the Printer’s
Tray.
2. The clamping pins on the outer
perimeter of the disc pad, these pins
move to center the disc on the pad,
indicated by the circles.
When you have the disc on the Printer’s Tray
as shown above, the alignment is now correct.
If an adjustment is needed, you can use the
Alignment Commands for Prism Plus Printer.
Hook in the
middle of
Prism Tray.
When aligning the P-55 Printer, the 3 points to
consider are the 3 small pins in the middle of the tray.
This disc is in perfect alignment. Please see Picture
#2 for a close up of the pins and how the disc should
look on the tray.
Picture #2: Disc on P-55 Tray
This is the guide
pin, it moves to
center the disc
on the tray.
Disc on Prism Plus Tray
Disc on P-55 Tray