3 installation – Longshine LCS-C842SC User Manual
Page 6
Enhanced 10/100Base-TX to 100Base-FX Converter
- 7 -
3 Installation
To install your Converter, please see the following
procedures:
•
Location
•
Switch Settings
•
NWay settings
•
Link Fault Signaling
•
Loopback Test
•
Install the Converter
Location
The location selected to install the Converter may
greatly affect its performance. When selecting a site,
we recommend considering the following rules:
•
Install the Converter in a fairly cool and dry place.
See Technical Specifications for the acceptable
temperature and humidity operating ranges.
•
Install the Converter in a location free from strong
electromagnetic field generators (such as motors),
vibration, dust, and direct exposure to sunlight.
•
Leave at least 10cm of space at the front and rear of
the unit for ventilation.
•
Affix the provided rubber pads to the bottom of the
Converter to protect the case from scratching.
Enhanced 10/100Base-TX to 100Base-FX Converter
- 8 -
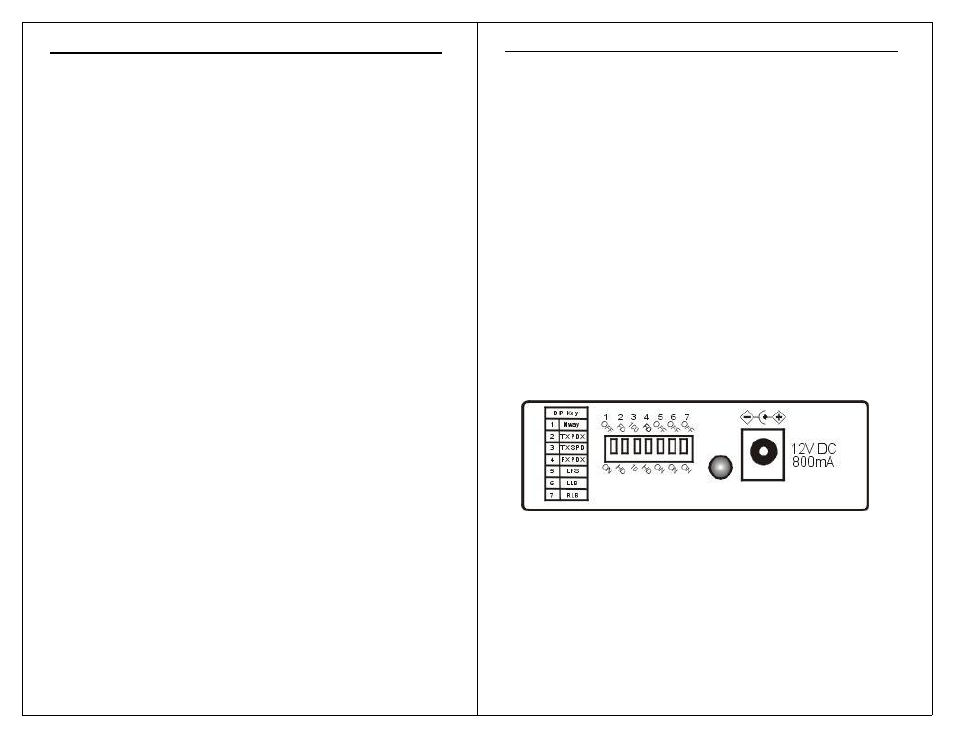
DIP Switches
DIP 1
– Enables / disables auto-negotiation (RJ-45)
DIP 2
– Copper port (RJ-45) duplex mode: full or half-
duplex
DIP 3
– Copper port (RJ-45) data bit rate: 10Mbps or
100Mbps
DIP 4
– Fiber port duplex mode: full duplex or half-
duplex
DIP 5
– Enables / disables Link Fault Signaling (LFS)
DIP 6
– Enables / disables Local Loop Back (LLB)
DIP7
– Enables / disables Remote Loop Back (RLB)
Notes: All models in this series feature the above
set of DIP switches.