Nvc series b-vent, Remote controls, Ceramic refractory panels – Vermont Casting NVC43 User Manual
Page 22: Arched door front
22
NVC Series B-Vent
20000194
Remote Controls
Optional remote control units are available to control
different functions of the appliance.
Model
Function(s) Controlled
MRC1
ON/OFF
MRC2
ON/OFF and Temperature
MRC3
ON/OFF and Temperature control
with a digital and a programmable
24 hour clock
IMT
Wall mounted thermostat control
Ceramic Refractory Panels
Ceramic refractory panels are available to line the fire-
box area.
Unit
Kit Model
NVC36
NV36CR
NVC39
NV39CR
NVC43
NV43CR
Take care when handling the refractory panels as they
are fragile until held in place and supported.
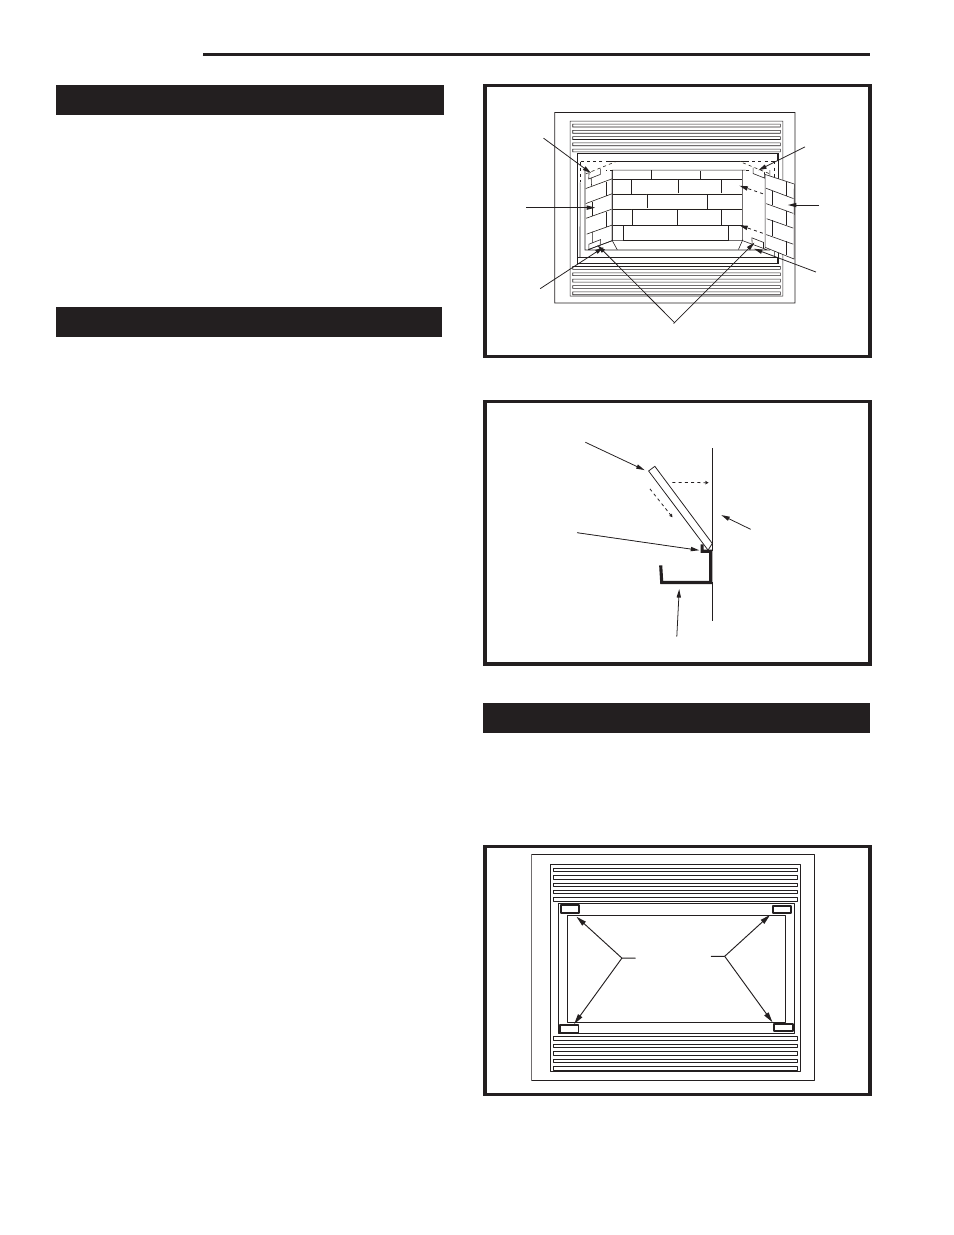
Installation, refer to Figures 24 & 25
1. Remove the window frame assembly.
2. Remove the logs.
3. Place the lower supports for the side refractory pan-
els on the base of the firebox. Place each support so
that the slotted hole fits over the forward screw head
along the edge of the base.
4. Lay the angular base panels in place on the floor of
the firebox on either side of the burner housing as-
sembly.
5. Loosely attach the top adjustable tabs to the studs
located in the top of the firebox toward the front cor-
ners.
6. Place the rear refractory panel in place. Locate the
'small brick' edge of the panel into the two small
supports on the back panel just above the rear log
support.
7. Slide the side refractory panels into place to hold
the rear panel secure. Adjust the top adjustable tabs
to hold the side panel against the firebox wall and
secure the tab. Repeat the procedure on the other
side.
8. Replace the logs and window frame assembly.
For aesthetic purposes we recommend lining up the
horizontal mortar lines.
Adjustable
Tab
Side
Panel
Floor
Refractory
Panel
Lower Side Supports
FP1193
Fig. 24 Install ceramic refractory panels.
Adjustable
Tab
Side
Panel
Floor
Refractory
Panel
Rear Refrac-
tory Panel
Rear Panel
Support
Brackets
Firebox
Back
Rear Log Support
FP1194
Fig. 25 Place the rear panel on rear support brackets.
Arched Door Front
The arched door front kit is designed to visually en-
hance the appearance of the NVC fireplace.
To install the door front simply position the magnets as
shown in Figure 26. Place the arched door into position
and peel off the plastic. (Fig. 27)
FP1195
Arched door front
2/27/02 djt
FP1195
Fig. 26 Install magnets.
Magnets