Pointing device, Cd-i controller, Caunon – Philips CDI210/73 User Manual
Page 9: Installing a digital video cartridge, Removal
Attention! The text in this document has been recognized automatically. To view the original document, you can use the "Original mode".
POINTING DEVICE
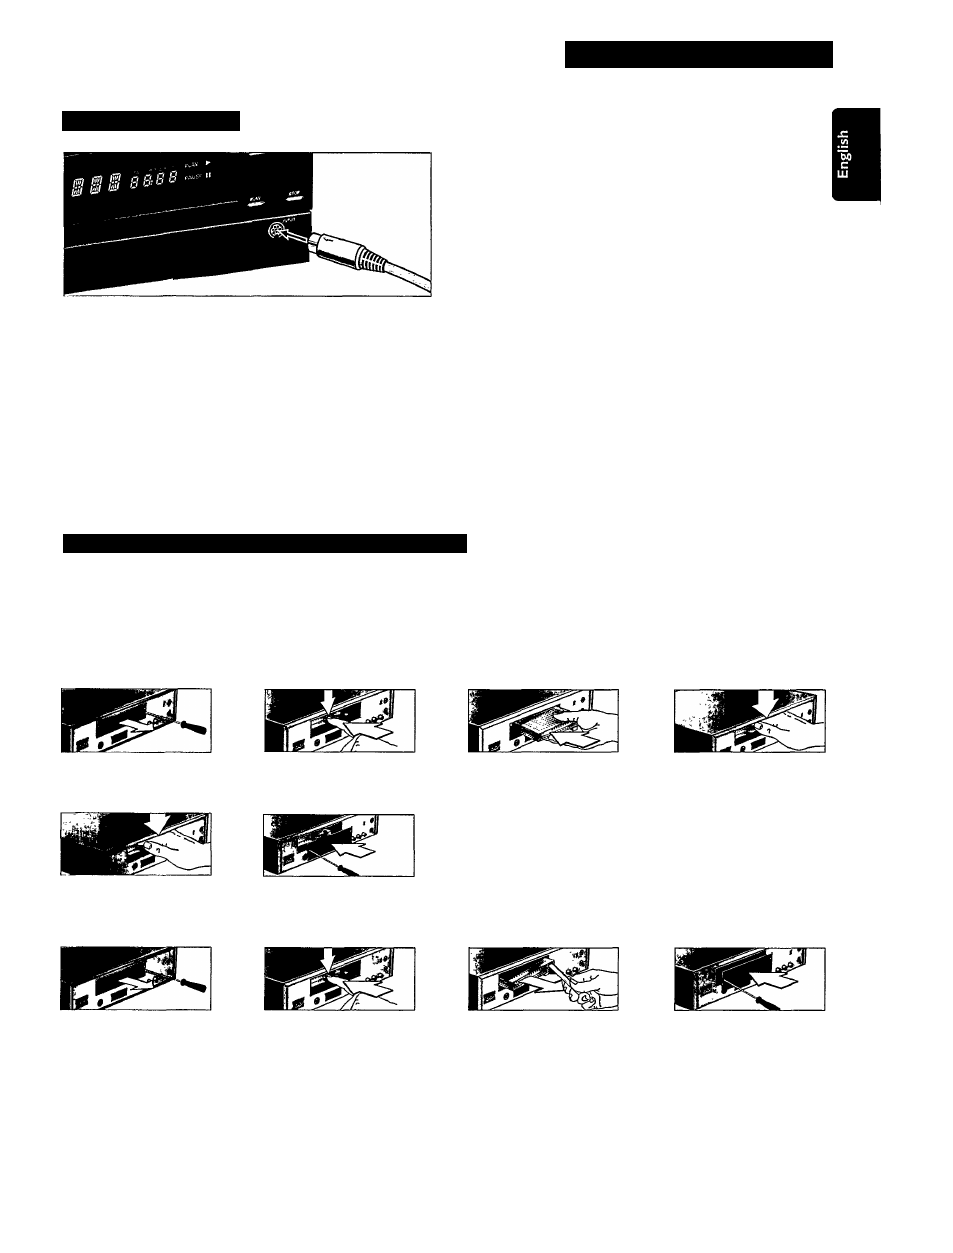
CD-I CONTROLLER
Another way to operate your CD-i player is by using CD-i
controller (optional).
Press the ON/OFF button (7) to switch the player off.
Plug the connector of the CD-i controller into the input port
(5). Insert the connector with the arrow at the top.
Switch the player on.
Move the cursor in the direction you want.
Click on one of tire action buttons.
The function selected by this "point-and-click" technique is
highlighted to confirm the selection.
NOTE
When simultaneous use of two pointing devices is required by
the CD-i tide, the optional accessory 22ER9208 (I/O Port
Splitter) has to be used to cormect these devices to Input (5).
Optional devices are: Roller Controller, Trackerball, Mouse,
Touchpad, Gamepad, Thumbpad (refer to the accessories
page on the back of this manual).
To "point-and-click" on any screen shown in this manual,
either one of the two action buttons of the pointing device can
be used.
The shape of the cursor can be different according to the
program you are playing, but it is always controlled in the
same way.
Pointing devices are sensitive precision instruments. Handle
them with care, keeping in mind the following precautions:
Avoid dropping or knocking.
Do not use them in locations subject to extreme temperatures,
humidity, dust or vibration.
Never hold the pointing device by the cable.
Never pull the cable to disconnect the pointing device from
the player.
CAUnON
NEVER MAKE OR CHANGE CONNECTIONS WITH THE
POWER SWITCHED ON.
INSTALLING A DIGITAL VIDEO CARTRIDGE *
As soon as you have plugged this cartridge into your CD-i player, you can play the
latest CD-i discs, featuring interactive movies, music videos and state-of-art video
games as well as video CD's. Enjoy yourself! But first.......
CAUTION - WHILE INSTAUING (OR REMOVING) YOUR CARTRIDGE, MAKE SURE THE
PLAYER IS SWITCHED OFF!
NOTE:
-A special tool is supplied xvith the cartridge.
Keep it safe in case you need it.
INSTALLATION:
Loosen the screws and
remove the coverplate.
Then push the cartridge
firmly as far as it will go.
REMOVAL:
Loosen the screws and
remove the coverplate.
Push the bracket on the
left side down.
Check if the cartridge is
positioned horizontally.
Replace the coverplate.
Push the bracket on the
left side down.
Take hold of the cartridge
with connector side
pointing to the right. Slide
the cartridge in the slot.
Connect the cartridge by
pushing it untill the
bracket goes up.
THE CARTRIDGE IS NOW INSTALLED AND SHOULD NOT BE
REMOVED WITHOUT CAUSE; IT CARRIES A LOT OF EXTRA
MEMORY WHICH IS VALUABLE EVEN FOR TITLES WITHOUT
DIGITAL VIDEO (FULL-MOTION).
Hook the special extractor
tool in the slot of the
cartridge and remove the
cartridge from the slot.
Replace the coverplate.
BEFORE REQUESTING SERVICE!
CAUTION
- SHOULD THE PLAYER MALFUNCTION AFTER CARTRIDGE
INSERTION, TRY REMOVING AND REINSERTING IT.
DO NOT PROBE INTO THE VENTILAXION HOLES!
DO NOT BLOCK THE VENTTLAIION HOLES!
- DO NOT ATTEMPT REPAIRS: THIS WILL INVALIDATE THE
WARRANTY.
• Already installed in some player versions.