Heli-Max HMXE1008 User Manual
Page 2
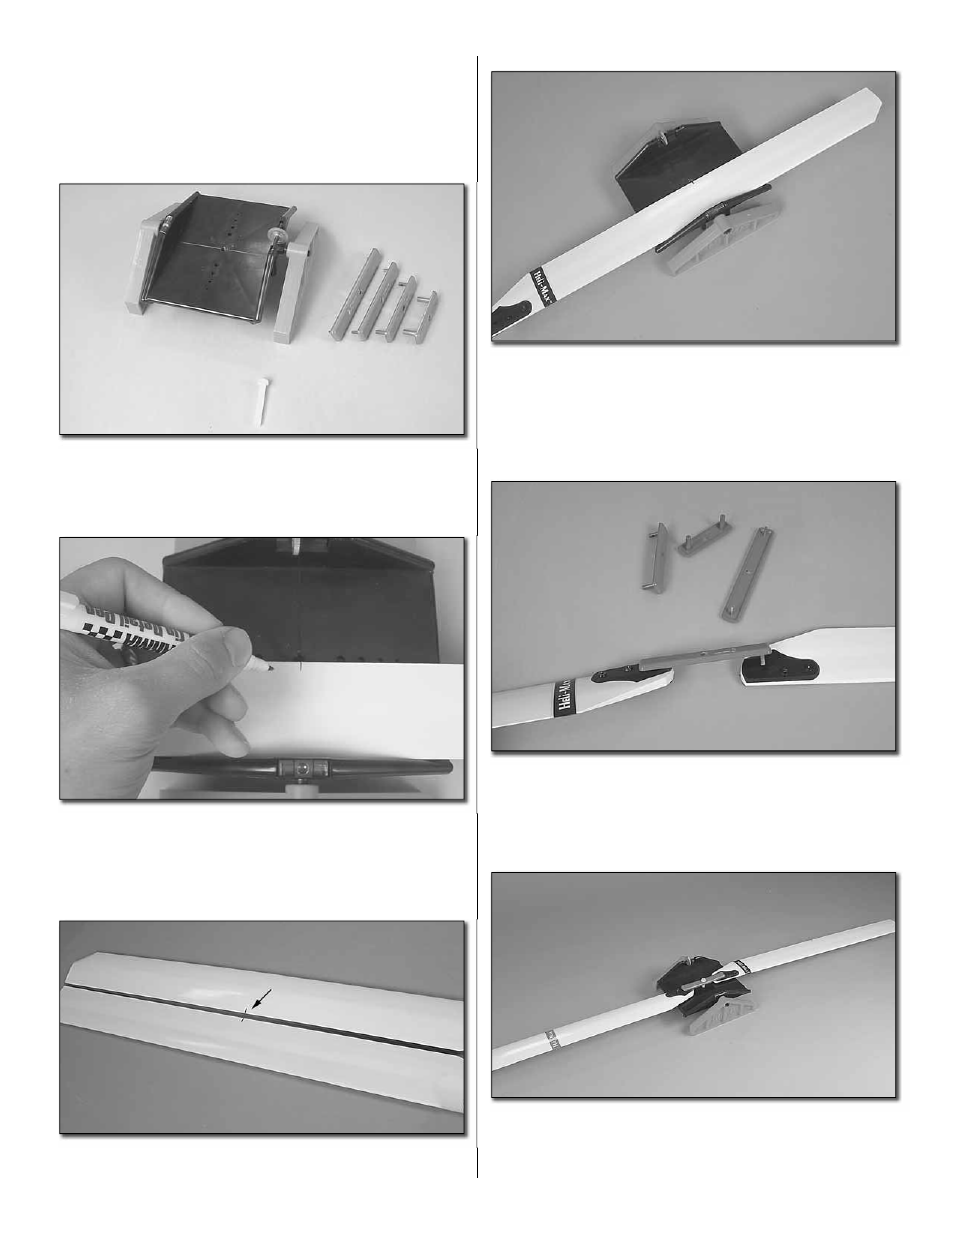
BLADE BALANCING
Note: All main blades must be balanced before use. We
recommend using the Heli-Max Blade Balancer (HMXR4855).
❏
1. Apply the two colored stripe decals to the tips of your
main rotor blades (for use in blade tracking later on).
❏
2. Prepare the balancer for use by rotating the brass
adjustment dial until the bubble in the vial indicates level.
Make sure that the blade balancer does not move during
this process.
❏
3. Place one blade onto the balancer with the leading
edge against the side with the level. Shift the blade on the
balancer until the bubble indicates level. The middle of the
black balancing tray is now at the C.G. of this blade. Mark this
position on the blade with a felt tip pen.
❏
4. Line up the ends of both blades. Transfer the mark you
made on the fi rst blade to the second blade.
❏
5. Position the second blade on the tray, with the mark
at the center. Add balancing or electrical tape to the lighter
end until the bubble indicates that both sides are level. The
C.G. of both blades is now matched. If the tape ends overlap,
make sure the overlapping end points to the trailing edge of
the blade.
❏
6. Your Heli-Max Blade Balancer includes four sizes of
blade mounting plates and a nylon mounting bolt. Select
the mounting plate that best fi ts the holes in the blade grips.
Secure the mounting plate and two blades to the balancer
with the nylon mounting bolt.
❏
7. Add tape to the C.G. of the lighter blade until the bubble
level indicates that the two blades balance. Using a different
tape color in this step will remind you that future adjustments
will require both balancing steps.
Copyright © 2008
HMXE1008INSTR