Great Planes Ultra Sport 1000 Kit - GPMA0425 User Manual
Page 36
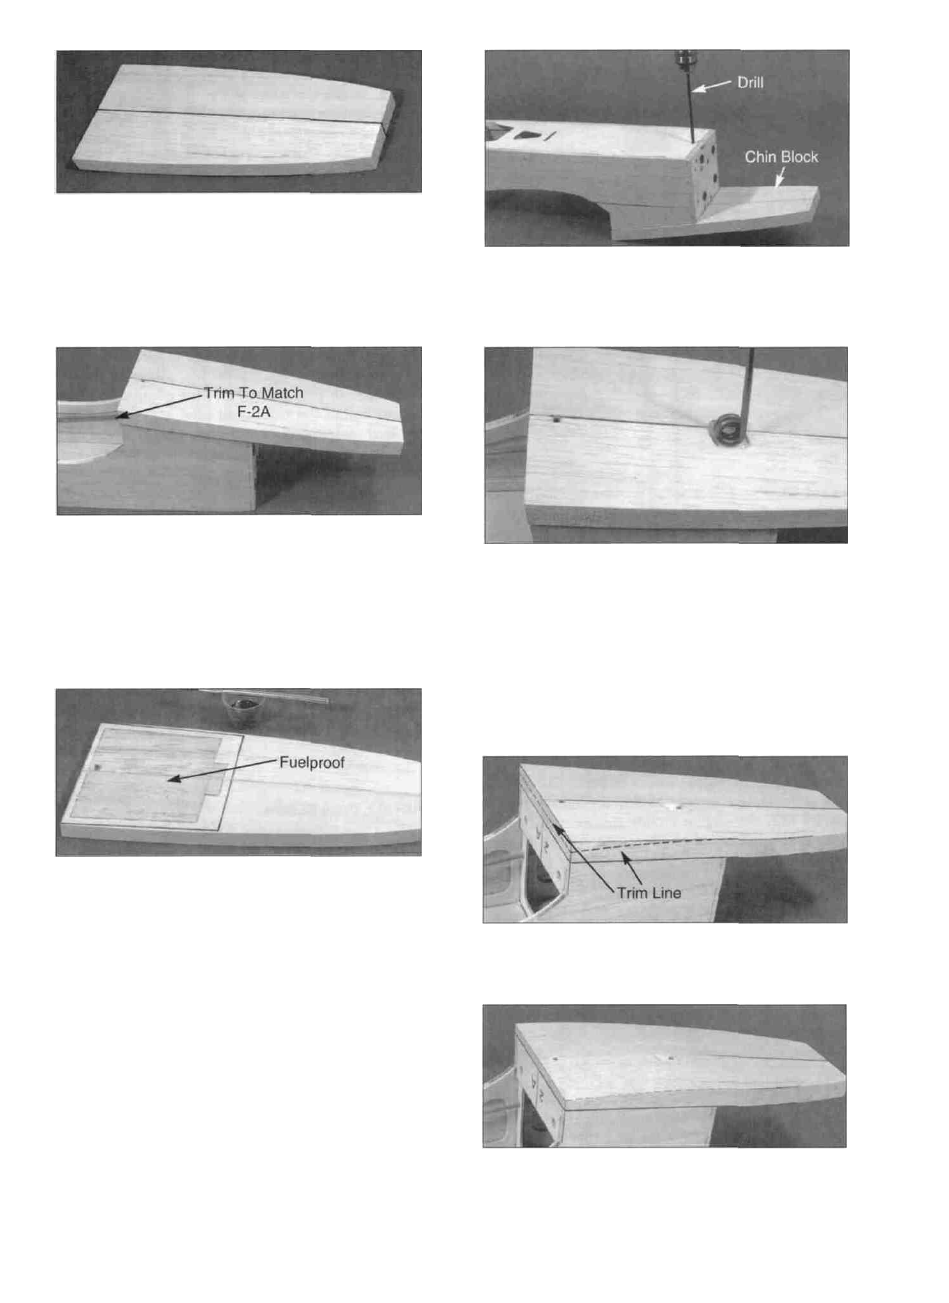
D 2. Glue together the two halves of the 3/4" balsa
chin block. Sand the glue joints smooth with your T-
bar.
D 6. If you're using trike gear, use a long 3/16" drill bit
to drill down through the nose gear bearings and out
through the chin block. Insert the nose gear strut and
carve out enough of the chin block so that the axle is
5" from the surface of the chin block.
D 3. Trial fit the chin block onto the bottom of the
fuse, and cut off and sand the aft end of the chin
block to match the angle of F-2A. Mark where the
front of F-1 intersects the chin block.
D 4. Fuelproof the portion of the chin block that will
become the inside floor of the fuel tank compartment.
Note that we have also installed a "dribble tube" near
F-2 which will allow fuel to drain from the fuel tank
compartment and will let us know if the tank or fuel
lines develop a leak. The tube will be sanded off flush
with the surfaces of the chin block after the
fuelproofing has hardened.
D 5. Securely glue the chin block to the bottom of the
fuse.
D 7. Draw a line along the horizontal center of the
rear edge of the chin block. Carve and sand the block
down to this line in a smooth curve from just behind
the firewall (see the fuse plan side view).
36